Tuesday, January 26, 2016

Adding lining to existing shades

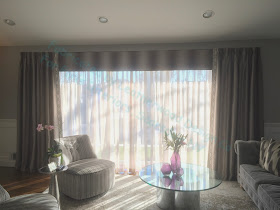
Do you remember these sheer shades from last autumn? http://leatherwooddesignco.blogspot.com/2015/09/the-other-sheer-shades.html
These are some of the most beautiful shades I've ever made, so you can imagine my dismay when the designer informed me that the homeowner needed them re-lined, with an opaque lining rather than the gorgeous grey voile.

I dreaded doing this, but it turned out to be a satisfying project.  It was less difficult yet more time consuming than I had projected; and the opaque shades with grey sateen lining are just as beautiful as they were when they were sheer.
The goal was to not have to take apart the shade and sheer lining. 
I did consider adding lining in the manner of a double-sided shade, but I thought that would be an untidy solution, and ultimately inefficient because I'd have to fiddle with it a lot, not to mention I'd be unhappy with it in the end. 
Therefore I decided to remove the rings and lay the new lining over the sheer. 
I unstrung the shade, removing the orbs and cord clips, leaving the lift cord in their clips.
First making sure all the rings pointed up, I laid out the lining, rough cut to about 3" over the finished size on each side, wieghted it in place, and used the iron to make an impression in the lining of the existing rings- sort of like making a gravestone rubbing!
I could see where the rings were sewn, and used purple pen to mark the stitches.
Keeping half the lining weighted down, I folded back one half at a time, and snipped off the ring stitches, except for the bottom rings which I clipped off because I wanted the stitching to remain.
I kept the lint roller handy so the little snipped threads wouldn't wind up inside the shade!
At the top, I trimmed the lining even, leaving enough to tuck under the board.
When I staple, I use tacking strip set back about 1/2", which leaves wiggle room at the front of the board.  That wiggle room is what allowed me to tuck in the lining.
I stapled to secure the lining.
Sewing the rings went quickly.
At the bottom I was careful to avoid a pucker at the pocket when I sewed the bottommost rings.
Because the weight bar lay underneath, creating bulk, I knew I should let the shade hang before sewing the bottom.
 I trimmed the bottom and folded it in place.
I pinned it for hanging, then removed and re-positioned the pins after I knew the shade was true.
The lining and sheer are ladder-stitched together by hand.  Re-stringing with ring locks was quick and simple.
After leveling and completing the rigging, all that was left was to sew the lining to the face at the bottom.
Ta-da!


Thursday, January 21, 2016

Portiere pinch pleat panel

An open doorway needed a two-sided pinch-pleated drapery panel on an inside-mounted track with glides.
After much trial and error, I devised a way to sew glides in between the two drapery layers, so the fabric could be pleated outward on both sides.
To make the panels, I sewed right sides together - - - by hand with a ladder stitch.  I did not trust my machine-sewing skills enough to get these edges matched perfectly.  The layers are interlined with thermal lining.
At the bottom, I slipped in drapery weights.....
And closed the bottom with a few inches of stitching.
At the top, one layer has buckram folded into the header, and the other layer has the thermal lining folded into the header.

I pressed them down and basted about 10" down so the layers would not shift when I transferred the fabric to the sewing machine to create the pleat back-stitching.
Each side is pleated separately, to pattern of course!- and the sewn-in glides join the layers.

Friday, January 15, 2016

Soft Cornice Magic

I'm entranced by the versatility of the soft cornice.  This particular one, for Monica Plotka Design, showcases an awesome fabric from R. M. Coco.
 I used the stripe in the motif as binding at the bottom.
I fitted the fabric onto two layers of buckram padded with interlining, then worked the cutout to fit the fabric design.
The shape was cut and the layers bound together with a little drizzle of white glue to keep them from shifting.  Even though the binding is sewn on, it first was secured with fusible adhesive tape.  I wanted to position the stripe and form the inside and outside corner turnings before beginning to sew.  This is a great time-saver because it keeps the binding from shifting as I sew. 
Now that I've learned the ladder stitch, I can't seem to live without it!  The binding is ladder-stitched to the face.  Because the fabric has a puckered look, the lines are not perfectly even.  But that is part of the charm.
After the face was prepared and the bottom turned back, the reverse side was covered with black lining and hand-stitched in place.  I couldn't do a proper ladder stitch here but it doesn't matter.

There are no returns- it fits between two cabinets and the board had to be just 3/4"- it seemed like returns would just be a distraction.
I want one!!!


Tuesday, January 12, 2016

Happy New Year, Blog!!!

Hey!  This blog is now 6 years old!
For my first post of the new year, here is a project for Paris Interiors in Scarsdale NY that included something of everything: a relaxed shade, a soft cornice, a 14' hard cornice, interlined pinch pleats with exquisite trim, and 14' of sheers.

The shade and soft cornice were in adjoining rooms, made from the same fabric- a taupe Scottish lace from Noblis-  but treated very differently.
In the living room, a luxurious ombre silk from Romo became stationary  pinch pleat panels mounted over a cornice, with grey traversing sheers under.
The shade is flat, with the rings set in 10" to create generous tails.  The bottom is trimmed with layered tape and glass beads from Samuel and Sons.  In case you wonder about the proportions, the width is about 65".  The lace is lined with a plain winter white voile.
I'm falling in love again with soft cornices.

This one was made on two layers of buckram.  Here the fabric is laid out over the paper pattern and photographed for the designer's approval.

Napped lining in khaki was layered under the lace, and a tiny lip cord finished the bottom edge.  All of this was hand-sewn, not glued.  It's not that I'm anti-adhesive, it's just that I like the results of sewing better with this little lip cord, plus sewing is more fun.
The top was finished with a 1/4" braid lip cord.


I wasn't sure if the treatment would need legs, but it did.  We didn't want the treatment to extend much beyond the molding, so I made the legs out of 1/4" hardwood from Home Depot.
The breathtaking trim for the LR panels came from Zimmer-Rohde.  It is applied by Dofix.  The pinch pleats are tacked by hand, with the thread looping around the front of the pleats.  Unfortunately it was totally impossible to pleat this to pattern, but I think it is fine anyhow!
 The sheers were also entirely sewn by hand.  I LOVE sewing sheers.
It was important to keep the face of the cornice untouched in case the client ever wants to use it without the panels.  I slipped pin strip from Rowley under the loosened top welt.  It was a little tricky hooking the drapery pins into the little holes, but Mario managed to do so, gracefully.
Little screw eyes provided a spot to hang the returns.
It took awhile to dress this silk, but Mario excels at that.  I let out the lead edge hem on one side and re-stitched on-site, to let it down a little- it didn't want to reach the floor without some coaxing.
I learned a lot from this installation.  That's why it's important for workrooms to get out there when their products are being installed.  Seeing the challenges and devising solutions informs protocol for the next time around with the same treatment.