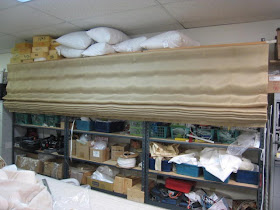
I reached deep into our bag of workroom tricks to make this shade, including making a permanent bottom fold; using trim to hide the bottom hem; getting creative with the weight bar pocket; working on a gridded canvas table; and basting, basting, basting.
The gridded canvas table was indispensable for this project. It's 12' wide and 5' wide, so I was able to get most of the shade done before having to shift the fabric. Plenty of weights helped, too.
With a double wide sheer for both the face and the lining, there were no seams to contend with. I probably logged 1/2 mile of walking just laying out the fabrics, smoothing, pressing, and aligning. The fabric spilling onto the floor was cut off, so I wasn't worried about it, I just had to be sure I didn't trip on it.
I knew I needed a sturdy pocket for the weight bar, so I decided to add a permanent bottom fold which would hide the pocket. I slipped a tube pocket (from Rowley) into the top of the double hem, pinned in place, then machine sewed it down at the very end, so the weight bar was snug and secure.
Mesh tube shroud in a khaki color (also from Rowley) was the best lift cord option, so there wouldn't be rings showing through. I spaced the tacks every 8" vertically since the shade was so huge, and the lift lines are 10" apart horizontally.
The grid lines on the canvas cover could be seen through the sheer, so marks were unnecessary. My favorite thread for rings (or "rings") is Coats Extra Strong Upholstery thread. It doesn't break, it knots tightly, and best of all, it doesn't twist.
Trim at the bottom hid the selvedges, unevenness and takeup of the fabrics folded into the hem. I glued the trim, then clamped the shade at each end of the table until the glue dried, to keep the ends from pulling in. I used glue because I was afraid that hand-sewing 12' of trim would cause too much take-up.
A 30# Rollease clutch completed the product, and I was glad that some time ago I invested in a tube of 14' fiberglass rodding, so John had none of the headaches of splicing the clutch rod. Our hanging system accommodates up to 12'- thank goodness!


No comments:
Post a Comment