Workrooms receive all sorts of fabrics for creating home furnishings, and it's difficult sometimes to imagine some fabrics in their eventual homes. One thing you learn as a wholesale workroom: make no presuppositions, because context is everything! Such was the case with this two-room project we fabricated for Crosstown Shade and Glass.
We were jolted by this brilliant yellow fabric, a Madcap Cottage print from Robert Allen, and couldn't imagine how it was going to look made up. It was such a joy to work with these fresh colors and a thrill to see the final product installed.
Both of the treatments, above, were a little under 12' wide. The swags were wider than a width of fabric, so the cuts were pieced, then aligned precisely on the table so we could stack cut.
The Parkhill Swag System makes swag-making a breeze. I'm glad, however, that I had years of practice making swags without it, first with M'Fay patterns, and later drafting by hand using Ann Johnson's book "Anatomy of a Swag." Those early experiences made it easier for me to improvise using the Parkhill.
Anyhow, using the Parkhill chart we set the template and marked the shape for cutting.
The beauty of the Parkhill is the finger cutouts which allow mounting with minimal bulk on the board.
Mounting the straight window was textbook, but mounting the bay swags was fiddly, requiring some improvisation. For the swags overlapping the angle, I wanted all of the folds to stack on the "arms" of the bay which resulted in some excess fabric to disguise. To achieve that I snuck in a 7th fold on each of those two swags in the angle.
In addition to the bay angles, we also had to find a way to trick the eye into believing that the two "arms" of the bay were the same size; in reality, the right arm is 2" longer. I think we pulled it off.
And, hey, if you've read this far, please accept my apology for the sparse posting so far this year- January was a crazy month.
THE BLOG IS HAVING TROUBLE WITH COMMENTS! SOMETIMES THEY DON’T GET PUBLISHED, AND WHEN THEY ARE I AM UNABLE TO REPLY TO THEM. IF THAT HAPPENS, JUST EMAIL ME AT stitchlore@gmail.com.
Looking for something specific? Check out the Topic Index, or the Search bar, just below, on the left.
Sorry about this problem!
SO.........WHAT ARE WE WORKING ON TODAY??
Showing posts with label swags. Show all posts
Friday, February 2, 2018
Thursday, September 12, 2013
Swag variation- straight bottom- and a "duh" moment!
Recreating window treatments from a photograph is sometimes part of the workroom's job. Sometimes we have design input, but sometimes we are required to simply make what is ordered.
I was asked to duplicate a swag with a flat, straight bottom, that was seen in a magazine. After much experimenting, I developed this mock-up. I based the swag specs on that bottommost fold, using Ann Johnson's swag book. I pretended that was the swag silhouette, and then left a lot of excess fabric, which I cut away to get the shape I sought.
Postscript *** Here's the "duh" moment: Now I am realizing that I basically was creating a variation of an Empire valance. Those straight sides are where horns would be sewn to an Empire.***
I was so surprised when I unstapled the mockup- for the bottom to appear practically straight, the bottom edge actually is a concave curve. This is the weirdest swag pattern I've ever made!
The real fabric is a plaid, however, and I didn't want the bottom edge to be cut off-pattern, so on this one point I compromised and cut it straight on the bottom, which meant the sides raised up a little higher than wished, but I didn't think the alternative would've been attractive at all. Here it is before pleating..... strange, huh!
Postscript *** and now that I've had my "duh" moment, I see that it's just a very big Empire swag, with separate jabots instead of attached horns! ***
Ta-da! The final product. The swag dimensions, as well as the jabot style, short point, long point, and face width, were all specified by the client to be based on the very fuzzy photocopy of a photograph.
Postscript *** Well, if I had recognized this treatment as a wide Empire, I still would have had to draft a pattern from scratch, but it might have been easier if I had visualized this pattern shape in the first place. ***
I was asked to duplicate a swag with a flat, straight bottom, that was seen in a magazine. After much experimenting, I developed this mock-up. I based the swag specs on that bottommost fold, using Ann Johnson's swag book. I pretended that was the swag silhouette, and then left a lot of excess fabric, which I cut away to get the shape I sought.
Postscript *** Here's the "duh" moment: Now I am realizing that I basically was creating a variation of an Empire valance. Those straight sides are where horns would be sewn to an Empire.***
I was so surprised when I unstapled the mockup- for the bottom to appear practically straight, the bottom edge actually is a concave curve. This is the weirdest swag pattern I've ever made!
The real fabric is a plaid, however, and I didn't want the bottom edge to be cut off-pattern, so on this one point I compromised and cut it straight on the bottom, which meant the sides raised up a little higher than wished, but I didn't think the alternative would've been attractive at all. Here it is before pleating..... strange, huh!
Postscript *** and now that I've had my "duh" moment, I see that it's just a very big Empire swag, with separate jabots instead of attached horns! ***
Ta-da! The final product. The swag dimensions, as well as the jabot style, short point, long point, and face width, were all specified by the client to be based on the very fuzzy photocopy of a photograph.
Postscript *** Well, if I had recognized this treatment as a wide Empire, I still would have had to draft a pattern from scratch, but it might have been easier if I had visualized this pattern shape in the first place. ***
Tuesday, December 4, 2012
Are you tired of swags yet?
Another swag order that was perfect for my new Parkhill template system..... it has paid for itself already in time saved! Bring 'em on!
Until I get more comfortable with the calculations, I'm going to mock up each swag first. Good thing I did with this one, because I had made a mistake. Here's the corrected mockup, in front of another mockup for a shade project I'll be showing off shortly.
I just love how, like magic, the swag "fingers" just lay down in a nice straight line, and a quick "snap" of the fabric produces perfect swag folds.
Another thing I've learned: hang the treatment up before finishing the ends and the top of the board, so if adjustments need to be made, there won't be lots of tedious unstapling. I realized that the center swag had to be nudged forward because layering it over the other swags created take-up and the center swag looked too short. An easy fix, with double-sided tape!
Until I get more comfortable with the calculations, I'm going to mock up each swag first. Good thing I did with this one, because I had made a mistake. Here's the corrected mockup, in front of another mockup for a shade project I'll be showing off shortly.
I just love how, like magic, the swag "fingers" just lay down in a nice straight line, and a quick "snap" of the fabric produces perfect swag folds.
Another thing I've learned: hang the treatment up before finishing the ends and the top of the board, so if adjustments need to be made, there won't be lots of tedious unstapling. I realized that the center swag had to be nudged forward because layering it over the other swags created take-up and the center swag looked too short. An easy fix, with double-sided tape!
Wednesday, November 21, 2012
Raised Swags installed!
So, hurray, the raised swags featured in the last post were installed this week, with great success.
Megan Kearney Bailie (of New Fairfield CT) not only designed the treatment but also installed it.
The components looked a little strange lying on the floor.
The overlapping swags looked even weirder on the wall all by themselves. Talk about droopy drawers.
Once the little boards with the jabots went up and the swags were attached on the outside, it started making sense. We left them for Megan to staple on-site in case they needed tweaking.
That wide, empty wall area is why we made the center swag on a separate board- the space couldn't be covered adequately with a swag falling from the raised board.
The big challenge was to hit all the marks- making the short point long enough so the wall was not exposed, and the long point to not cover too much of the window.
Oops, I can see some wall peeking through above that center swag...........
Clever Megan, improvising to attach the medallions!
The homeowner loved her new window treatments.
The components looked a little strange lying on the floor.
The overlapping swags looked even weirder on the wall all by themselves. Talk about droopy drawers.
Once the little boards with the jabots went up and the swags were attached on the outside, it started making sense. We left them for Megan to staple on-site in case they needed tweaking.
That wide, empty wall area is why we made the center swag on a separate board- the space couldn't be covered adequately with a swag falling from the raised board.
The big challenge was to hit all the marks- making the short point long enough so the wall was not exposed, and the long point to not cover too much of the window.
Oops, I can see some wall peeking through above that center swag...........
Clever Megan, improvising to attach the medallions!
The homeowner loved her new window treatments.
Tuesday, November 13, 2012
More swags: gathered this time
Here's a project that definitely is not ready for a blog post, but it was so much fun to work on that I want to write about it now.
For a wide window with a high cathedral ceiling, the designer planned raised swags on boards. After drawing the concept to scale, I started playing with chain weight on the hallway wall to get the exact silhouettes in the right proportions. The biggest challenge was to get the long points to not cover too much of the window, and the short points long enough to cover the molding.
Once I got all the shapes to hit their marks, I began the pattern-making process. I studied Ann Johnson's swag book, but the overlapping swags did not fit exactly into any hybrid that I could find, so I had to do a lot of experimenting. The mocking-up process required a lot of cutting and re-cutting, and I finally developed a pattern that exactly followed the contours of the draped string.
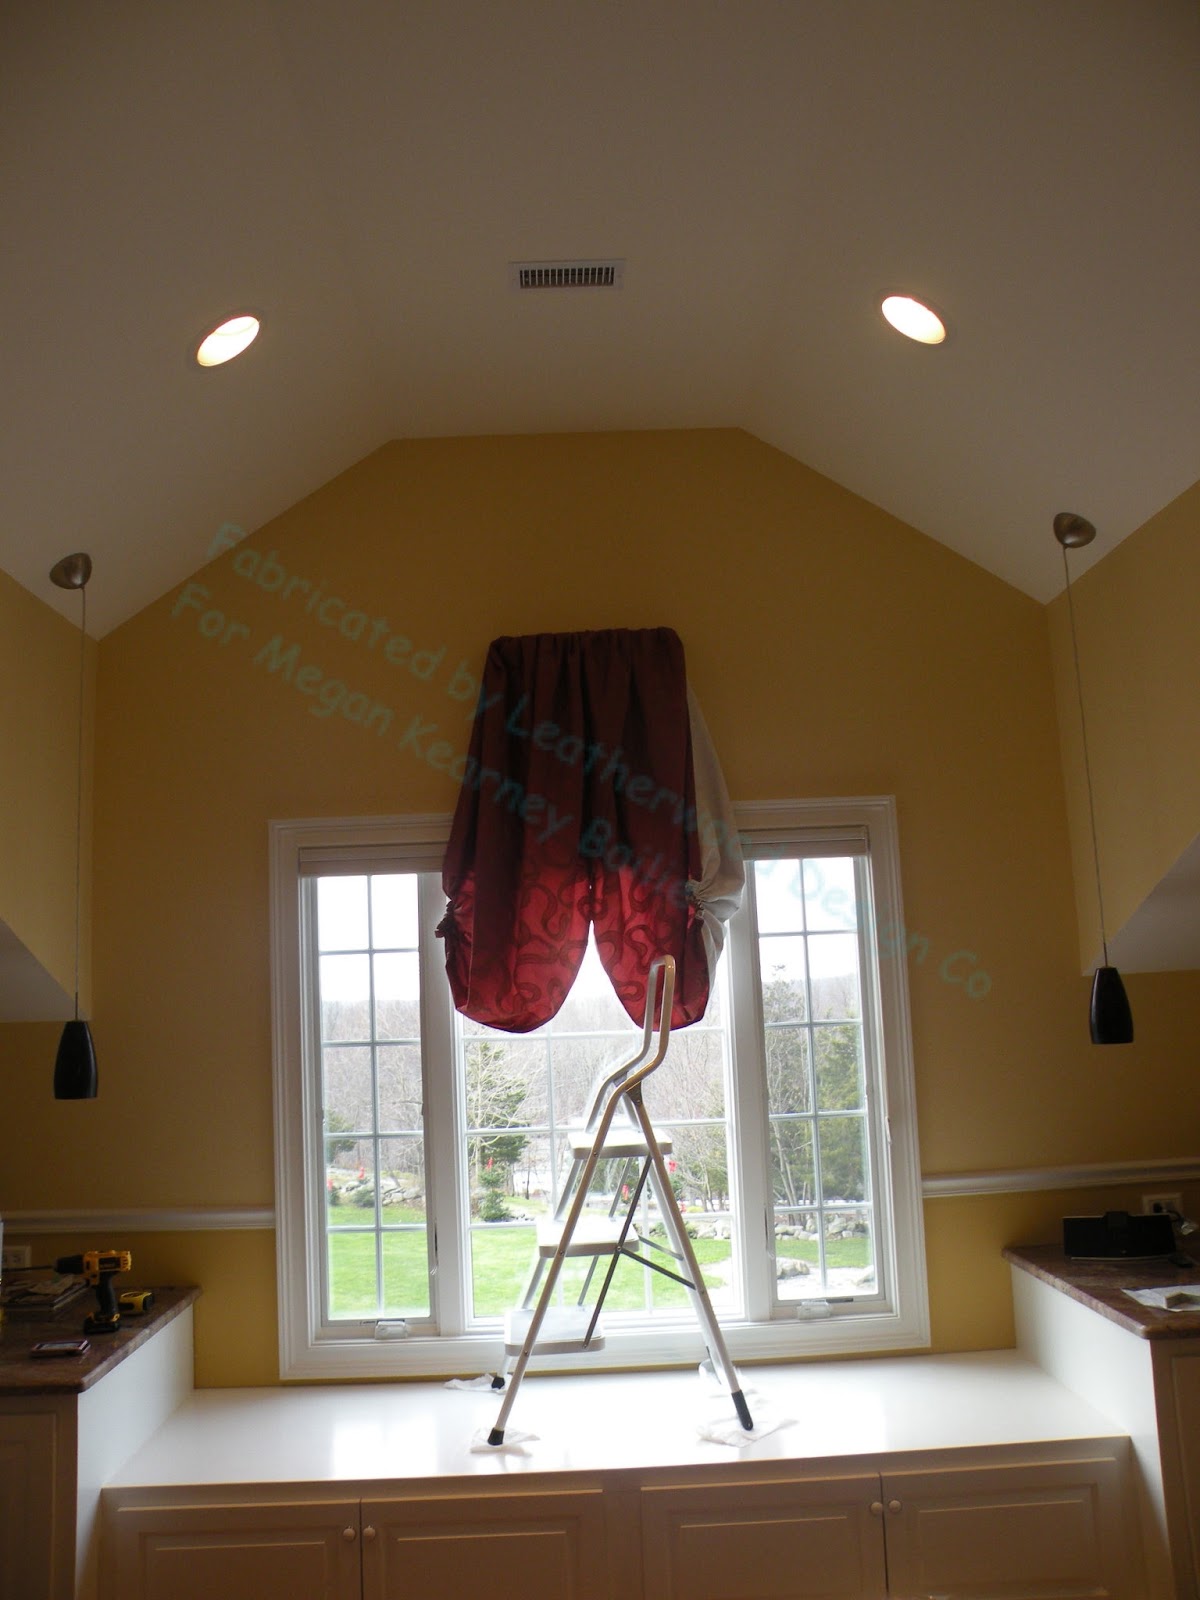
Here are all the components, completed: two small boards with the jabots, the comparatively normal center underswag, and on the stand, the nondescript-looking thing that actually is the curved board with the two overlapping swags. At the right are three shallow swags for the back window treatment.
We chose to gather, not pleat, the swags and jabots, so, alas, the Parkhill system was not any use for this project. I like to hand-gather with a small running stitch. Bulk was an issue so that eliminated shirring tape as an option. It doesn't take but 5 minutes to hand-gather both sides of a swag.
It's hard to remember to document projects like these- so much experimenting going on, I forget to take pictures throughout the process. The decorator has promised plenty of photos at installation time..................
For a wide window with a high cathedral ceiling, the designer planned raised swags on boards. After drawing the concept to scale, I started playing with chain weight on the hallway wall to get the exact silhouettes in the right proportions. The biggest challenge was to get the long points to not cover too much of the window, and the short points long enough to cover the molding.
Once I got all the shapes to hit their marks, I began the pattern-making process. I studied Ann Johnson's swag book, but the overlapping swags did not fit exactly into any hybrid that I could find, so I had to do a lot of experimenting. The mocking-up process required a lot of cutting and re-cutting, and I finally developed a pattern that exactly followed the contours of the draped string.
Here are all the components, completed: two small boards with the jabots, the comparatively normal center underswag, and on the stand, the nondescript-looking thing that actually is the curved board with the two overlapping swags. At the right are three shallow swags for the back window treatment.
We chose to gather, not pleat, the swags and jabots, so, alas, the Parkhill system was not any use for this project. I like to hand-gather with a small running stitch. Bulk was an issue so that eliminated shirring tape as an option. It doesn't take but 5 minutes to hand-gather both sides of a swag.
It's hard to remember to document projects like these- so much experimenting going on, I forget to take pictures throughout the process. The decorator has promised plenty of photos at installation time..................
Monday, November 5, 2012
Swags!
This past spring I made some velvet pole swag treatments. I drafted the pattern myself using Ann Johnson's book and was pleased with the results, but the velvet caused me a lot of grief due to the bulk. I swore I'd never suffer again making swags.
By wonderful coincidence, a workroom that was going out of business had a Parkhill swag system for sale at about half the price of new- and I jumped on the opportunity. The instructions came on an old video so I called Scot Robbins, the US distributor/rep, and he sent me a DVD.
Naturally I did not have a single swag order until last month, and I wondered if I'd made a mistake; but finally I had the chance to use it. First I mocked up a sample swag the size of the six I had to make.
What makes the Parkhill system so easy to use is the adjustable template which creates fingers that are stapled to the board side by side, and the book of tables for every possible variation. Fusible tape seals the face and lining together and eliminates virtually all excess bulk.
I took my time fabricating the actual swags; I was still a little nervous. But once they were done, I examined them carefully for anything unacceptable and discovered that they were.... well, perfect. There are two treatments, mirror images of each other.
An amazing bonus to the system is the jabot pleating jig which is really fun to use AND eliminates pleating anxiety.
I'm a believer! I'll still need my pattern-drafting skills- in fact I'm drafting some raised swags this week that are totally non-conforming to any hybrid swag style I can find, so I'm deep into the mocking-up process right now. But for standard swags, you can't beat the Parkhill system for speed and accuracy. Scot says that as I grow more experienced using it, I'll be able to figure out how to use it for unusual swags, like arched, asymmetrical, etc. That will be fun, but right now I'm just thrilled to have it for standard swags.
By wonderful coincidence, a workroom that was going out of business had a Parkhill swag system for sale at about half the price of new- and I jumped on the opportunity. The instructions came on an old video so I called Scot Robbins, the US distributor/rep, and he sent me a DVD.
Naturally I did not have a single swag order until last month, and I wondered if I'd made a mistake; but finally I had the chance to use it. First I mocked up a sample swag the size of the six I had to make.
What makes the Parkhill system so easy to use is the adjustable template which creates fingers that are stapled to the board side by side, and the book of tables for every possible variation. Fusible tape seals the face and lining together and eliminates virtually all excess bulk.
I took my time fabricating the actual swags; I was still a little nervous. But once they were done, I examined them carefully for anything unacceptable and discovered that they were.... well, perfect. There are two treatments, mirror images of each other.
An amazing bonus to the system is the jabot pleating jig which is really fun to use AND eliminates pleating anxiety.
I'm a believer! I'll still need my pattern-drafting skills- in fact I'm drafting some raised swags this week that are totally non-conforming to any hybrid swag style I can find, so I'm deep into the mocking-up process right now. But for standard swags, you can't beat the Parkhill system for speed and accuracy. Scot says that as I grow more experienced using it, I'll be able to figure out how to use it for unusual swags, like arched, asymmetrical, etc. That will be fun, but right now I'm just thrilled to have it for standard swags.
Tuesday, December 20, 2011
Bustle Swags, Point to Point Swags, or Drapery Swags
Occasionally I've referred to the book "Anatomy of a Swag" by Ann Johnson, and I think I did so most recently when showing you the Turban Swags we made out of a gold stretchy jersey-like fabric, but I must mention the book again because I've had two orders for the swags known variously as bustle swags, drapery swags, or point to point swags.
For the very first swags I ever made, I used the excellent patterns by M'Fay, for board, pole, and bustle swags. Eventually I realized I needed to learn how swag patterns were drafted because I had more complex situations where ready-made patterns did not fit, such as these silk stripe swags that had to finish a specific width and length that was not available in a pattern.
At the time, I could not afford the fancy template system that I coveted, so I purchased Ann's book, which had come out just in the nick of time for me!- and studied, studied, studied. Now I can draft patterns in no time, to fit any circumstance. Here you can see the muslin mockup I made for eight striped silk swags.
Something that makes my heart go pitter-patter is nice finishing. For the interlined silk I bound the pleats in the rose.
For this black and gold damask, I cut identical binding strips centering part of the medallion motif. I doubt that anyone but me will ever realize they are all carefully bound, identically, but I can always look back at this picture and smile.
For the very first swags I ever made, I used the excellent patterns by M'Fay, for board, pole, and bustle swags. Eventually I realized I needed to learn how swag patterns were drafted because I had more complex situations where ready-made patterns did not fit, such as these silk stripe swags that had to finish a specific width and length that was not available in a pattern.
At the time, I could not afford the fancy template system that I coveted, so I purchased Ann's book, which had come out just in the nick of time for me!- and studied, studied, studied. Now I can draft patterns in no time, to fit any circumstance. Here you can see the muslin mockup I made for eight striped silk swags.
Something that makes my heart go pitter-patter is nice finishing. For the interlined silk I bound the pleats in the rose.
For this black and gold damask, I cut identical binding strips centering part of the medallion motif. I doubt that anyone but me will ever realize they are all carefully bound, identically, but I can always look back at this picture and smile.
Friday, November 18, 2011
Turban Swags
If you want to learn how to draft your own swag patterns and troubleshoot to fine-tune your swag, you can't do better than to consult these two books by Ann Johnson. These books are regular lunch-time reading for me.
I pored over them when I had a recent order for two Turban swag valances, and learned that a Turban swag is not simply a swag with one side made wider to wrap around the board; rather, it is a hybrid: the top-mounted side is a regular swag, and the return-mounted side is a boxed swag. Two patterns must be drafted and joined.
Both of the valances for my order were quite wide, and were to have only two swags each. That meant that the top-mounted half was actually the equivalent of half of a 100" swag!
In this case, the top is pleated, and the return sides are scrunched. We had to do a good bit of improvising because of the nature of the slinky, stretchy, satin fabric- more on that below.
This is not the glam shot- in fact the swags are barely dressed- but you get the idea.
I followed the instructions for dropping plumb lines from the board to determine the line where the regular swag and the boxed swag meet; and I draped chain weight to get the exact finished measurements and the specified short point at the overlap in the center.
I made my pattern and when I stapled it onto the board, it fit just the way I wanted it to except that I found I needed to trim a little off the bottom curve. I just used a Sharpie pen to draw the bottom curve where I wanted it, then trimmed off the excess.
The fabric was a slinky, stretchy satin- and it was interlined. Here it is, again, not quite dressed!
It was an extremely difficult swag to drape, in the end; although the mock-up draped just the way I planned, the actual swag was so heavy and stretchy that I had to modify it to make it fit the specifications. Pleats on the returns absolutely would not hold their shape so we turned them into scrunched/gathered returns.
Luckily the installer is very talented and was able to dress the swags perfectly once the valances were hung. The decorator and the homeowner were delighted, and I was relieved when they called to tell me so.
I pored over them when I had a recent order for two Turban swag valances, and learned that a Turban swag is not simply a swag with one side made wider to wrap around the board; rather, it is a hybrid: the top-mounted side is a regular swag, and the return-mounted side is a boxed swag. Two patterns must be drafted and joined.
In this case, the top is pleated, and the return sides are scrunched. We had to do a good bit of improvising because of the nature of the slinky, stretchy, satin fabric- more on that below.
This is not the glam shot- in fact the swags are barely dressed- but you get the idea.
I followed the instructions for dropping plumb lines from the board to determine the line where the regular swag and the boxed swag meet; and I draped chain weight to get the exact finished measurements and the specified short point at the overlap in the center.
I made my pattern and when I stapled it onto the board, it fit just the way I wanted it to except that I found I needed to trim a little off the bottom curve. I just used a Sharpie pen to draw the bottom curve where I wanted it, then trimmed off the excess.
The fabric was a slinky, stretchy satin- and it was interlined. Here it is, again, not quite dressed!
It was an extremely difficult swag to drape, in the end; although the mock-up draped just the way I planned, the actual swag was so heavy and stretchy that I had to modify it to make it fit the specifications. Pleats on the returns absolutely would not hold their shape so we turned them into scrunched/gathered returns.
Luckily the installer is very talented and was able to dress the swags perfectly once the valances were hung. The decorator and the homeowner were delighted, and I was relieved when they called to tell me so.
Friday, July 29, 2011
Gathered Swags and other stuff
There is a lot of work done here that we never get to see after it leaves the workroom. I was dying to see the opera shade featured last week and was thrilled that the timing worked out and I was able to get to the installation.
As a bonus, I got to see on-site the many other projects we've done for this home over the past few years. I wish my photo of these gathered swags and jabots looked as good as they do in reality in the master bedroom.
For some reason, I don't seem to have a workroom shot of these treatments. Single swags covered the small windows flanking the bed.
I do have a workroom shot of these silk balloon shades- the detailing is discussed in this blog post from April 15, 2010- can't believe it was so long ago!
And now I have an after shot, too. That's one fancy master bathroom!
A few years ago we made medallion swags for a different room, and this past winter the designer had us re-cut them for the narrow windows on the wall leading outdoors.
Here is how it looked in the workrooom in this post on March 11....
And a few weeks later we made pillows out of the scraps. I love this fabric and was happy that it wasn't wasted.
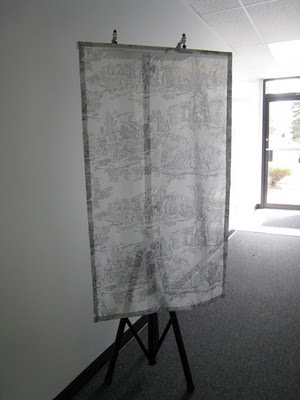
One of my favorite treatments is also the simplest: a totally flat panel, on a board, to showcase the amazing Jeanne d'Arc toile print on a fine cotton sheer. It provides just enough privacy for a downstairs powder room facing the back garden.
Here's how it looked in the workroom, on March 9.
One of the coolest fabrics ever!.........
As a bonus, I got to see on-site the many other projects we've done for this home over the past few years. I wish my photo of these gathered swags and jabots looked as good as they do in reality in the master bedroom.
For some reason, I don't seem to have a workroom shot of these treatments. Single swags covered the small windows flanking the bed.
I do have a workroom shot of these silk balloon shades- the detailing is discussed in this blog post from April 15, 2010- can't believe it was so long ago!
And now I have an after shot, too. That's one fancy master bathroom!
A few years ago we made medallion swags for a different room, and this past winter the designer had us re-cut them for the narrow windows on the wall leading outdoors.
Here is how it looked in the workrooom in this post on March 11....
And a few weeks later we made pillows out of the scraps. I love this fabric and was happy that it wasn't wasted.
One of my favorite treatments is also the simplest: a totally flat panel, on a board, to showcase the amazing Jeanne d'Arc toile print on a fine cotton sheer. It provides just enough privacy for a downstairs powder room facing the back garden.
Here's how it looked in the workroom, on March 9.
One of the coolest fabrics ever!.........
Subscribe to:
Posts (Atom)