THE BLOG IS HAVING TROUBLE WITH COMMENTS! SOMETIMES THEY DON’T GET PUBLISHED, AND WHEN THEY ARE I AM UNABLE TO REPLY TO THEM. IF THAT HAPPENS, JUST EMAIL ME AT stitchlore@gmail.com.

Looking for something specific? Check out the Topic Index, or the Search bar, just below, on the left.


Sorry about this problem!

SO.........WHAT ARE WE WORKING ON TODAY??

Thursday, October 24, 2019

Ripple to Pattern

Once Pleat-to-Pattern draperies became an industry standard, Ripple-to-Pattern wave draperies were soon to follow, thanks to a variable wave tape developed by Forest Group
This graphic drapery, recently fabricated for Denise Wenacur Design and Decor, illustrates perfectly the striking effect possible when rippling to pattern. 
A few weeks later we used the same technique to fabricate geometric ripple-to-pattern for Cottages to Castles, installed by Scott Berniker who kindly provided photos.
All ripplefold begins with the rod.  We template the master carrier by fitting translucent snap tape to the actual hardware, using a fabric stapler.
This ensures a perfect fit on installation day.
We make a template of the header and plot out the placement of the pattern.  I make sure to include every detail during this step.
The header template is one reason to always order a little more fabric than the project strictly requires.  With the widths joined on the template, we can be sure the seams fall to the back of the ripples rather than show on the front.
After the drapery is on the table, we align the template to be sure everything is where it should be.
In our workroom, we prefer to fabricate with no stitching visible on the front- a huge change from the old way in which one of two rows of stitching were considered inevitable.
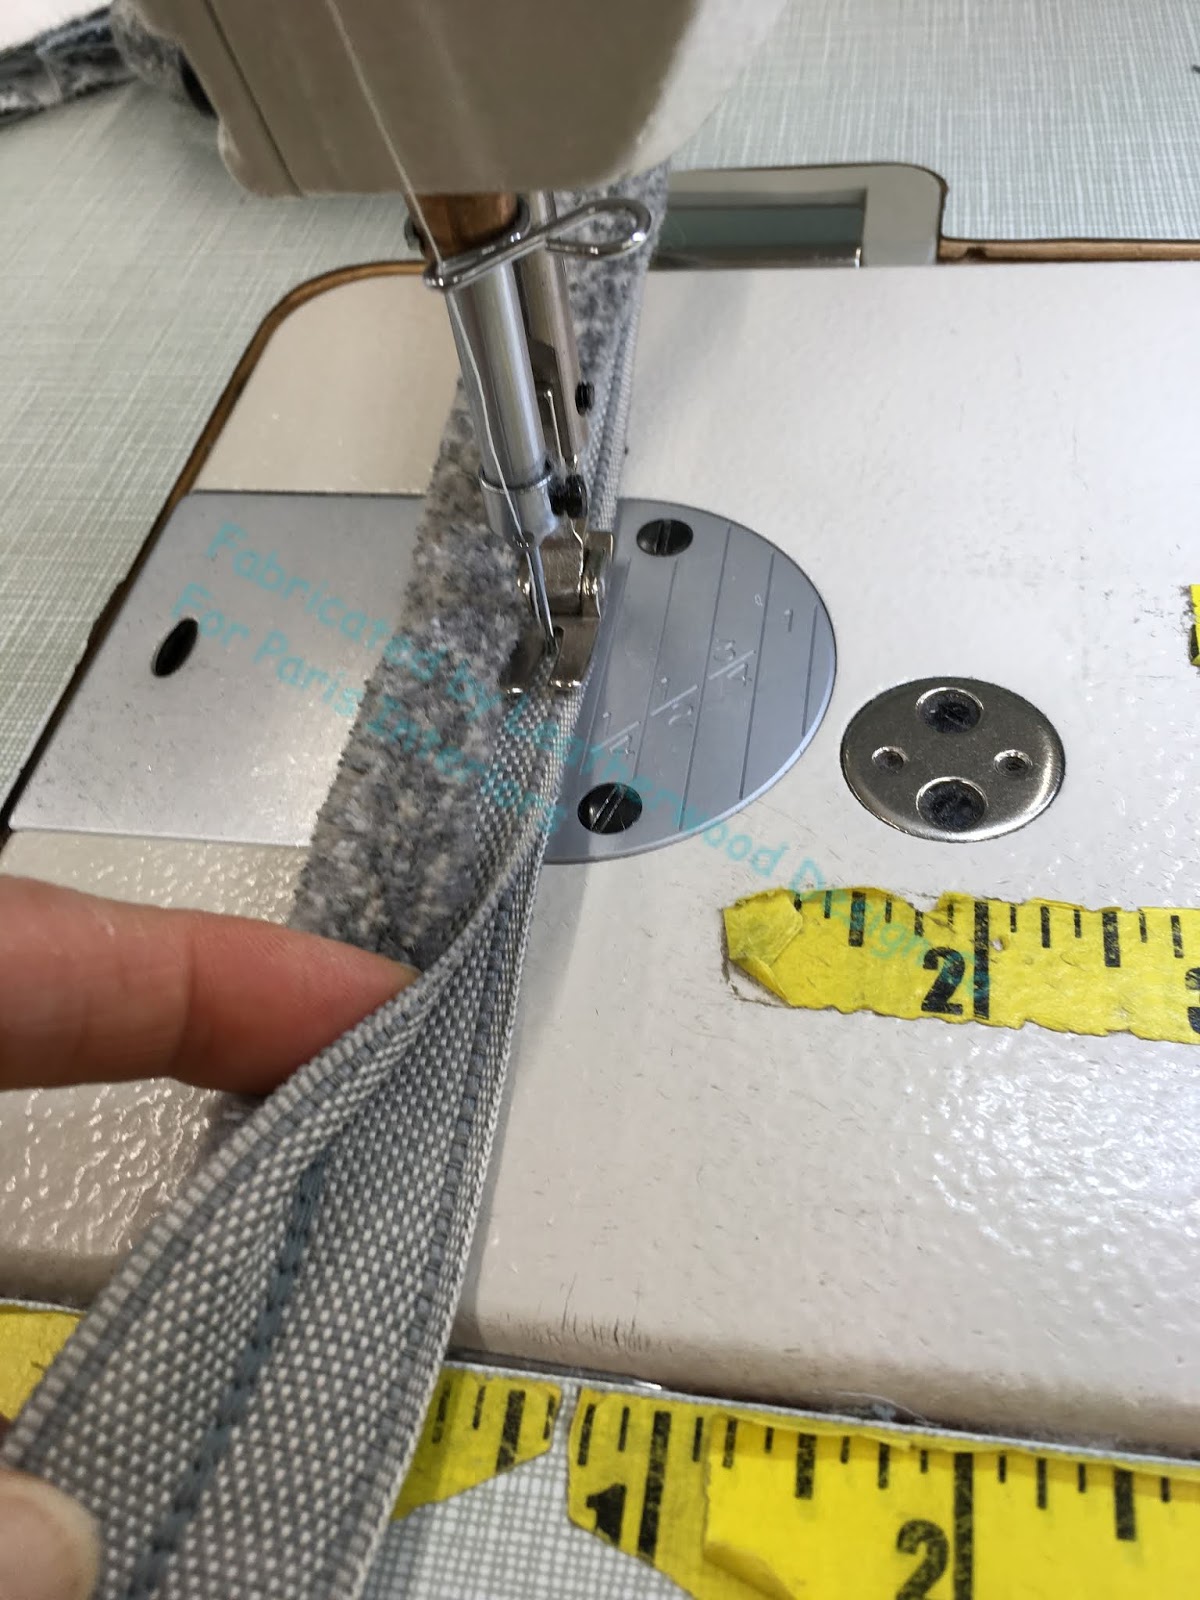
Our method for fabricating begins with a lock-stitch (basically an interlocking stitch which itself is actually a long, loose blanket stitch) to hold the lining and face fabric together, just past the crease on the heading side.  
Translucent 2" Dofix buckram is fused right at the crease line.
Easy-flex tape from Forest Group is secured with a narrow strip of Jewel tape down the center.
Our template show exactly where to position the 3 snaps.
The doubled heading is folded under, and the Easy-flex tape is staple-basted on both sides, through the heading only.
The ends are finished neatly (and hand-sewn after the tape is applied).
The header is opened up flat, and the Easy-flex tape is sewed on both sides.
All that remains is to hand-sew the ends, and insert the Easy-flex Hooks.
The only thing that varied between the two projects: the orange drapery is blackout, and we did not use buckram, concerned that it might not fuse securely.  Instead, we opted to hold the header down with a double-sided adhesive tape.
Did you read all the way to the end?  One thing that really super thrilled me, for the second time ever, I made pleat-to-pattern draperies AND a shade for the same room!  If you're a workroom nerd too, you'll totally get it :)

Thursday, October 17, 2019

Tale of a Bunny Tail Trim

What a perfect combo- this Sanderson bunny print "Dune Hares," and soft grey "Strata Marabou" trim from Samuel and Sons.
This fuzzy brush fringe has tape on both sides, and I had no idea how to apply it.  I tried a few different ways, including attempting to baste it on by hand, all with dismal outcomes.
However, thanks to our marvelous workroom network, after posting an inquiry I got enough suggestions to cobble together a process I felt comfortable with, and started out with some confidence.  If I had to use this again, I might try another method, but for my first time, this is how I did it.
Before I began to sew, I had to satisfy my curiosity about the name "marabou."  First, a "marabout" is a west African Muslim ascetic and teacher.  A "marabou" is a sub-Saharan stork whose hermit-like habits I presume gave inspiration for the term for the reclusive saint.  The feathers of the avian marabou were used in fashion- think Mae West in a boa, or that fluffy, feathery trimming on high-style garments.  Nowadays you can buy fake marabou feathers or marabou trimming made from turkey feathers from places like Walmart.  And in home dec trimmings, the term seems to have expanded beyond feathers to include fluffy, bushy trim from any material- such as wool or silk, or in this case, poly/viscose.
Back to the bunny pillow.  I sewed the two layers of tape together- and I still am not sure if this is how it's intended to be applied!- but this is how I started.
I sewed it to the pillow edges with a skinny foot.  I know, I know, I know about using a cording foot with the cord down and the fabric on top- but this is how I did this.
I put right sides together and sewed around the perimeter- not too close.
I turned to the right side and used the edge of a scissor to pull out fringe fibers that had gotten stuck in the seam, and then I could see how much further in I needed to sew.
I sewed again from the other side of the pillow, still with the skinny foot.
THEN I switched to a cording foot, turned the pillow over one more time, and sewed from the other side.  This last go-around did the trick.   I'm sure you wonder why I didn't begin with the cording foot.  Well, I feel that I could not have sewn the trim effectively if I had just started from this point- I feel that I would've gotten too much fiber caught into the seam.  I could be wrong, but this is the method I used and I'm sticking to it.
There was no way to sew a zipper to this, so I sewed the pillow closed by hand. 
It was tough sewing, and it took about four times longer than a normal pillow, but it turned out great!

Wednesday, October 9, 2019

Laser level saves the day!

Double-wide fabrics are designed to be run sideways for draperies, with the selvedge running at the top and the bottom of the drapery.  This eliminates seams (not that I have anything against seams- sewing seams is how I earn a living!), and with sheer fabrics the absence of seams is a blessing.
This particular pattern is created by heat-setting pleats which, when the fabric is used as intended, run in wavy vertical lines.
But the client wanted to run it the other way, running the wavy pleated lines horizontally.  I suspected this could cause trouble if the heat-set pleats stretched out from the weight of the hem.  And unfortunately, the rep for this fabric company insisted on stating, incorrectly, that the pattern is "woven" and gave the client confidence that she was making a good decision .  I had misgivings about the outcome, but accepted the project.  (Go ahead, say it!  I should trust my instinct!)
To be sure I was cutting on grain, I pulled a thread which provided a cutting guide.  The fact that the grain line didn't follow the pattern proved that the pattern was not woven.  But, anyhow.
Since the fabric was run off the roll instead of railroaded, it had to be seamed to achieve the required width (thus obviating the advantage of the double-wide fabric!).  We French-seamed the cuts by serging them wrong sides together, removing the selvedge in the process:
Then completed the French seam by turning the fabric right sides together, sewing to encase the serged edges.
A small bottom hem was turned and blindhemmed with chain weight inside. 
The tops were pleated with what we call a butterfly pleat: a 4" long pleat, tacked right in the middle.
So, we hung these up in the workroom to see if they would hang straight. 
Well, guess what.  See for yourself:
So this is how we spent a Sunday afternoon.  After letting them hang overnight, we took out the hem and the chain weight.  The hem could barely be pressed because the heat-set pleats would come out.  We didn't see any point in trying to re-table them, since that had already turned out to be unreliable.
So, we set up our laser level on the vertical post of a rolling stand.....
and hung the curtains back up and allowed the laser to indicate a level line.....
and I stumbled and crawled around behind the curtain to pin-mark a new hemline as best I could:  And this took a long time, because, naturally, the fabric moved every time I tried to mark it.
 I re-hemmed it, without the chain weight and hung it back up- and ta-da!  It was level! 
We left it hanging overnight again, and it still was hanging level the next morning.  The draperies were installed the following week, and to my utter amazement, they fell exactly where they were supposed to and have held their shape!


Wednesday, October 2, 2019

Topping off the Roman Shade

We use toppers for Roman shades under a variety of circumstances, from utilitarian to aesthetic.
Crosstown Shade and Glass requested reverse mount for these shades: the shade falls off the back of the mounting board, allowing the bead chain loop to hang conveniently in front of the inside-mounted shades.  A topper hides the mechanism, and the grommets that route the lift cords to the front of the shade for rigging.
There plenty of methods for making toppers.  In this case, we wrapped 1/4" hobby wood with blackout fabric and interlining before covering it with the face fabric, so these toppers are thin but rigid, and slightly padded.
The wood doesn't come in the size we needed, so we pieced it together.  This topper had to be about 7-8" long in order to hide the grommets that route the lift cords from the back of the shade to the front, where the reverse-mounted lift system is located.
During preparation, double-sided adhesive tape secured the linings.
The shade is rigged and strung before the topper is made, because, for one reason, once it's on, the shade is hard to hang for testing.  We used the Rollease traversing clutch- an industry tried-and-true- because it offers the most versatility.  The bead chain loop was specified to hang 2" in from the end, and with some other systems this would push the outermost columns 5-5.5" in from the edge- too far, in our opinion.  The outer columns on these shades are about 3" in from the edge, and ribs in the folds keep the sides from drooping.  In case you're wondering, these shades are blackout, made with our own no-pinholes-of-light fabrication technique.
Another reason for making the topper after the shade is mounted is so we can be sure we match the pattern to the shade body.  The third reason is to be sure the topper is long enough to hide the grommets.  Sometimes in the workroom we will raise the shade up to the height of the window to double-check what that length should be. 
The topper is nail-gunned to the board face, then the fabric wrapped to the top of the board.
I am pretty thrilled with the pattern match!  And, of course, I love the pleat-to-pattern of the folds :)  Are we tired of that yet?!?