Hey- once again, the blog is having trouble with comments; sometimes I can't get them to be published; and when they are published I am nearly always unable to reply to them.
Please, if you don't see your comment or my reply, just email me at stitchlore@gmail.com and I'll get back to you.
Sorry about this problem!
Friday, April 19, 2019
Monday, April 15, 2019
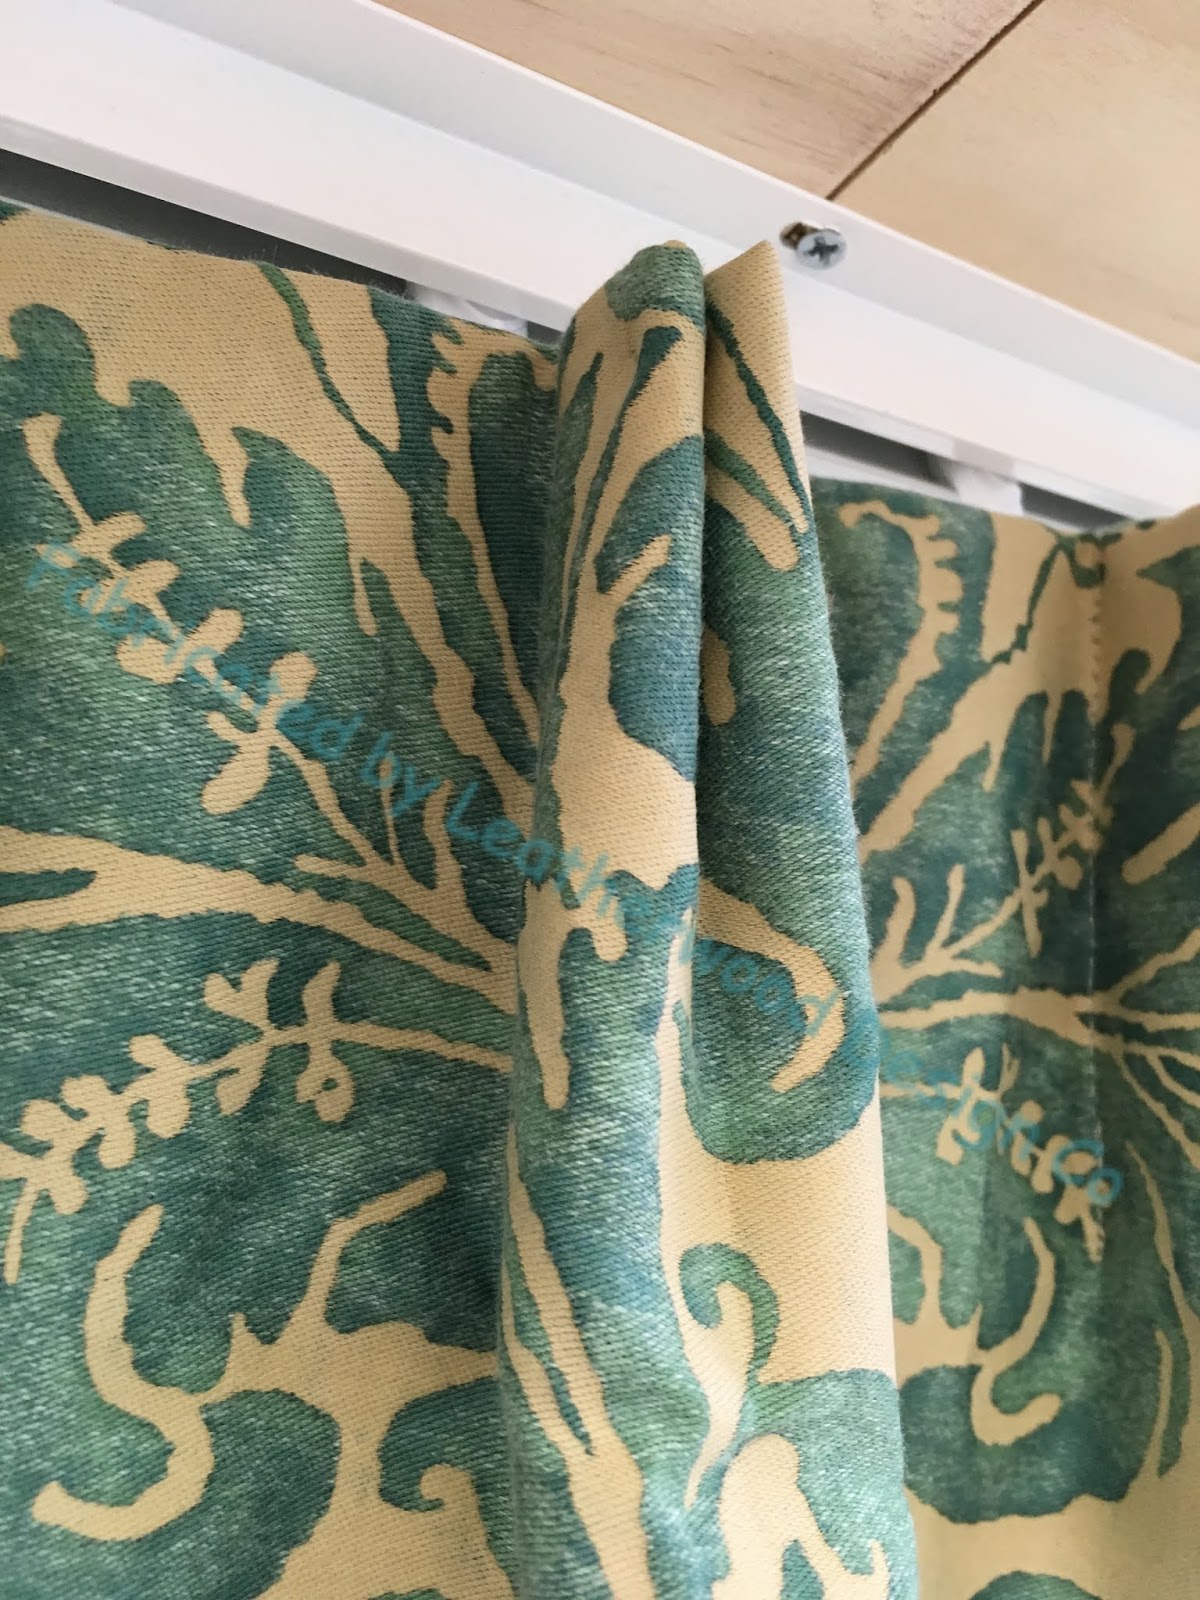
A pleat-to-pattern natural
Pleat to pattern, pleat to pattern, are we tired yet of pleat to pattern? UMMMM...... NO!
 At least not on this project for Crosstown Shade and Glass.
 Pleat to pattern just keeps getting more fun. This applique stripe is such a cool fabric, OF COURSE it had to be pleated to pattern.
 The homeowner's original idea was ripplefold draperies with this fabric. I made mockups to help the client and designer choose how to best show off this pattern and address the practical issues.
 With ripplefold, half the fabric goes to the front, half to the back, just like grommet draperies. A workroom sample like this helps everyone visualize the effect.
 I did a mockup with buckram on a string to simulate the profile.
 We also made a mockup of inverted pleats, so the client could compare
styles. This creates a wave effect, which visually is very similar to
ripplefold, except instead of a backward-projecting ripple, that fabric
is pleated to the back and stitched down flat.
We also made a mockup of inverted pleats, so the client could compare
styles. This creates a wave effect, which visually is very similar to
ripplefold, except instead of a backward-projecting ripple, that fabric
is pleated to the back and stitched down flat.


 The pleats lie flat, but once they're hung on a rod, the flat part rolls forward like a wave.
 Everybody was happy with this project!


Guess what, inverted pleats were the choice.
The pleats are sewn to the back, instead of to the front as they are with pinch pleats.

Since these draperies were unlined, we French seamed the widths together, so there were no raw or serged edges.
The pleats were flattened out and "stitched in the ditch" on the front.


Tuesday, April 9, 2019
Hybrid top tack and happy fingers
My favorite top tack style is with coordinating color thread wrapping around the front, like these:

 There are other ways to create a top tack. (As well as a lot of names for it, including Euro, fan, butterfly. I call it top tack.) I made this sampler to help my client choose between wrapped, stab, and across the top edge. (The little pinch pleat was a last-ditch pitch though I knew she wouldn't choose it.) She chose wrapped, yay!
 The pleat can be stabbed through the sides- and although I like how discreet this tack is (you can't even see it, can you?), it is really hard to do by hand. Of course if the pleat is tacked by machine, this is easier, but not as nice looking. But when tacking by hand, the layers of fabric, lining, and buckram make a stab tack almost impossible.
 The pleats can have zero visible stitching, too, by tacking the folds across the top; but I like this the least, because I feel it doesn't control the fall of the fabric as well as the other methods.
 Regardless of which method, it's important to catch the fabric at the top and back of the pleat to hold the folds securely in place. Usually this step is done in conjunction with the hand tacking, but it adds up to a lot of time that my aching hands spend fiddling with controlling the folds.
So I had a brilliant idea- why not do that step by machine? It would save my hands, and also make the pleat much more secure.
So I did! Easier AND better = Winning! (Another example of my "best of both worlds" fabrication philosophy.) And I bet I am not the first person to have thought of this!!
I flattened out the pleat, making sure it was centered, then ran the tacker for one cycle.
 There- that took a second or two, whereas doing that by hand would take a minute or two.
 I formed the pleat and held the folds together with Wonder Clips.
 With the folds secure, it was much easier to make pretty, even stitches.
 On the back there is this little stitch from the machine. On the front, nothing, because it's hidden!
 I'm happy- but more importantly so are my hands, with this easier AND better pleat! :)


So I had a brilliant idea- why not do that step by machine? It would save my hands, and also make the pleat much more secure.
So I did! Easier AND better = Winning! (Another example of my "best of both worlds" fabrication philosophy.) And I bet I am not the first person to have thought of this!!
I flattened out the pleat, making sure it was centered, then ran the tacker for one cycle.


Monday, April 1, 2019
All the Best, part 3
Making such a simple valance look sleek and sophisticated is not as effortless as it would seem.
 The two previous posts showed how much effort went into hand-sewing the trim, assembling the layers by hand, and preparing for board-mounting. Scroll down to read Part 1 and Part 2.
Where the valance is pleated, there is additional bulk. This results in an uneven top line unless additional steps are taken to even it out.
The first step was to sew mitered corners at the ends to get as little bulk as possible underneath the pleats.
 The seam was trimmed closely and pressed open.
 The bottom edge was nice and heavy due to the trim, but thin ribs helped keep it from waving.

Between the pleats, the fabric is raised up to the height of the pleats with the addition of layers of tacking strip. Sometimes we use rolled fabric, but in this case that looked to soft; the wool needed a sharper edge.
 Two of the valances were extra-wide, so we hinged the boards for easier handling and transportation. Yeah, we use a literal hinge.
 The top is finished so the hinge barely shows.


 The sitting room had two right-angle corners. We made two individual valances for these. Corners require careful measuring- as you can see, the individual valances do not come all the way to the corner- a deduction in the board width is made, equal to the return size of the perpendicular board.
 We were not sure if we needed a gusset in the corners of the sitting room, but I made some and brought them to the installation.
 Once the corner valances were hung, it was obvious that the gussets weren't necessary.
 Finally, Susan echoed the blue tones in the adjacent kitchen space, with a playful geometric pattern and button grosgrain trim, in the same treatment style.


Where the valance is pleated, there is additional bulk. This results in an uneven top line unless additional steps are taken to even it out.
The first step was to sew mitered corners at the ends to get as little bulk as possible underneath the pleats.


Between the pleats, the fabric is raised up to the height of the pleats with the addition of layers of tacking strip. Sometimes we use rolled fabric, but in this case that looked to soft; the wool needed a sharper edge.


Subscribe to:
Posts (Atom)