THE BLOG IS HAVING TROUBLE WITH COMMENTS! SOMETIMES THEY DON’T GET PUBLISHED, AND WHEN THEY ARE I AM UNABLE TO REPLY TO THEM. IF THAT HAPPENS, JUST EMAIL ME AT stitchlore@gmail.com.

Looking for something specific? Check out the Topic Index, or the Search bar, just below, on the left.


Sorry about this problem!

SO.........WHAT ARE WE WORKING ON TODAY??

Monday, June 27, 2016

Hybrid shades

These are the widest I've ever made this hybrid shade, a cross between a London and a relaxed shade..  London shades droop too much in the center to be used on wide windows, but with the addition of a lift line in the center section, the long point is controlled.
If this style had a center pleat, it would simply be a balloon shade with tails, or a double London shade.  
This woven upholstery weight fabric is French blackout lined.
The railroaded fabric is pattern-matched at the pleats.  With a 14" repeat,  that is a LOT of fabric in each pleat.
These shades are quite heavy, but stationary.  Their success lies in the beautiful dressing at the installation.


Friday, June 24, 2016

The Lazy-S Valance

For a variety of reasons, our workroom is most often associated with shades.  What many people don't know, however, is that we also do a brisk production of valances which are rarely seen here on the blog. 
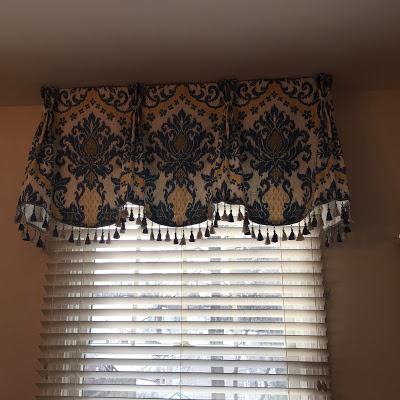
Sheffield, Queen Anne, scalloped kick pleat- they are all the same basic shape.


I call these the "Lazy-S" valances, because they mostly begin with a serpentine bottom shape like this.
These valances are reduced to five steps: draft, cut, mark, make, and mount.  Whether it's a one-off or multiples of the same valance, my procedure and tools are the same.
Meticulous preparation allows us to feed valances like these through the workroom quickly, efficiently, and accurately.
First, the valances are broken down into numbers.  Sometimes I'll make a sketch to scale, like these I did recently to help a client narrow down shape, size, and proportion.
On a large roll of graph paper I draft the pattern; in the case of 10 identical valances I made a full pattern, flipping the first scallop and horn to repeat.  More often, I choose from scallop and horn patterns which I have made in every size and join them together.
 The notcher is my most indispensable tool for efficient marking:
The pattern is weighted down and since these valances were railroaded I could layer the face and lining and cut them both at once.  I got two out of the width, and I cut and sewed the first two to test the fabrics and trim, before cutting the remaining 8.  These valances are white fabric with white lining, sorry it's not more visually appealing in the photos!
Then I rolled out 8 layers of fabric and lining to stack-cut the remaining valances with my electric rotary cutter.
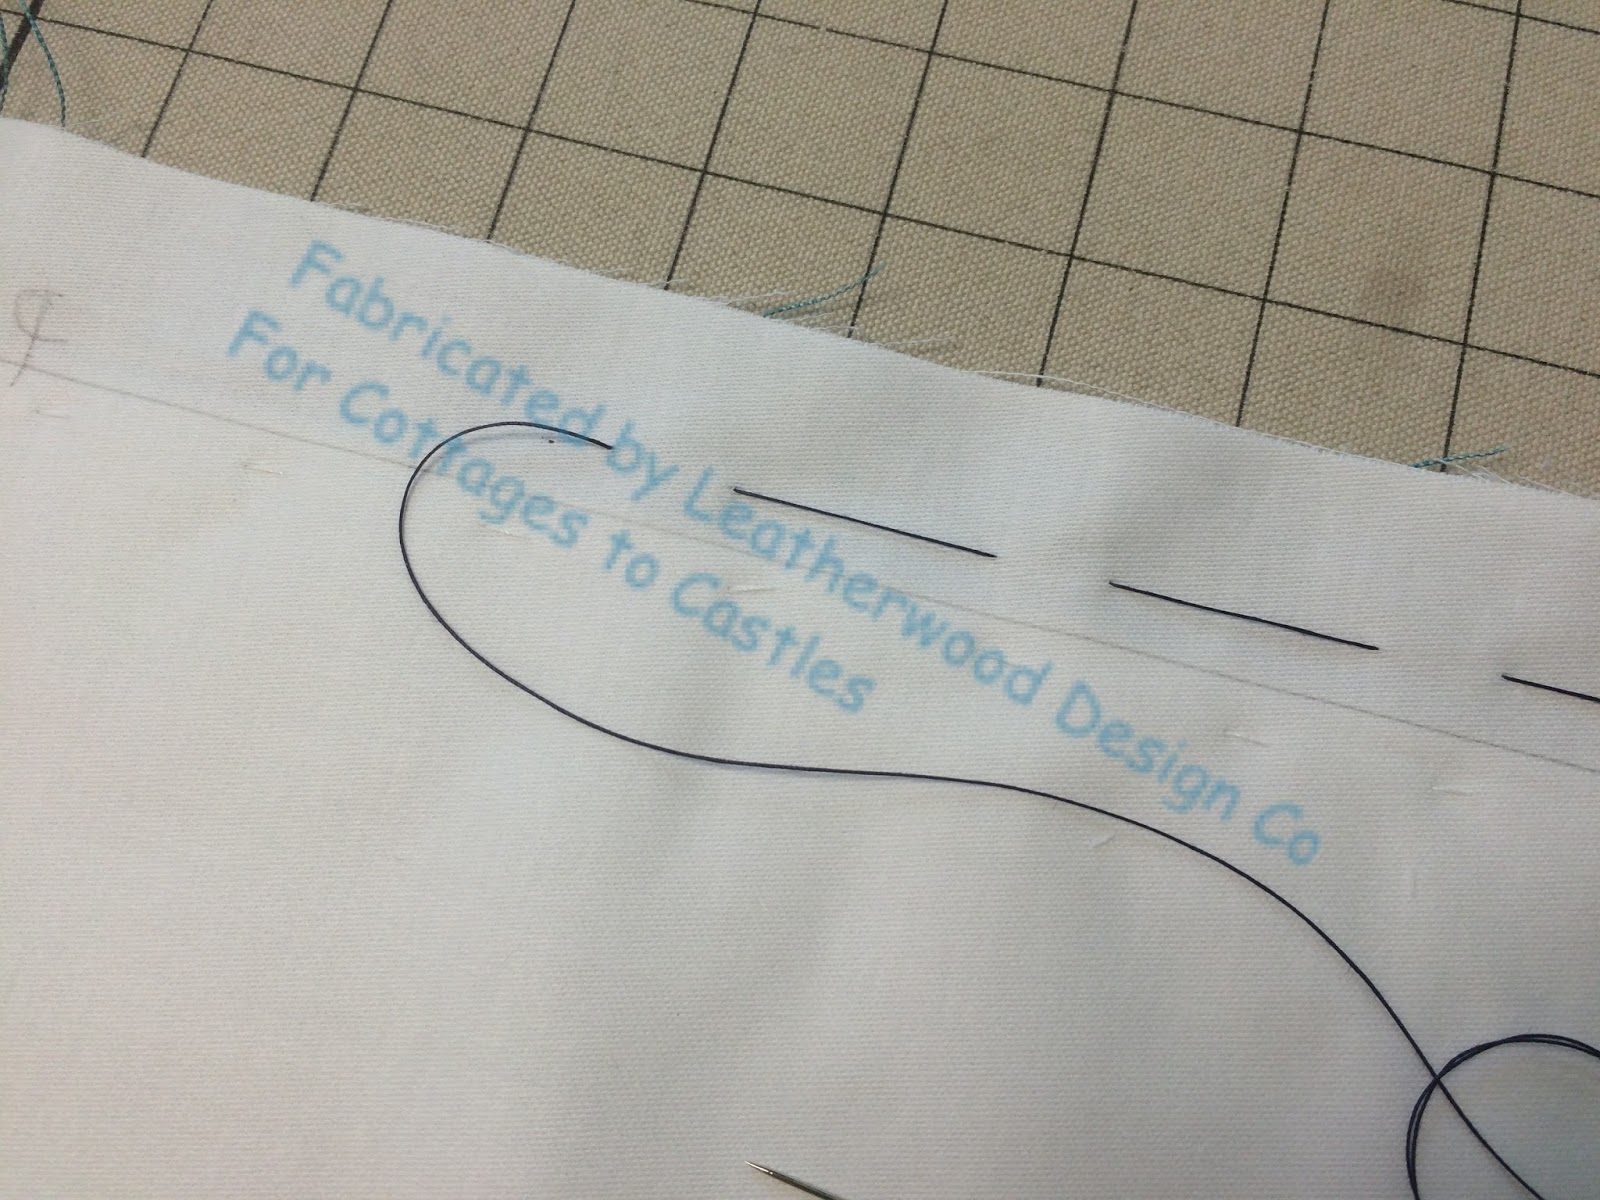
The notches are transferred to the fabric at the bottom.  This allows me to sew efficiently, with a minimum of pinning.  These valances had lip cord at the bottom; I applied it first to the face then used the notches to align the layers as I sewed the lining.
Most importantly, before moving the valances off the table, I carefully mark the tops with black Sharpie pen.   I've standardized a system of marking for myself which allow me to staple the valances to the boards quickly and accurately after they're sewn and pressed. The permanent ink ensures that the marks will still be there when I'm ready to mount, sometimes days or a week later. 
A length of fabric is cut and sliced with a rotary cutter for the dustboard covers.  I always cut the dustboard covers when I'm cutting valances and shades!
And there you have it!  With careful preparation, the sewing is the least of the effort. 

Wednesday, June 22, 2016

Grosgrain and French blackout

Four rows of grosgrain ribbon: this is why I got a Dofix!  Well, one of many reasons.  But grosgrain ribbon application was near the top of my reason list. 
With the many widths to choose from, the tape fit from edge to edge.   We marked the finished width with blue tape and then applied the ribbon, so we knew the lines were symmetrical without any fussing.

French blackout lining adds such substance to a roman shade.  I love how it's thick yet sleek. Although adhesive tape plays important roles in the workroom, when it comes to shades with interlining or French blackout, we always hand-sew side hems.  The bottom hem is reinforced with fusible buckram to encourage a straight bottom line.  A weight bar tube is hidden in the hem.  This is the essence of the Leatherwood shade method.
The fat folds make me smile :)
We left the shades hanging in the workroom for a day to let the folds train.  
Afterwards, these beautiful shades went to their forever home.

Tuesday, June 21, 2016

Some recent projects

I have been so remiss lately, totally forgetting to document our daily fabrication adventures!  Partly because we're busy, and partly because I some projects can't be photographed, and partly because I just forget.
So here are some post-installation photos of some recent projects.

Denise Wenacur turned this window seat into a colorful and tasteful space that a young girl can grow into.  Is glazed cotton making a resurgence?  Both of these prints were somewhat glazed, especially the cushion fabric.  It was a delight to sew, and the geometric design made it super easy to match the pattern on the boxing to the main body.
I opted to alternate motifs on the valance.  The valance is 18" long, and to have the sections all literally match just seemed too much.
In the guest room, I got to reprise the hybrid soft cornice with kick pleats that I had so much fun making earlier in the year.  You can't tell from the photo, but the light color diamond pattern is a fairly heavy chenille, so there was a bit of a challenge keeping the bulk off of the board at the ends. 
Here is the same style we made back in March.  I posted a how-to at the time, here.  We made these new ones the same way, on buckram with interlining, minus the trim and lip cord.
The room is not quite finished, but the window treatments will be an important component.
Let's see, what else?  For Suzie of Cottages to Castles: blackout draperies, 4 widths each side, out of a horizontal striped faux silk?  I did have help fabricating these- that's quite a handful of fabric!  We used double-wide "Silky" blackout so there would be no seams with light leakage.  These curtains are installed on a motorized rod.
And how about this room for D. S. Interiors, full of inverted pleat, mock wave curtains?  Every single space had a slightly different finished length, so we pattern matched from the top down, using 4" fusible transparent Dofix buckram.  What a breeze that product made the project!  The tucks were pleated to pattern so the geometric motif is the same on every "wave."  The bottom hems were barely 1" so there would be a minimum of embroidery showing through the double fold.  White chain weight helps the fabric stay put.  The measurements were so unequal, sometimes even on one single window, so we mostly split the difference to keep the bottom line of the curtain as much the same as possible.
Well, that's all for today, folks!  More next time........

Wednesday, June 15, 2016

Another bit on basting

This was a single pillow project for Cottages to Castles; a gift from Suzie to the homeowner.  The mission was to center this beautiful embroidered elephant piece in a field of velvet.

It was up to me to decide: I could applique it onto the velvet, or add mitered borders.
Because the edges of the piece were uneven, and cut so close to the embroidery, I thought I'd do a better job if I turned under the least tiny bit I could, then applique it.
Also, I didn't like how I thought the nap would behave if I tried sewing the velvet on the diagonal.
To stabilize the piece on the velvet, I considered fusibles, sticky tape, and pins, but hand-basting won out.  I started basting as a quilter bastes a large quilt: in an X shape, from the center out to the corners.
After basting around the perimeter, I stabilized the vertical edges further with this stitch shown below, which I know has a name that I cannot remember- I wanted those horizontal stitches to fight against the tendency of the fabric to slip along the velvet nap.
All that basting kept the elephant perfectly in place.  I used the tip of my snippy scissors to help ease in while sewing.

After applying self-welt I decided to have a go at sewing front to back with just pins.  I wasn't sure if I'd need to baste the seams, too.  It took more pins than usual (well, usually I don't use pins at all on pillows) but it sewed up just fine.
It took extra time and care, but, everyone was very happy with this big pillow!

Monday, June 13, 2016

Basting, and double mitered corners

You know I love to baste, right?  There is something so very BASIC about it.  Something so satisfying that pins, staples, or double-sided sticky tape can never offer.

The first challenge for these two valances, for Suzie of Cottages to Castles, was the double mitered corners, and the second challenge was the interlining.  The interlining is where the basting comes into the story.
First, the mitered corners.  Mitering does not happen in my comfort zone.  I have to travel far outside, venturing way up on the learning curve, to do mitering.
First I cut and mark the pieces, and lay them out so I won't get the right side and direction mixed up.
I'm sure there is a way to make a double mitered band all in one step, and that would be like magic to me.  I have to do it the baby way; it just takes a little longer.
Once the bands are on, all the seam allowances are trimmed and pressed.
After flipping the piece to right side up, I use blue tape to mark the eventual hemlines.  This is a technique I learned from Scot Robbins, to keep lines straight when the reference point is on the side you can't see.
Back on the wrong side, the interlining is laid out and trimmed to the exact front shape.  Anxious to keep the corner bulk to a minimum, I only want interlining in the face.  To help keep it in place, it's folded back and interlocked  vertically to the grey seam allowance.
Interlining is a technique I learned from Penny Bruce; it's internal, permanent basting. 
The interlining stops at the edge of the board, and to keep it there, it's basted to the lining just below the board line where it will never be visible because it'll be behind the board.
After pressing it back into place, the lining and face are basted together just above the board line.
Once the treatment is secured by stapling to the board, this basting line will be removed.
The entire hem is hand-sewn with the invisible ladder stitch.  The blue tape tells me that I've got exactly 2" of blue on the right side.
 
Ta-da!  Board-ready.

Tuesday, June 7, 2016

French Blackout shade with contrast banding

Every time I make a shade, I tweak my method a little bit.  I was concerned about making certain the contrast band on this shade to stays nice and crisp. 
I didn't take individual step-by-step photos of the basic construction, because there are plenty of those on the blog.  Instead, here you can see it deconstructed.
The fabrics were pretty stable, but this shade was French blackout lined, so it was bulky.  I doubled up the fusible buckram in the hem, and I fused the weight bar tube to it. 
When I turned up the hem, it was incredibly solid and secure.
I hand-sewed the hem before adding the bottom row of rings and inserting the weight bar.  Even though the weight bar tube is fused to the buckram, it's essential that the stitches for the rings go through the tube.  The stitching also must go all the way to the end of the hem, not stop at the ring.
The back looks amazing!
Oh, and the front does too :)