THE BLOG IS HAVING TROUBLE WITH COMMENTS! SOMETIMES THEY DON’T GET PUBLISHED, AND WHEN THEY ARE I AM UNABLE TO REPLY TO THEM. IF THAT HAPPENS, JUST EMAIL ME AT stitchlore@gmail.com.

Looking for something specific? Check out the Topic Index, or the Search bar, just below, on the left.


Sorry about this problem!

SO.........WHAT ARE WE WORKING ON TODAY??
Showing posts with label Bordeaux valance. Show all posts

Monday, December 5, 2016

More Bordeaux?

I love the M'Fay Bordeaux valance because of its understated swag and graceful jabot.  I also love its versatility: with three basic shapes you can cover spaces of different sizes and achieve a unified look in a room.
Not shown on the pattern cover, however, is the beautiful single swag.  Just in time for Thanksgiving, we made 5 of these.  For the interlined silk in the dining room, we've extended the width to 45" and shortened up the jabots.
A bit of the jabot's curvaceousness is lost by shortening it, but it's still really pretty, and the tassel trim enhances the silhouette.

And for the adjacent living room, the same style in a different fabric is extended out to 52" wide.
With at least 3 sections, however, it's possible to use the center dip swags flanked by the tapered side swags, separated by a 5-pleat tail. 
For even wider areas, there are further possible combinations.  These were designed to follow the arched window.
But my favorite version is still the double tapered swag with a center tail- my workroom sample!

Friday, May 8, 2015

The Big Pink Monster

I like to launch project stories with a dramatic "after" shot, but in this case, I don't have one.  I will someday, but I want to write about this project now.   I'm going to tell this story sort of backwards.
I was asked to fabricate a treatment for a 10' high space in a rather grand 19th century home.
The space was measured previously and the dustboard assembled, for a five-sided bay area.  The frame I was given  was pretty big- about 4' high when standing on end, and about 12' wide at the front.  My job was to make a Kingston valance out of rose-colored velvet with jabots, self-decking on the back, and tassel trim sewn IN.
 I started making a bunch of sketches, because the biggest design issue was what to do with the outermost sides which were only 13" wide.  With half a horn in the corner and a full horn and jabot on the end, the remaining 6" would leave room for only a tiny, weird swag.
I thought it would be better to put a half swag on that short outer leg, and eliminate the usual horn, letting a jabot finish the end.  The designer asked for a jabot that could have some pleating on the return edge since that would be facing out into the hallway.  I suggested the beautiful Bordeaux jabot- my FAVORITE jabot!
I had thought a leg might be necessary to support the half-swag, but after the pleats were tacked by hand, the vertical edge stayed plumb.
Have you ever cut a dark velvet on a fabric-topped table?  Last time I did that it was red velvet and it was a year ago and there are still red fibers in the fabric table cover.  This time, I used a rotary cutter on a plastic-topped gridded table.  That kept the lint to a minimum and away from the fabric table!  I used an M'Fay Kingston pattern, lengthening it for a 22" long point.  And I was able to stack-cut, keeping the stress on my hands to a minimum.
The designer wanted only the tassels to show, not the trim's tape.  I really fretted over sewing the trim INTO the seam with velvet on both sides.  I considered basting it on by hand but then I tried glue-basting, not expecting it to work- surprise, what a breeze that was!  The glue bonded almost immediately.  I glue-basted both layers with the trim in between, then took it to the machine, where it sewed up smoothly and did not walk or pucker at all.
Time to staple the valance, and I was so grateful it was a Kingston and not an Empire.  With a Kingston, all the hard work is done before stapling: joining the pieces, turning, securing the folds and forming the horns- when the valance is large and heavy, it's an arduous process, but then it's relatively easy to staple.  With an Empire, the sewing is pretty simple, then all the hard work goes into stapling.  I covered the boards and marked them, then worked my way around, moving the valance as I went to get the area I was working on into the open space so it could hang freely.
The installer worked his way around the valances, dressing swags as he went.  It was a big success!
I was reminded of a sweet Kingston valance I made about 5 years ago- out of a rose-colored taffeta- which I loved then and still do.


Wednesday, February 25, 2015

I'll have the Bordeaux

M'Fay's Bordeaux valance has always been one of my fave top treatment looks.  So when I was asked by Christopher Matson to create a valance with a super-minimal one-pleat swag, and some sort of tapering tails, I suddenly realized that a Bordeaux variation would fit the bill.
I quickly sketched my variation and immediately got the designer's approval.  (OK I'd like to know how many of you prefer a pencil and paper over a computer design program!)

Then I quickly determined proportions using my sophisticated rendering software (haha) on a photo of the window.
Besides altering the size of the pattern, I made a few modifications- I gave the swag a graceful dip, and the jabots a bit more of an angle.

By the way, the Bordeaux is the only top treatment I have on display in the workroom.  That's how much this valance is my favorite!

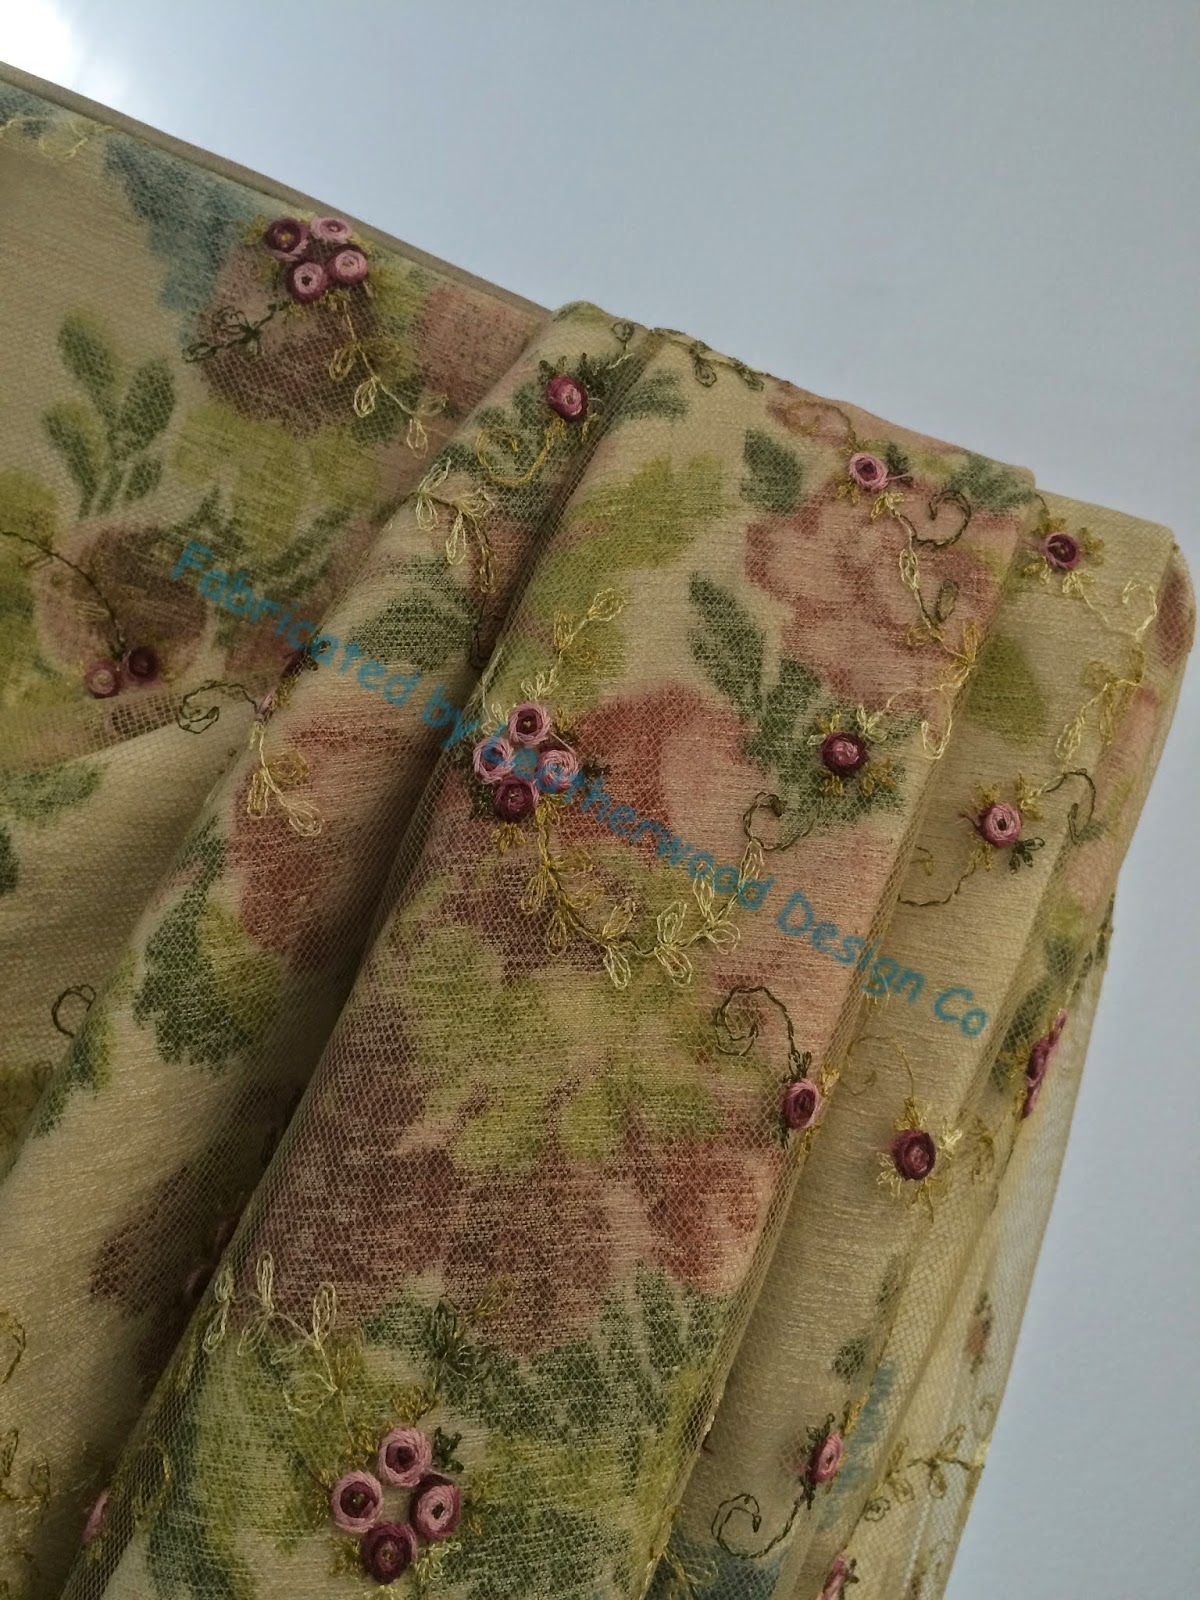
Anyhow.  These 3 valances were to be made from an print underlayer with an embroidered tulle overlay:
The first challenge was to get the pattern balanced on the pieces.  Luckily this wonderful fabric has a true mirror image print, although staggered halfway down.  That made it possible to have the same motif- flower, ribbon- on both left and right jabots.  It took a lot of laying out, tracing, and taping to get the cutting plan in place.
I started by taping out all the jabots, to make sure they could all be cut from the available yardage.
Red, blue, and green ink tracing the ribbon motif in order to determine how to make the left and right jabots the same. 
Ready to start cutting!
Once the pieces were cut, the tulle was laid over it for cutting.
It was basted around all sides: the top and curve were basted by hand, and the sides with fusible webbing.  The basting kept the layers together for sewing on the microcord, and also served as staystitching.
I lined the jabots part way up with the same tulle-covered print.


Not shown: I piped the jabot with 1/16" microcord made from a muted dupioni silk which I bulked up with fusible fabric stabilizer.  I had intended to sew the crystal bead trim by hand, but it wasn't turning out well, so I did end up using Sealah tape, and reinforcing it with stitching.
I used colored pins to mark the complex fold lines so I wouldn't get them mixed up, and secured the folds with a tag gun. 
I love how the microcord gives a neat finish to the back side of the jabots.
At the top, I applied a slightly larger microcord, about 3/16", and I liked it going under the jabots, not all the way across the whole board.  I love how the jabots pour over the edge.  The microcords were a time-consuming detail that probably no one will ever notice, but they make all the difference.

Finished!  I'm happy- off to installation!  Once the valances were up, installer Mario meticulously dressed the folds with a tag gun for training, and the next time we're there, we'll clip them out.


Thursday, January 14, 2010

Picture of brain thinking


How do you show a picture of a brain thinking?
This has been a "breather" day- busy thinking and calculating and cutting new work.
Naturally this has not gone so well- the gorgeous job we're about to start had a few changes which means we're just a little short on fabric and trim. There's more trim available, but the fabric is nearly gone.
(I know, I know)
The search is on for more- that's not my department- but at the same time I'm busy here trying to determine the alternatives in case more is not available.
This takes a lot of brain work! I took a picture of my notes on the job. It's 2 hobbled shades, and 2 pair drapery with bullion fringe in the lead edges and hemlines. I've figured both out several ways, depending on how much (if any) extra yardage the decorator can find. I'm just waiting for that phone call.
Why scribbles on plain paper???
I'm too old to do things differently- I learned to figure with a pencil, paper, brain, and calculator- work order forms just don't work for me, though I've tried. I always come back to scribbling by hand and calculating by brain with a little help from the same calculator I've had for 20 years.
You gotta enjoy numbers and manipulating them to enjoy this job.
And that's what we're working on today.
So since I can't take a photo of my brain thinking, I've put up a very very old picture of one of my favorite window treatments ever. It's so old that the picture was taken with (GASP!) FILM. The photo was scanned into, like, 3 computers ago, and keeps getting transferred with each new computer. It's a bad photo- grainy- but the treatment is SO lovely!
The Bordeaux valance (pattern from M'Fay) is one of my all-time favorites. It can be modified in a million ways to meet all kinds of window treatment challenges.