THE BLOG IS HAVING TROUBLE WITH COMMENTS! SOMETIMES THEY DON’T GET PUBLISHED, AND WHEN THEY ARE I AM UNABLE TO REPLY TO THEM. IF THAT HAPPENS, JUST EMAIL ME AT stitchlore@gmail.com.

Looking for something specific? Check out the Topic Index, or the Search bar, just below, on the left.


Sorry about this problem!

SO.........WHAT ARE WE WORKING ON TODAY??

Tuesday, May 31, 2011

A Keepsake

A valued client of a valued client of mine had a scrap of embroidered linen and velvet, leftover from this campaign bed hanging we made for her last year.

All she asked us to do was to serge it so the raggedy edges wouldn't unravel, but I wanted to do better than that. 

A scrap of heavy linen, very similar to the velvet's base linen, just the right size, became the backing.  By folding it over to the right side, it also became a binding.  (I love binding!)


My valued client wanted the tag left on.  No problem.


We left the selvedge intact.
Now she has her scrap, beautifully finished in a style that is both rustic and elegant, appropriate to the fabric and her vision of it.

Friday, May 27, 2011

Queen Anne Valance, and a lesson in facings

A Queen Anne valance is just a scalloped, pinch-pleated valance.   As with all patterned pleated treatments, the beauty lies in good pattern placement.  With this fabric for this valance, the pleating creates a whole new interplay of pattern.

The sections are cut individually and joined.

The contrast lining, face, and interlining are layered and cut.


This is a long post, so click on "read more" to read the rest:

Wednesday, May 25, 2011

Stan and Crash show off

Wonderful new fabrics are constantly appearing here, which gives me reason to live.

This eyelet I assume is laser-cut.

The bottom hem is double-folded to pattern so you can see through it.

For sheer shades, I cover the weight bar in tubing before inserting it into the pocket.  (Where white or natural is not appropriate, I make a tube out of the face fabric.)

I chose cord loop shroud for this shade.

From the front, the squiggly cord is not noticeable.

Unless you put your eye right up to the fabric.

Workroom Valets have feelings, too, and ours even have names.  They are Stan and Crash, and here they are, showing off.

Monday, May 23, 2011

Our first experiences with Safe-T-Shade

Developed in response to the new shade safety standards, Safe-T-Shades are completely cordless.  From the front, they look exactly like any other fabric shade, whether flat roman, relaxed, London, balloon, whatever. 

They are actually two shades in one: the front fabric shade, and in the back, a spring roller shade.  When the roller shade is raised or lowered, it winds around its roller, and the fabric shade in front comes along for the ride, folding up independently, looking just like any other fabric shade from the front.

Here is a view into the space between the two shades, and you can see the J-hooks and battens that loosely join the two layers. 

The workroom makes and attaches a pull tab out of the face fabric which is completely hidden behind the shade.

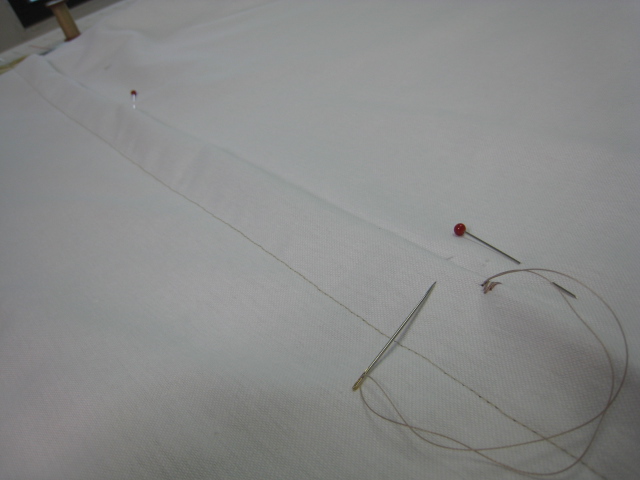
The shade is fabricated similarly to any shade, with a couple of exceptions.  Here, the side and bottom hems have been sewn, the pocket fold line is marked for stitching, and the rings are attached.  All the sewing was done by hand.


One important difference is that for the outermost rows, J-hooks are sewn on instead of rings.   The rows generally are 10" apart, which is somewhat greater spacing than traditionally fabricated roman shades.

It helps to sew the rings on sideways so they don't twist when the battens are inserted.  The weight bar pocket is sewn as usual, but instead of a 3/8" steel rod we used a 1" wooden slat. 

Our client wanted one permanent fold at the bottom; here you can sort of see that we used that pleat as the place to sew the weight bar pocket, and sewed the ring through the pocket and the face.

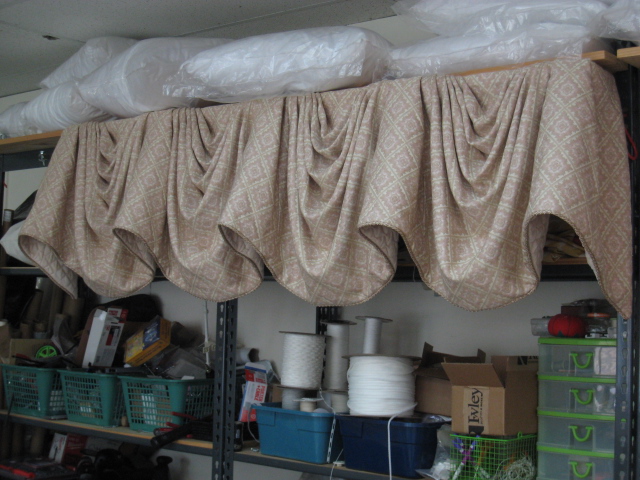
Here is the Roman shade, all the sewing completed, and the battens in place. 

There was an awkward moment when the pull tab was sewn on to the roller shade fabric.  It wasn't easy getting it under the machine.   It's important to not let the stitching interfere with the pockets that are already there for the bottom rods, because they're quite snug already.  In the future I'll make the pull 1" longer so I can sew it above the top line, rather than along the middle line where there is a chance my stitching might sneak into the pocket area. 

Because of the extra permanent fold, the roller shade started 8" up from the bottom instead of the 5" or so that would be more usual.  So our pull tab was 8".  We didn't have enough scraps to make it entirely of the face fabric, so we made it out of lining and added the face fabric to the bottom.  The kit comes with a little weight bar to tuck into the pull tab.

Once the shade is stapled to the board, the roller shade is pulled down to the lowest batten, and probably will need re-tensioning at that point.  Once it is taut enough, the bottom is secured with the acrylic bars, the sides of the roller shade fabric are tucked in to the J-hooks, and the whole thing is done.

Safe-T-Shade offers kits for the workroom to cut to size and assemble, or a made-to-order headrail already assembled to the workroom specifications.  We ordered them pre-assembled.  It comes mounted on a covered board; included are the battens, J-hooks, and pull tab weight insert.

I love the fact that this option is entirely cordless.  It is easy to operate.  They were not terribly complicated to make, and the cost is in the ballpark with other lift systems.

I think it's a great solution for small and easily accessible windows in homes with young kids.  And guess what, I have a new order for two!

Saturday, May 21, 2011

A little more on the showhouse-

The showhouse has been in full swing for a week now, and getting a lot of attention.


 Visitors to the guest bedroom by Susan Marocco Interiors  love the draperies and the horizontal stripe silk bedskirt that we created. 


Gala night.... Susan Marocco, her husband Joel Goren, me, and Heidi Holzer who created the marvelous wall and ceiling decorative paint treatments.

For more on the showhouse, click on "showhouse" in the topic list to the left.

Friday, May 20, 2011

Arched Flat Roman Shade

How do you like our arched window treatment?  Really, that IS an arched flat Roman shade!  It's a shame that you can't see the arch; the installer said it fit perfectly. 


The homeowner does not like her arch.  She wanted to hide it.  The only proof I have that we made an arched Roman shade is the workroom photos.   That's John, holding the shade and waving to me.


Here he is, trying to suck in his gut for this picture.  As if.  He's a skinny rail these days.  The workroom is a real mess, though, isn't it?  Trash can overflowing, chairs up on the work table, must have been a busy day.  Ha.


This is a ribbed flat Roman.  The frame is made entirely from FirmaFlex.  

The Rollease clutch is set in enough that brackets can be used on the sides of the window molding.  You can see that we used mesh tube shroud for this shade.


I forgot to take a picture of the front of the frame, before stapling the shade on.  Here I've tried to pull the fabric back and get a shot of the inside of the front.  It's made to be open, so the installer can get his drill in there and put in a couple of screws up into the top of the window. 


The Empire valance is soft and sweet, made from an upholstery fabric with the shade matelasse as the lining.


Lip cord defines the edge.  I forgot to take a close-up of the draperies, which are made from the same face fabric plus the lip cord plus brush fringe.


Did I mention this is for a newborn baby girl's room?  A nice room to wake up in!

 Sweet dreams, baby!

Wednesday, May 18, 2011


The tape dispenser ran out of masking tape.  My friend Josh likes to be helpful, so he filled it for me.


Hey, that's not masking tape!!  That's the trim for his shade order!