THE BLOG IS HAVING TROUBLE WITH COMMENTS! SOMETIMES THEY DON’T GET PUBLISHED, AND WHEN THEY ARE I AM UNABLE TO REPLY TO THEM. IF THAT HAPPENS, JUST EMAIL ME AT stitchlore@gmail.com.

Looking for something specific? Check out the Topic Index, or the Search bar, just below, on the left.


Sorry about this problem!

SO.........WHAT ARE WE WORKING ON TODAY??

Friday, December 30, 2011

Fab Fabric Friday

It's been awhile since I made a dedicated effort to keep up with Fab Fabric Friday, but today I have a fab fabric in the house that I think will inspire me to reinstate the tradition.  It is Friday, isn't it?  I kind of lose track of the days during this week between holidays.

This fabric is "Richter" by Studio Bon Textiles.  Check out the website if you love contemporary prints.

Destined in this case to become Roman shades, this fabric is hand-printed and has lively visual movement.

One shade is wider than the width of fabric.  I mistrust my ability to join widths perfectly on a tricky print like this, so I'm glue-basting the seam before sewing.

The Studio Bon website shows five colorways but I think this red is the best. 

That red dye is beautifully printed on a very good linen-cotton, and the quality of both materials and process clearly shows.
And here's something you don't see very often: repeat information printed on the selvedge.

Tuesday, December 20, 2011

Bustle Swags, Point to Point Swags, or Drapery Swags

Occasionally I've referred to the book "Anatomy of a Swag" by Ann Johnson, and I think I did so most recently when showing you the Turban Swags we made out of a gold stretchy jersey-like fabric, but I must mention the book again because I've had two orders for the swags known variously as bustle swags, drapery swags, or point to point swags.

For the very first swags I ever made, I used the excellent patterns by M'Fay, for board, pole, and bustle swags.  Eventually I realized I needed to learn how swag patterns were drafted because I had more complex situations where ready-made patterns did not fit, such as these silk stripe swags that had to finish a specific width and length that was not available in a pattern. 


At the time, I could not afford the fancy template system that I coveted, so I purchased Ann's book, which had come out just in the nick of time for me!- and studied, studied, studied.  Now I can draft patterns in no time, to fit any circumstance.  Here you can see the muslin mockup I made for eight striped silk swags.

Something that makes my heart go pitter-patter is nice finishing.  For the interlined silk I bound the pleats in the rose.  

For this black and gold damask, I cut identical binding strips centering part of the medallion motif.   I doubt that anyone but me will ever realize they are all carefully bound, identically, but I can always look back at this picture and smile.

Wednesday, December 14, 2011

Multiples

Workrooms have some ambivalence about fabricating multiples of a product.  While multiples do afford the opportunity to streamline production, the boredom factor sometimes outweighs the convenience.  Folks, it's not all thrills in the workroom, every day.  Here we had 4 identical shades to make, and now they're ready to string.  These had been stack cut then fabricated one at a time.  The little striped guy we snuck in with the 4 toile shades and it was like a magic trick, done with no apparent extra effort. 


Once all the shades were on the boards, the strings were all run, stacking the next shade on top of the previous one.  With all the boards face up, first all the screw eyes were installed, then the Rollease clutches, and the cords were clipped on at the top and secured with orbs at the bottom.

Then it was just a matter of hanging each one on the Workroom Valet for leveling.

Ready to be packed up!
I think 4 of something is the perfect number to make at one time, with a bonus one-off snuck in.  It's one of the ways we workroom folk trick our minds to battle the tedium.  

This fabric behaves perfectly for shades.  One time up, down, and back up, and the folds were trained.  Nothing makes a shade look good more than an appropriate fabric choice.

Sunday, December 11, 2011

Trimming selvedges

Why we trim selvedges off of fabric before sewing: this is how a super-fine silk behaves if you try to iron it with the selvedges on- it twists and grimaces and buckles and won't lay flat for anything.

Trim off the selvedges....

And like magic it irons flat.

Thursday, December 8, 2011

Ladder shroud and blackout lining

A number of cord shroud techniques for shades have been available for nearly a year now, and we use whichever one is most appropriate for the fabric and shade style.   
Ladder shroud is very useful with blackout lined shades because it's possible to apply little blackout "bandaids" to very effectively block light that wants to peek through the holes left from the needle where the rings are sewn.

  I have discovered that the "bandaids" are applied most easily with a hot glue gun.  They're cut about 1/4" wide by about 1" long.   They don't get in the way of the cord as the shade is raised.

Friday, December 2, 2011

Fab Fabric Friday, and Keeping it Simple

My friend Josh is a master at knowing how to showcase a brilliant fabric, like this Schumacher embroidered sheer linen, shown here with a dark backdrop.

The normal instinct would be to run the wide striped motif vertically......

but the client wanted a horizontal stripe.  Josh chose flat valances, his restrained taste bringing out the best in this lovely fabric by keeping it simple.

We railroaded the fabric, cutting the bottom along the scallop, and using a portion of the embroidery at the top for balance and finishing.

The back of the scallop is finished with a sheer binding rolled to the back as a skinny facing.

The bias strip was sewn to the face fabric before the scallop shape was cut:

Then trimmed, and the curves clipped:

The strip was pressed down....

Then to the back, rolled, and pinned.....

Finally, machine topstitched.

  I thought it would have needed to be hand-sewn, but actually the topstitching was unobtrusive, added the illusion of a little bulk, and turned the facing into a design element.

Tuesday, November 29, 2011

Drapery over Top Treatment

I am really liking this recent trend of layering drapery panels over top treatments, a reversal of what we are accustomed to seeing.  This is the third or fourth recent project with this layering arrangement.
The inverted pleat panels are finished with a mitered tacking strip so it will fit easily and with as little bulk as possible.   

To make installation as easy as possible for the installer, we prepare the boards ahead of time.  Here the valance underlayer is stapled and the board covered.  The inverted pleat panels will be stapled on-site.   The industrial strength velcro will hold the bishop-sleeve overlayer.   There is a little screw eye near the back of the board with coiled string that matches the lining of the bishop-sleeve: the string loops through the screw eye and will run down the back of the bishop-sleeve to the tassel tie-back to hold it in place.

Tuesday, November 22, 2011

Curved Wall

I had it pretty easy with this curved kick pleated valance: the installer measured, made the template, and cut and covered and hinged the boards ahead of time.

I really wish I had the glam shot for this but I never had a chance to see it after installation.

In all it was about 16' of valance- one side was a curved eat-in area and the other 8' extended straight across a sliding door.  The decorator called to tell me that it was gorgeous, made my day!

Friday, November 18, 2011

Turban Swags

If you want to learn how to draft your own swag patterns and troubleshoot to fine-tune your swag, you can't do better than to consult these two books by Ann Johnson.   These books are regular lunch-time reading for me.

I pored over them when I had a recent order for two Turban swag valances, and learned that a Turban swag is not simply a swag with one side made wider to wrap around the board; rather, it is a hybrid: the top-mounted side is a regular swag, and the return-mounted side is a boxed swag.  Two patterns must be drafted and joined.
Both of the valances for my order were quite wide, and were to have only two swags each.  That meant that the top-mounted half was actually the equivalent of half of a 100" swag!     
In this case, the top is pleated, and the return sides are scrunched.   We had to do a good bit of improvising because of the nature of the slinky, stretchy, satin fabric- more on that below.
This is not the glam shot- in fact the swags are barely dressed- but you get the idea.


I followed the instructions for dropping plumb lines from the board to determine the line where the regular swag and the boxed swag meet; and I draped chain weight to get the exact finished measurements and the specified short point at the overlap in the center. 

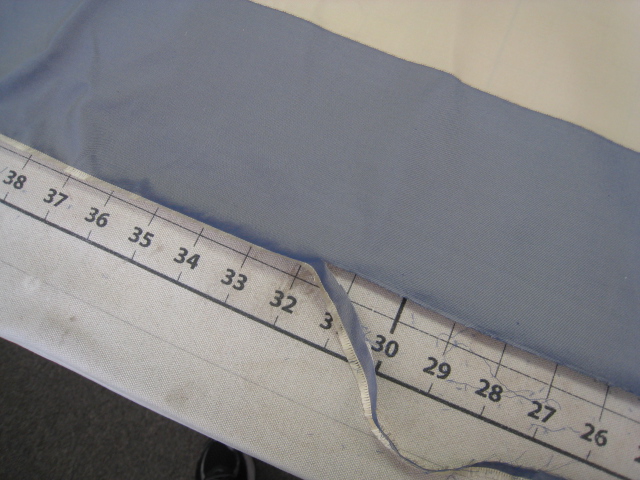
I made my pattern and when I stapled it onto the board, it fit just the way I wanted it to except that I found I needed to trim a little off the bottom curve.  I just used a Sharpie pen to draw the bottom curve where I wanted it, then trimmed off the excess.

The fabric was a slinky, stretchy satin- and it was interlined.  Here it is, again, not quite dressed!
It was an extremely difficult swag to drape, in the end; although the mock-up draped just the way I planned, the actual swag was so heavy and stretchy that I had to modify it to make it fit the specifications.  Pleats on the returns absolutely would not hold their shape so we turned them into scrunched/gathered returns. 
Luckily the installer is very talented and was able to dress the swags perfectly once the valances were hung.  The decorator and the homeowner were delighted, and I was relieved when they called to tell me so.  

Wednesday, November 16, 2011

Outdoor decorating to make Ralph Lauren drool!

The prettiest farm in the world, to me, is Kitchwan Farm in Ossining, owned by my friend Linsay and her family.   The farm feels like a big outdoor living space and is treated like a canvas. 

On a recent golden November afternoon, Linsay arranged chairs and textiles around a fire pit, with a basket of marigolds ready for making leis.  Move over, Ralph and Martha!