THE BLOG IS HAVING TROUBLE WITH COMMENTS! SOMETIMES THEY DON’T GET PUBLISHED, AND WHEN THEY ARE I AM UNABLE TO REPLY TO THEM. IF THAT HAPPENS, JUST EMAIL ME AT stitchlore@gmail.com.

Looking for something specific? Check out the Topic Index, or the Search bar, just below, on the left.


Sorry about this problem!

SO.........WHAT ARE WE WORKING ON TODAY??

Friday, July 29, 2011

Gathered Swags and other stuff

There is a lot of work done here that we never get to see after it leaves the workroom.   I was dying to see the opera shade featured last week and was thrilled that the timing worked out and I was able to get to the installation.

As a bonus, I got to see on-site the many other projects we've done for this home over the past few years.  I wish my photo of these gathered swags and jabots looked as good as they do in reality in the master bedroom.

For some reason, I don't seem to have a workroom shot of these treatments.  Single swags covered the small windows flanking the bed.

I do have a workroom shot of these silk balloon shades- the detailing is discussed in this blog post from April 15, 2010- can't believe it was so long ago!

And now I have an after shot, too.   That's one fancy master bathroom!

A few years ago we made medallion swags for a different room, and this past winter the designer had us re-cut them for the narrow windows on the wall leading outdoors. 

Here is how it looked in the workrooom in this post on March 11....

And a few weeks later we made pillows out of the scraps.   I love this fabric and was happy that it wasn't wasted.

One of my favorite treatments is also the simplest: a totally flat panel, on a board, to showcase the amazing Jeanne d'Arc toile print on a fine cotton sheer.  It provides just enough privacy for a downstairs powder room facing the back garden.

Here's how it looked in the workroom, on March 9.

One of the coolest fabrics ever!.........

Saturday, July 23, 2011

Serendipity

If you want a job you can report to every morning, work a specified number of hours at a pre-determined activity that you are capable of doing but will not have to think much about, you will not be creating window treatments for a living.

Every minute of every working day, window treatment fabricators are thinking their way through one-of-a-kind projects.  Even when we make a style over and over again, the materials and math for a particular project makes that job unique.

If you love the unexpected twist, the happy coincidence, the lucky break; if the occasional surprising perfect marriage of the specific numbers with the specific fabric quickens your pulse; if your heart goes pitter-patter every time a raw material is transformed before your eye; if the mathematics of your project are as beautiful to you as the end product is to everyone else- then you will be rewarded every day in this line of work.

Which leads me to this valance that has been meandering through this post.
The cut length of the sections is 23", and the pattern repeat is 23.25"- right there you know you're on to something!  The horizontal repeat is offset so that when the scallops are cut to size, what is left is the perfect part of the pattern to allow the repeat to flow continuously across the scallop and the horn on its right.

This kind of fortuitous coincidence is to window treatment fabrication what a lunar eclipse is to astronomy.
Usually it is the alternate motif that is used for the horn.  

Some numbers, some fabric, a few snips and a few stitches, and- another Sheffield valance is born.  The fabric is a beautiful English print on a cotton-linen blend.

I'd like to see this one mounted on its board, but, we were asked to put it on a tacking strip instead.   It will be installed on-site. 

Friday, July 22, 2011

Night at the Opera


Another Opera Balloon Shade...... 142" wide!... with 5 poufs of varying widths.  The fabric is a semi-heavy silk & rayon blend.  It's lined with napped sateen, though the draperies are lined and interlined.


Can you believe- this is the fabric?  The gold is the right side; but, amazingly, the wrong side is that acid green.

Workroom shot:

This shade is functional, but it will never be fully lowered, so when it's down it's just flat.  It was really cool to see the green glowing through the part of the fabric that was over the open window where the sun came through.

As the shade was raised, the green disappeared....

When fully raised, only the gold is apparent.  

From this angle you get a hint of the green.  This shade operates with a 30# Rollease clutch.  If you make these, you might be interested to know that the weight bar is attached 5 rings up.

Here are two other opera shades we've shown previously: this one with a header and 5 poufs of equal size, in an upholstery weight fabric-

This one with 5 narrower sections, also in an upholstery weight fabric-

Wednesday, July 20, 2011

Menswear as window treatment

A few quizzical glances were cast at this fabric.......

Wool suiting?

It behaved wonderfully.....  

And made up into really beautiful hobbled shades. 

Tuesday, July 19, 2011

Pillows on TV!

Remember these pillows?

We made them in February, and- at last- they turned up on HGTV on the premiere episode of "Home by Novogratz" on Saturday night.

Courtney Novogratz discusses the makeover on the HGTV "Design Happens" blog.

These spectacular fabrics were custom printed and the pillows made up as each fabric arrived- involving late nights and couriers and rushed meetings at the train station- to get them made up in time for the shoot.


From HGTV's "Design Happens" blog post by Courtney Novogratz July 16, 2011


Monday, July 18, 2011

Coverlet

Infrequent posting is not a sign of inactivity- more a sign of a frenetic pace and inattention to photography. 
Last week we produced shades at the usual rate and neglected to take a single photo.
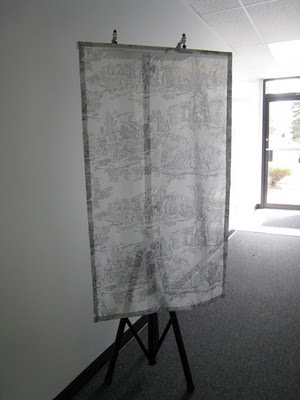
In addition we made this luscious silk coverlet.


The face is a silk damask, and it's interlined with silk batting, lined with a fine quilt-weight cotton sateen.

I was thrilled with the drape of the silk batting.  I wish the photo could capture that.


After the widths are joined and the components layered and pressed, the tacking is done.  I forgot to take a picture of the tiny X tacks.  The widely spaced tacks secured the layers with scarcely a dimple. 
Then everything is trimmed to size, shaped, and basted.  I love basting!  Yes, it could be pinned, but it's not the same.   Thread basting is so much better and doesn't take long. 


Once basted, the edges are bound with a 5/8" self bias binding.  First the strip is sewn to the perimeter right sides together.  Bias strips tend to stretch and thereby lose some width so it's important to cut them a little wider than you think you'll need.  For a 5/8" binding the strips are 3" wide.  The shrinkage can be uneven if there is a woven pattern. 

Then I like to press from the right side, pressing the main body of fabric as well as the binding outwards, then, working from the right side, fold evenly to the back, pinning as I go. 

Especially on the round corners, the bias binding folds itself over into a neat finish with very little coaxing.

Isn't that round corner lovely?  You make the curve by measuring in from the bottom and the side the amount of the drop, in this case 14", then draw the quarter-circle from that point. 

Then the fun part: stitching in the ditch.  This is done from the right side.  As you sew, you pull the face and the binding apart slightly and stitch carefully in the "ditch" and when you let go and do a final pressing, the stitches are barely visible on the front.  You can see them on the back, but that is why the back is the back.  I considered hand-sewing the binding, but as this coverlet is going to get a lot of tossing around, I wanted the security of machine stitching. 

To stitch in the ditch effectively, it's best (for me) to not think too much about what I'm doing.  If I concentrate too much on the stitching, I miss my mark.  Also don't go too fast, and try to remember to keep checking the back side, otherwise when you check your work at the end, you'll find missed spots like this!

A long time ago I learned a machine-quilting trick that I use for re-sewing a spot like this: take two stitches forward, then two back, then sew; end your sewing in the same way, two back then two forward; when finished, clip the thread on the right side right up next to the fabric, then on the wrong side pull the bobbin thread til the tiny tail of thread on the right side pops through to the back, then clip.  The stitch join should be secure and unnoticeable.

Friday, July 8, 2011

This week it's all ruffles

My awesome Johnson Ruffler got a total workout this week.  This little machine is one of the best workroom investments I've ever made.

This bedding package has three ruffled products: a bedskirt, inset rouched velvet panels on the duvet cover, and a top-sewn silk ruffle on the pillows.
We did not fabricate the headboard.  Or the dog.

Quite a pile of ruffles!

The velvet was first overlocked, then ruffled on each side.

The rouched strip was applied over the full width of tapestry.  First the lip cord was basted to the tapestry, then the rouching sewn right sides together then flipped to the edge.  The edges were basted together and then the second row of lip cord applied, then the outer band.  This method worked surprisingly easily, especially considering all three fabrics are upholstery weight.

To fill a duvet cover, I lay it wrong side out on the work table, snap the comforter to its corresponding snap tabs in the cover, then work it through the opening, duvet and cover all as one, and zip it up.  It takes awhile but it's easier than stuffing the comforter into the cover right side out and trying to reach inside to fasten the snaps. 

Bedskirt- what can I say?   The ruffler handled the velvet squares with professional calm at 3x fullness.

The silk was sewn into a tube, turned right side out, and pressed with the seam 1" from the edge.  Then it was fed through the ruffler right over that seam line (which is on the wrong side), and again, the ruffler performed like a pro.

The finished ruffle was first basted to the face of the pillow with a narrow strip of double-sided adhesive tape, then topstitched over the ruffling stitch. 

Three of those!

And some sleek throw pillows (no ruffles!) to top it all off.