THE BLOG IS HAVING TROUBLE WITH COMMENTS! SOMETIMES THEY DON’T GET PUBLISHED, AND WHEN THEY ARE I AM UNABLE TO REPLY TO THEM. IF THAT HAPPENS, JUST EMAIL ME AT stitchlore@gmail.com.

Looking for something specific? Check out the Topic Index, or the Search bar, just below, on the left.


Sorry about this problem!

SO.........WHAT ARE WE WORKING ON TODAY??

Wednesday, April 28, 2010

Interesting sheers

We've been getting some wonderful fabrics in lately.

Sheers continue to be popular, as well as unusual.   Sometimes sheers are used unlined, but more and more they are lined, or even interlined or blackout lined.

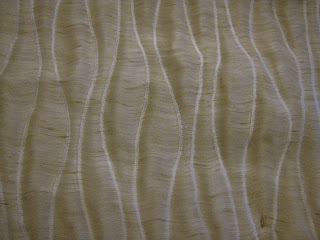
These shades are made from a loosely woven semi-sheer cotton that has been pin-tucked and pleated.  They are lined with a napped cotton sateen.  These shades were sewn by hand, including the rings. 

As happens sometimes, we received this fabric from two different decorators, for two different customers, in the same week.  The other batch is being made into hand-sewn unlined cafe curtains with little pinch pleats- photos next week.


At the bottom is another interesting semi-sheer that has been made into flat Roman shades with ribs, lined with a near-blackout lining. 

Friday, April 23, 2010

Ocean Wave Shade

This shade is the embodiment of island serenity.
The face fabric is bamboo, a cellulose-based fabric made similarly to rayon with the same lazy, drapey fluidity.  To protect the fabric from the damp salt air, the shade is lined with nylon shower curtain lining.
Four-inch interrupted back tucks stitched horizontally across the width of the shade create the "waves."  The rings and lift lines are positioned at the tucks.  
You can't see from this picture, but the ceiling is angled.   A dustboard holds the lift lines as usual, mounted where the wall meets the angled ceiling, and in order to allow the fabric to come up to the ceiling, a board is secured at right angles to the dustboard, the top edge first being trimmed at an angle to follow the angle of the ceiling.  I think there is a word for this but I can't think of it now, on Friday afternoon!

Wednesday, April 21, 2010

Willow Pillow

It's spring and the trees are in full flower.
I wanted to capture the cool, damp, dusky spring haze by the river and print it onto fabric.  I wanted a rustic, primitive print, just a suggestion, really.   Turned into a rustic, primitive pillow.
This was a print photo, scanned into the computer in order to print onto fabric.  The fabric is a grainy unbleached muslin and the "frame" and lettering  are drawn with black Sharpie.
The print is an iron-on transfer.

The willows are disappearing, one by one, victims of their own shallow root systems and decades of living in the pathway of violent riverfront thunderstorms. 

Friday, April 16, 2010

Fab Fabric Friday again


Is this perfect for Fab Fabric Friday, or what?

(The colors aren't as true as I'd like.  The brown is more chocolate, the embroidery is deep as the bluest summer sky.  The contrast lining matches the embroidery but I couldn't get it to look that way.)

Anyhow, this fabric is in the process of becoming flat panels, interlined, with a contrast decorative lining.

I've folded the lining side over to show the lead edge and the return edge.

The portiere lead edge has our signature narrow band of face fabric wrapped to the back, and topstitched.  There's no trim to hide the topstitching, but because of the dark color the stitching disappears.  I like this technique because it secures all the layers so they don't bag open.

The return edge, as well as the bottom face fabric hem, is hand-sewn.

At the top, 2" translucent buckram is folded in and stitched securely on the back side.   Narrow "grooves" of vertical stitching hold it all in place and provide a secure place for the drapery pins.  Again, thanks to the dark color, the stitching blends right in.

We like to use the translucent buckram on flat panels because it adds structure with fluidity.  These panels won't droop between the rings, but they also won't be rigid.

These panels are 116" long.  Because of the portiere edge, I can't think of a way to make these without tabling them twice..... lots of walking!

Thursday, April 15, 2010

Pleated balloon with header


These pleated balloons have separate headers, with lip cord in between and a loopy braid run horizontally across the center of the header.
This is a silk plaid which was railroaded in order to get the header out of the most appropriate section of the plaid.
It's interlined, and as you can see trimmed at bottom with a tassel fringe.
Though they will be used as stationary valances, we have strung them with a cord lock so the length can be adjusted on-site.
I don't see all of the treatments we make here in the homes for which they were created, because, as in this case, a lot of designers pick them up and arrange and supervise the installation.
I dressed these for the photo but dressing is NOT my strongest point!

If anybody wonders if blue is back, take a look at the trims I have sitting in my workroom for current jobs.  There was one more that I forgot to include.

The side hems on these shades were sewn by hand.  I took the opportunity to practice hand blind-hemming, although there was no need to use that technique here.  Once you get the hang of it, it goes almost as quickly as a slip stitch, but it does take practice.  

Wednesday, April 14, 2010

Dropped Iron

While I'm waiting for the iron to cool down-
Here's what happened when I tripped over the cord.
Yeah, perhaps you noticed- I have a regular iron and don't have an overhead track.  I'm waiting for this recession to end and then I'll get a boiler iron on a track.  Amongst other things. 
I cleaned the iron immediately with Ez-Off which works like magic- you have to use it while the iron is hot- but now I want it to cool down so I can polish it up a bit and let my nerves settle down.
Also I have to let the smell get out of the room.  What a horrible smell!  Between singed carpet and the cleaner, yuck. 

Tuesday, April 13, 2010

More on Efficiency

I have been working on some hobbled shades.  Since these have a lot of steps, I thought I'd showcase one shot that illustrated as many steps as possible.
For shades, as for drapery panels, I have found that you get not only the best product but also the most efficient use of time if you leave the product on the table for as many steps as possible.

For hobbled shades,  the fabric is laid face down and the lining over it, squared up, then the side hems are pressed in, but not secured yet.

The bottom will be made in various ways, depending on the style, trim if any, and the customer's preference.  For these shades I folded up a double 4" hem and hand-sewed it.

Next the fold lines for the rib pockets are marked.
Here, we use disappearing purple pens.  I don't know what we'd do without those!
And then the fold lines are pinned, pins all in the same direction. 
As long as the straightedge is right there, the marks are made for the rings.  If three lines are marked, the straightedge can be laid down to mark the remaining rows.

Now the side hems are secured.  Depending on the fabric, they might be hand-sewn, adhered with adhesive tape, or blindhemmed.  Machine blindhemming is a rarely used method here.  We've blindhemmed side shade hems maybe twice, ever.  
For these shades, adhesive tape is applied.  Look at the right side of the picture where a straightedge is holding back the opened-up side hem to reveal the tape.  I want to apply segments of tape leaving 1" on each side of the fold line without tape, because this tape is not nice to machine needles and I want to avoid having to sew over it.
The adhesive is a secure method but it is used only when some amount of machine stitching will be securing the layers somewhere- in this case, the rib pockets.

The twill tapes that will be "hobbling" the folds are laid out on the far right and marked, in this case in 6" increments, and brought to the sewing machine with the shades.


There are three steps the sewing machine will be used for. 
At the sewing machine first the folded pocket lines will be sewn 3/4" from the fold, making a right turn at the end of the row to close the pocket on one end.  I use thread that matches the face fabric, not the lining, because I want the thread to blend in at the side hems, unless it's a really dark fabric.  And then, I use white for the lining sections and color matched thread for the side hem bits.  A pain in the neck, but.  For these shades I used a pale yellow which blended in with both lining and face fabric.
The tapes, all ready and marked, are sewn behind the bottom row on the row's stitching line.

Now the rings can be sewn and ribs inserted into the pockets, and then it goes back to the straight stitch machine which hopefully is still threaded with the matching thread to sew up the open ends of the pockets. 
Ready for stapling & stringing!  The shade was on the table once, and not moved til all was marked and secured.
The indispensible tools for maximum efficiency on this project: purple disappearing pen, and the gridded canvas table cover.

Sunday, April 11, 2010

When mistakes happen

Okay, well, in this business, mistakes don't happen.  The truth is, one MAKES mistakes.  That is, I should say, I make mistakes.  There, I said it.  Occasionally I make mistakes.  Okay, well, really, I often make mistakes.  No, really, not all that often.  But sometimes.
So, see this beautiful silk print?
You got it- I made a mistake.  After joining the widths for 3 valances and 3 bottom facings, I made a mistake cutting the bottom shape.   I realized it almost immediately, so the damage was in just the outermost pieced section, of 6 layers.  The damage, however, was done, and my stomach did a little flip-flop.  Uh-oh.  This one's gonna cost me, I feared.

Now, it takes some steel nerves sometimes to cut into customers' fabrics.  Sometimes you're cutting up many thousands of dollars' worth of fabric.  One wrong cut and a dye lot that's no longer available, and you're buying a new bolt of some $120/yd-wholesale fabric.  ouch.

So we workrooms tend to be very careful.
We also draw on all our experience to not only plan well, but also to find ways to rectify mistakes when they happen.

When I was growing up, until I was about 35, I sewed most of my own clothes.  (That's when I started sewing for a living and sewing for fun kind of ended).  If I made a mistake on a project, I had to improvise to find a solution because there simply wasn't money to go buy more fabric.  This silk fabric retails for $50/yd, not horrible, but still, I was going to find a way around the mistake.

When I was about 12, I made a yellow dress with a square neckline and short sleeves which I piped in navy blue.  (lovely, eh?)  I set the sleeves in backwards.  So I took them out, and put them back in, backwards again.  So I took them out, and put them back in, backwards again.  That's not a typo, I really did it wrong 3 times.  Finally I put them in correctly.  Luckily that time I didn't ruin any fabric.

But plenty of times I did cut incorrectly, and boy, I learned to find ways to "make it work" (in the words of Tim Gunn, I hope everybody reading this watches Project Runway).  Those youthful decades of developing and honing problem-solving skills have served me well as a window treatment fabricator!  I can almost always find a way to work around mistakes, as well as fabric flaws and short fabric, using the available yardage.

I also was always trying to find ways to make my garment with less yardage than the pattern called for.  I was motivated by a desire either to spend less, or to have some leftover which I always believed I'd use for something later one.   

In the case of the silk, above, I found that I had JUST ENOUGH left over to re-cut the section that I cut wrong.  The reason I had leftover was because- by the book, the customer sent exactly enough fabric to make the job, but when I was laying it out I thought of a way to combine the cuts to use less, and I had yardage to spare.  Thought it wasn't necessary to save fabric, I did it out of habits formed 30-40 years ago.  It was a little tricky finding a way to match the pattern, but it worked out.  So I have just finished re-cutting and re-piecing the damaged sections.  (Which is why it's a beautiful Sunday morning and I'm at the studio).

But to look at the bright side- in spite of the mistake I still have some lovely scraps of this printed silk that are going to look great in some project.  Someday.  I swear.  Before I'm 80.
Saturday, April 10, 2010

Empire valance variation

g
Here is an Empire valance with extended gathered horns.  
This particular order was a challenge to fabricate mainly because of the need to reduce bulk at so many stages along the way.


As you can see in the second picture, the face fabric is a heavy woven upholstery fabric.  You can also see the very heavy lip cord that was sewn into the bottom.
The valance is also interlined, which adds a lot of bulk to an already bulky face fabric and a medium weight lining. 
All the seams had to be trimmed and layered to reduce bulk.


 The third photo shows the swag section laid out on the lining on the bias.  Since the face fabric is stiff and awkward pleated up into a swag, the lining and interlining are bias cut to give the swags a little drapeability.
For valances composed of many pieced sections, lining and interlining are railroaded if possible to reduce bulk at the seams.  Because we wanted to cut the swags on the bias, we could not railroad the linings.  However, with this style of valance, railroading wasn't an option anyhow, as you can see in the bottom photo.  Once the pieces are joined it forms a big arc. 
The bottom photo also shows how the interlining has been trimmed away from the board line of the swag pleats to reduce the bulk when it's pleated up.  Both interlining and lining have been cut from the board line on the slender cascades, since the layers all had to pleat up into 3" of space.  The flat "picture area" of the swag has been padded to lift it up to the pleat level. 

Friday, April 9, 2010

Efficiency

Yesterday I attended a seminar by Ann Johnson on Workroom Tips and Techniques, presented by the New Jersey chapter of the WCAA
For 3 hours Ann shared tips from her experience as a workroom owner and manager.  Ann is all about efficiency and she had a lot of wonderful ideas and common-sense solutions and practical suggestions on how to get more work done in less time and at the same time improving quality. 
Here I am putting into practice her teachings!  She asked how many of us used our tool belts, and if we didn't use them, why not?
I can think of a lot of reasons why not, but none of them are good ones. 
So this morning I came to work determined to re-dedicate myself to workroom efficiency.  And I put my tool belt on.
It also helped that the cable service was down this morning so I couldn't go online til now!

Wednesday, April 7, 2010

Wool


I'll admit it, I'm cheating, this is NOT what we're working on today.
These are treatments made from the most luscious wool I've ever had the opportunity to use.  It's "Bechamel" from Rogers & Goffigon, it is rather costly, and it comes very yummy colors.  This winter white is one of the best.  It is the drapey-est imaginable fabric!  The swags look like..... well, a satiny bechamel sauce.  Or molded butter.
We have a couple of clients about to use wool or wool sheer, so I have wool on the brain.  A wooly brain.
That's my justification for slipping in these oldies today.  These pictures are SO old, they are scanned PRINT photos (gasp!).  Complete with all the original smudges.
I think these treatments were made in 2002.
The swags are made a la Merrick and Day.  The swags are constructed with a unique point-to-point technique, and virtually none of the fullness is on the board.  It's all behind the horn & jabots.  The header is a separate piece, as are the extensions of the horn and jabots.
I can't remember who makes the trim, which manages to be sophisticated and whimsical at the same time.  It reminds me of little M & M's.
The valances and draperies are all interlined, and lined with an aqua dupioni silk.  Remember all that dupioni silk from those days??
There were tiebacks but at the time of this photo they hadn't been installed yet.
In the adjacent sitting room the same fabrics and trim are used for traditional Empire valances. 
Since these treatments were made we've used various wools for top treatments, draperies, and shades.  It is, to me, the ultimate luxury window treatment fabric.

Tuesday, April 6, 2010

Flat Bottom Relaxed Roman

Here is a twist on a relaxed Roman shade- a flat bottom.  The advantage: there's no "short point" on the sides.

Monday, April 5, 2010

Troubleshooting


So the table was piled with shade fabric and lining all cut and ready for sewing to begin.

There are all kinds of fabrication techniques used in the workroom, and a lot of different sewing machines.

For sewing rings on shades, there are two options- sew on by hand, or sew on by machine.

To sew by machine, you need a zig-zag machine that does not have any computer electronics in it.  You need just a plain old ordinary domestic machine, nothing fancy, as long as it does zig-zag and also can lower the "feed dogs."

I've always wanted to look up the term "feed dog" to see where it came from, but I haven't yet, so I can't tell you why that's its name, but what it does is move the fabric from front to back as you sew along.  When you disable it, the fabric stays in one place and that's how rings get sewn on.

Well, my little machine's feed dogs wouldn't stay lowered.  I took the machine apart and figured out how the mechanism works, but couldn't figure out what was wrong.

So I did what I always do when something doesn't work- call husband!  John, world-class troubleshooter, improvisor, fixer, and figure-outer.  The foremost qualifications of a successful audio engineer.

We examined the machine and saw what had to happen, but couldn't figure out exactly what part wasn't working right in order to improvise a repair.

The little metal thingie that was supposed to move the other metal thingie over wasn't holding, but nothing appeared to be broken.

So we tried to think of a way to disable the feed dogs.  Duct tape wasn't going to solve anything in this case, but in the world of problem-solving, the runner up to duct tape is cable ties- and I had a thousand of them, in all different sizes.

Two of them side by side fit perfectly in the little space where the metal thingie is supposed to be pushed over to- isn't that great descriptive writing- and voila, it's fixed!

At least long enough to finish up these shades.  John says he only wishes he'd used the blue ones so they'd look better in the photo.

Friday, April 2, 2010

Unfinished Projects

How about something totally off-topic?
My friend who made the beautiful Roman shades here in my studio, back in January I think, had a few unfinished projects sitting around that she brought here the other day.
They reminded me of some of my own unfinished projects and we thought they'd make a nice change of pace for a post topic.
The top quilt is one of two she made for her twin girls, begun when they were very little.  And now they're about to graduate from college.
All that has remained to do on this one is some of the quilting and the binding.
I adore the traditional folk-art palate and feel of this quilt, especially the red suns with yellow rays. And the quilted stars in the red squares.

The 5s and 0s are squares for a quilt she began for me for my 50th birthday.  When she showed the project to people, they were horrified to think of a quilt commemorating a birthday that most of us would prefer to ignore!  So she put these squares away and they've been bundled up in a closet for 6 1/2 years. I, however, was rather proud of turning 50, more or less still intact, and would have loved that quilt and wished she'd gone with her own instincts!  It's too late to use them for 55 since that's come & gone.  Maybe I'll take them from her and finish them for her 55th.  Or maybe she'll make two small quilts for us both.
The day is coming soon when I'd look at this quilt and remember fondly when I was "only" 50!! 

The bottom picture is a quilt top that I made nearly 20 years ago- it practically takes my breath away to think 1990 is so long ago- the piecing is all done except for a border.
By my taste nowadays I still love the colors but wish it were a little less bright and I wish I'd used a little more black.  So I'm trying to decide what to do with it.
I thought of tea-dying the whole thing to dull it up, and perhaps using black thread to quilt it.
Or maybe black embroidery.
Or tie-quilt it using black and maybe tiny black buttons.
Or black applique.
Definitely black binding, and black in the border.
Or all the above.

Thursday, April 1, 2010

Picture Problem

Well, nothing new here until Blogger fixes the problem with uploading pictures.  This has been happening since the beginning of the week.
I guess I'll keep working!  Not like there's nothing else to be doing LOL.
See you when it's fixed!