Whew, this blog post is taking forever!
But this treatment was so much fun to make, I want to finish documenting it, for anyone who has the fortitude to keep reading about it. This is going to be a long post.
Here it is, one more time:
And here's where I left off at the end of the last two posts. The sections have been planned, marked, joined, cut, and pressed, laid out and aligned with the table grid.
Against the face fabric, interlining is laid in place, pressed, and cut to shape.
The buckram pieces are laid in place in the sections but not the pleats. The bottom "seam" allowance is folded up and lightly glued against the buckram and interlining. Blackout lining is then laid across it all and cut to shape like the interlining. I also ran a little glue line around the perimeter of the blackout, to keep it in place. But keep reading- it's not the glue that holds this together- it's all hand-sewn later.
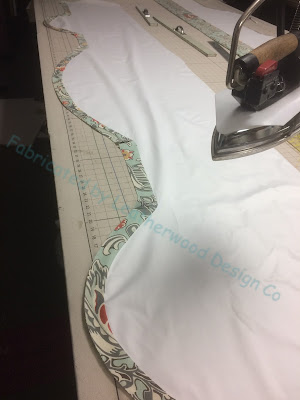
For the final layer, backing is cut to shape from regular lining, and a 2" continuous bias strip sewn on to create a facing.
It's like magic when the facing is turned and pressed! This makes me happy.
The faced lining is layered over the valance, and the bottom is sewn to the welting by hand. With all the hand-basting I had already done, I figured in for a penny, in for a pound, right? No glue is holding this treatment together! I love how the hand-sewing makes a perfect welted bottom line.
At the corners the excess is folded to shape and ladder-stitched.
Since this treatment is not waterfalling off the top of the board, but instead stapled to the face of the board with a standing open box pleat header, I needed to be certain the layers would not droop inside the top. First I joined the interlining and blackout with a running stitch, enclosing the buckram so it can't budge.
Then I lock-stitched the face fabric to the interlining. Now I know that all the layers will stay put.
I folded the face fabric to the back, fold the lining under just below the top, and ladderstitched the lining across the valance.
Then I had the pleasure of turning the treatment over, folding and pressing in the pleats, and making sure the face measurement was correct! I also drew a purple-pen line 4" down from the top using a quilter's rule, and secured the pleat areas with a tag gun so I could easily ant-trail staple the valance to the covered board.
Yay! Nearly done.
I knotted the rope and hot-glued it to the staple line, and tied the cut ends tightly with matching thread.
Opening up the rope strands, I saturated the trim fiber with Rowley's fringe adhesive and let it dry.
The rope was snipped through the clear-drying glue, leaving a neat, smooth end.
Everybody was happy! Even the back is beautiful.
THE BLOG IS HAVING TROUBLE WITH COMMENTS! SOMETIMES THEY DON’T GET PUBLISHED, AND WHEN THEY ARE I AM UNABLE TO REPLY TO THEM. IF THAT HAPPENS, JUST EMAIL ME AT stitchlore@gmail.com.
Looking for something specific? Check out the Topic Index, or the Search bar, just below, on the left.
Sorry about this problem!
SO.........WHAT ARE WE WORKING ON TODAY??


No comments:
Post a Comment