There is one thing they have in common: the cool Dofix AL1 compact velcro headrail.
Here are a few I've made this year:
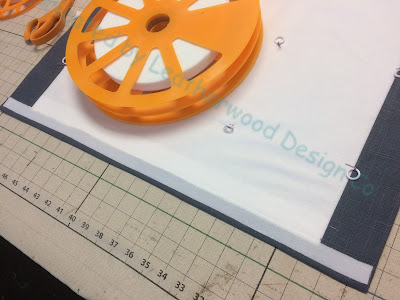
I make the shade mostly the same way as I usually do. At the top, all extra bulk at the side hems is cut out:
At the top, 1.5" is pressed at the finished length:
The lining is cut out evenly with the top:
The top is secured with Dofix, and the raw edges covered with fusible velcro:
Ring locks are used as spacers, and the cords are run through the rings, drawn up, and secured with orbs:
For this arched stationary shade (obviously on a frame, not the AL1 headrail!) there was no appropriate place to secure the cords at the top, so instead the cords are run through the rings with ring locks and secured at top and bottom with orbs:
After making the arched shade without lift cords going to the top, I tried it with a door shade. By planning ahead, the rings and locks can be hidden behind a mullion.
A neater alternative to orbs is the level locks from Safe-T-Shade:
A dot of glue gives peace of mind that the level locks won't slip:
The headrail is attached to the door with tiny brackets:
The velcro allows some flexibility at installation:
I like the way the fabric draws up naturally, as if it were strung to be operable. Simply cinching the rings creates a pinched look that I never liked.The little valance looks great alongside the larger stationary roman valances on the windows:
The arched shade is flanked by 4 inside mount stationary roman valances, made the same way but stapled to boards:


Hi Deb!
ReplyDeleteJust curious...what is the Bic lighter for??
Mona
Hi! Good question!! To get the cord through the ring locks, we lightly singe the ends. Otherwise the cord frays and won't feed through.
DeleteIs the fused Velcro the only thing holding the lift cords? Secure enough? (I understand this is a stationary shade...)
ReplyDeleteI believe so, Frances! I doubled up the bortenfix tape and steamed thoroughly.
Delete