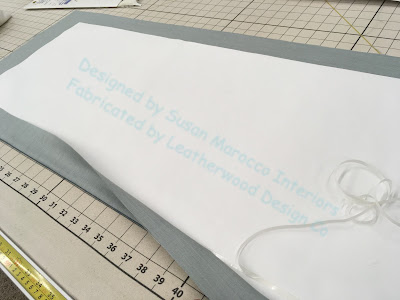
The qualities of wool that make it luxurious are also the qualities that dictate special handling when using it for window treatments. Wool's fluidity and drapiness make it prone to sagging and rippling, so we add internal structure to allow it to look its best.
The gridded canvas table is our most valuable workroom tool. We ensure that the fabric is straight on grain by aligning it with the grid. The bottom hem was calculated to be even with the top of the trim, and it was pressed and opened back up so the interlining could be layered in.
I considered options for making sure the wool did not sag below the fold line, which was even with the bottom of the trim. Using my "best of both worlds" approach, I ran a line of Jewel adhesive tape to secure the wool and the interlining right where I wanted them. Yes, I did consider joining the layers with a herringbone stitch. I was still a little leery of the wool sagging below the trim, and chose the tape instead. You'll see in a moment that the top was secured in such a way that I was confident that it would not sag.
Borrowing a technique from English curtain-making, the lining was folded up so the raw edge would be even with the raw edge of the wool, and hand-sewn into place.
Stabilizing the top edge was the key to keeping the fabric from sagging. The interlining ends right at the board line, to reduce bulk; therefore staples won't hold it in place. So the first step is to secure it to the lining.
A running stitch exactly at the board lines bastes the face fabric to the lining. When the valance is stapled to the board, the layers naturally shift a bit from the "turn of cloth" but the layers shift at different rates. They automatically grade themselves. That's why they have to be basted exactly at the board line. If they're secured further back, then there will be a little buckle in the layers.
I leave the thread ends on the right side so that after the valance is stapled I can easily find the basting thread to remove it. To keep it from loosening up or coming unstitched, I weave a bit back through the stitches.
The sides are hemmed by hand.
A variety of threads were chosen for the hand-sewing- here they are, along with the Jewel tape.
And now the valance is ready for mounting to the boards, and that will be the topic for "All the Best, Part 3," coming up later this week.
THE BLOG IS HAVING TROUBLE WITH COMMENTS! SOMETIMES THEY DON’T GET PUBLISHED, AND WHEN THEY ARE I AM UNABLE TO REPLY TO THEM. IF THAT HAPPENS, JUST EMAIL ME AT stitchlore@gmail.com.
Looking for something specific? Check out the Topic Index, or the Search bar, just below, on the left.
Sorry about this problem!
SO.........WHAT ARE WE WORKING ON TODAY??
Tuesday, March 26, 2019
Subscribe to:
Post Comments (Atom)


No comments:
Post a Comment