THE BLOG IS HAVING TROUBLE WITH COMMENTS! SOMETIMES THEY DON’T GET PUBLISHED, AND WHEN THEY ARE I AM UNABLE TO REPLY TO THEM. IF THAT HAPPENS, JUST EMAIL ME AT stitchlore@gmail.com.

Looking for something specific? Check out the Topic Index, or the Search bar, just below, on the left.


Sorry about this problem!

SO.........WHAT ARE WE WORKING ON TODAY??

Friday, July 30, 2010

More Miscellany

It's been an unusual week here, with lots of small projects, a few things we hardly ever make, and a lot of desk work.  Oh, and, hey, the driving!


It's hard to believe that pillows and cushions were my bread and butter for some years, because now arthritis makes cushion making very painful.  Sewing cushion covers is not too bad as long as the fabric isn't too heavy, but cutting the foam and stuffing the cushion is almost out of the question.
In a moment of weakness I agreed to make these chair pads.  But they turned out so nicely that I didn't even mind.  Instead of ties, these have brown snaps.


These grey velvet pillows are as soft as a kitten, and the inset pleated linen banding is a nice rustic contrast.


The trim is hand-sewn.  A quick trial on the machine demonstrated that the nap of the velvet made the trim "walk" when sewing down the nap, and "drag" when sewing up the nap.  It was pleasant, relaxing, rhythmic sewing.


1 1/2 width panel- all pleats the same

1 width panel- 1st, 3rd, 5th pleats same as larger panel


In a happy coincidence, the pleat spacing on this asymmetrical stripe worked out perfectly for a width-and-a-half pair of pinch pleated draperies.  Pleating on pattern is more important to me than whether the drapery fits or not!- because, well, you can always make it fit, by making it more or less full, but if the fabric isn't pleated on pattern it just doesn't look good to me.  And since these are side panels only, the exact finished width is not that important.
For the single width panels, the same pleating wasn't an option.  I compromised by making the pleats and spaces a little smaller, and centering every other pleat the same as on the larger panels.  That left two out of the five on the alternate stripe, so the single width panels are consistent with themselves and have at least some consistency with the other pair.


Monday, July 26, 2010

A Miscellany

Here is a collection of recent projects.

The first picture is my very own hybrid: a flat Roman shade, ribbed in back, with relaxed Roman folds over a straight bottom.  We wanted the bottom straight so the relaxed folds didn't pool on the shelf and also so the bottom corners would not be uncovered.  I've never seen a shade like this anywhere else, so as far as I know, I invented this myself!
If you're interested in how this is made, I'll do a separate post about it.  Let me know in the comment section at the end of this post. 
Imperial valances with jabots, self microcording


          Kick pleated valance in adjacent kitchen bay window.


Remember these pillows?  Here they are on a campaign bed, with the tapestry hanging.
Another "winter trees" shade- it just never gets old!
Calvin Klein sheer, Roman shade
Self-lined, hand-sewn.  This reminded me of fine Madras.

Wednesday, July 21, 2010

The fabric that could not be sewn, installed!


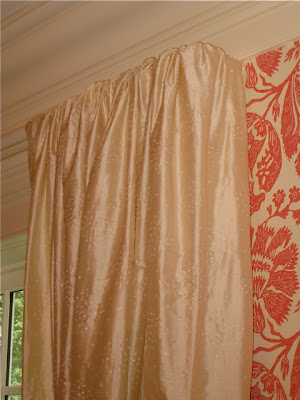
The all-over beaded draperies were installed today, and the site was close enough that I took a moment to run over and get a photo.

This is the fabric that could not be sewn by machine because of the all-over beading.  I was just barely able to join the widths with a 1/4" seam, and all the rest had to be hand-sewn.  The problem was how to create a rod pocket without being able to sew it by machine.

To read the whole story, scroll down to the previous post and find out more about the solution I came up with for this dilemma.

I'm pretty pleased with the results- it's an interesting waterfall effect.

Monday, July 19, 2010

My mother used to say......

"Pretty is as pretty does" was a favorite saying my mother used to remind us 4 girls that good looks was no substitute for good behaviour.
Someone should have told that to this pretty creamy silk with all-over pale pink beading.


The beads made it impossible.... repeat, impossible.... to sew by machine.  The widths could barely be joined with a 1/4" seam allowance because if a bead got anywhere near the feed dogs, the machine would jam.
Hand-sewing the bottom and side hems is everyday work around here, but how would I sew the rod pocket?  There was no way to sew it by machine, and I just couldn't see sewing the actual pocket by hand.  For one thing, my hands ached at the thought of such a tedious process, and I also didn't think it would be strong enough, let alone professional looking.


It took a lot of ideas percolating through my brain before one method filtered through and became feasible.
It boiled down to sewing the pocket in the lining and interlining only, and hand-sewing the face fabric to the back afterwards.


After hemming the sides nearly to the top, I trimmed the lining & interlining to finished length plus 3" and cut it in to the edge of the side hem, leaving the selvedges on.


The 3" of lining and interlining were folded down and pinned through the lining & interlining only.  All 3 layers were pinned a few inches below the seam line to keep them from shifting while the panel went to the machine.


After sewing the pocket, back on the table, I folded the selvedge end back in, folded over the silk, and hand-sewed the edges to give a neat finish inside the pocket so there were no loose edges to catch the pole while it was being inserted.


The loose edge of the silk was trimmed earlier to finished length plus about 5".  The last step was to turn it under and whip-stitch it across the back to the lining.  This was a went quickly because the silk is not carrying any of the weight of the hanging fabric so tight, close stitching was not necessary. 


There is no pocket line showing in the face fabric, which is kind of cool, and I can imagine using this technique again for other applications.  I like how the fabric just sort of waterfalls over the edge. 
 

Wednesday, July 14, 2010

Speed-hemming lining

 At the risk of exposing you to probably the most boring photographs ever, I'm going to show my method for cutting and hemming a lot of lining at once.


I figure out all the cuts for all the drapery jobs I have coming up in the near future, then begin cutting, laying the bottom at the -6" line and cutting with 4" over the FL at the top.
Here you can see all the widths I've cut out- I think it was 20 altogether.


I lay the straightedge at "0" and press the hem up, then move it up to "3" and press again, creating a double 3" hem.  I put in 2 pins.


Then fold it up maybe 15" to get it out of the way.
Then I keep doing this with all the widths in the pile.


Fold 'em all back down again, and start pinning right sides together at the hem foldline, and take to the serger.  I do this for all the widths of a particular job, then take them all to the machine to hem with a topstitch.


If there are half widths, when I get to a panel to be split, I fold it in half lengthwise and finger press, then slice it with nice sharp scissors, then proceed with pinning and serging.


Even though the hem is already pressed in, you can still sew the hem without re-pressing: as you near the seam join, just "snap" it into place and keep sewing.
Later when the panels are being tabled I give the bottom hem another quick pressing to freshen up the bottom edge.


As all the lining widths from a single job are done, I either fold in quarters and lay on the other table, or lay over hangers and hang them til I'm ready for them.
Then I repeat the process for the interlining.


Now that all the linings and interlinings are prepped, I start with face fabrics, press up the hem and either take them home to hem them all while watching YANKEES baseball, or hem them one at a time as I table each panel.


I think I've just used up a lot of words on this subject, a lot more than I ever imagined possible..... 


Monday, July 12, 2010

Opera Balloon Shade

I just love the drama of an opera balloon shade.  
I asked the decorator to wait til the installation was finished before coming into the room.  
When lowered, this shade is straight across the bottom like any ordinary balloon shade, but the special stringing method causes an opera shade to raise its sections to different heights.
So for the decorator we staged a theatrical curtain raising, and it got rave reviews.

Tuesday, July 6, 2010

Other people's grandmothers' scraps

The yield at Stormville Flea Market was even better than usual this time.  Here are the contents of a bag full of quilt scraps, for $10.

I am overwhelmed with wonder about the women whose hands created the quilts these scraps came from.  Textile is like the mitochondria of human culture- passed on through the untold generations of womens' hands.

I'm not sure how I'll work with these since they all have batting and backing and are quilted.  Since they're quite old and the battings are cotton, they're pretty musty and they need cleaning.  Certainly all these have been washed innumerable times, but because of the exposed raw edges of the little pieces, I think I have to use them first then launder my finished product. 

Some of these are pretty homemade looking, but there are also some pieces with quite skillful quilting.  I wish I could have seen the whole quilts they came from.

I also returned with quite a haul of embroidered hankies, doilies, tablecloths, and kitchen linens, many with hand-crocheted edgings and hand-made lace or cutwork trims- to add to the not insignificant stash I already have!  Not to mention my precious feedsacks.


Am I crazy?  I work with fabric all day, for a living.  I think about sewing projects all the time.  When I have some free time, I sew for myself or embroider my ready-made clothes.  I have probably a thousand yards of decorating fabrics scraps and on bolts, which I've secreted all over the place like squirrels hide nuts.  I have I don't know how many yards of quilting cotton fabrics for dozens of unmade projects.  I have old textiles that were made by my grandmother and great-grandmother.  And still- I go to flea markets and buy other peoples' old fabric scraps.

Monday, July 5, 2010

Fab Fabric Fifth (of July)

Brunschwig & Fils- black velvet on khaki silk

We are at the studio today, staying cool, and cleaning up and re-organizing in order to get back to work on Tuesday.   I'm looking forward to working with this fabric- it is amazing!

Friday, July 2, 2010

Sheer shades, in the moment

Sheer shades continue to be amazingly popular.

This is a poly sheer which looks and feels so ethereal it's hard to believe how sturdy it really is.  

I love making these shades.  They're made entirely on the table so nothing shifts, and I totally enjoy the process of taking one step at a time until it's all done.  Sometimes I forget, and insist on looking forward to the end of the process while I'm actually still near the beginning, and the joy goes out of the project, because it feels like it will never be done; anxiety mounts; impatience sets in; dare I say that I even feel bored.  Once I re-focus on the step I'm performing that moment, I love it again. 
Boredom is something I loathe more than almost anything, so I make sure not to feel that way.  I always find something to fascinate me, or to think about.

Thursday, July 1, 2010

What's hot? Flame stitch is hot!

When's the last time you saw a beautiful bargello flame stitch fabric?
I know, it's been awhile.
And now that you're looking at this one, are you wondering, why has it been so long?
Bargello fabrics will never not be in style, but they're not often actually in style.

Technically, "bargello" refers to a type of wool needlepoint or embroidery laid out in a mathematical manner to create various motifs, but when the traditional patterns created with the needle are translated into woven goods, it's still called "bargello."

These bolsters- and speaking of bolsters, don't you want some?- so practical and comfortable!- anyhow, these bolsters are for a seating area in a home whose owners value old traditions.

Not all bargello fabrics are flame stitch patterned.  Years ago, when I worked in a retail store, a medallion patterned bargello came in that I fell in love with but which was too expensive for me to get for a whole piece of furniture.  I agonized over it and during a weekend off I decided to get just enough for a pillow.  When I went to work after two days off, it was gone!!!!!  A very nice lady had bought the whole bolt, and was lovely enough to save me the scraps, and brought them to me, and I made my pillow!