 "Pretty is as pretty does" was a favorite saying my mother used to remind us 4 girls that good looks was no substitute for good behaviour.
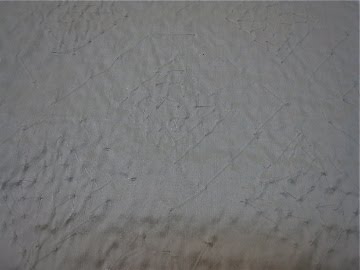
Someone should have told that to this pretty creamy silk with all-over pale pink beading.
The beads made it impossible.... repeat, impossible.... to sew by machine. The widths could barely be joined with a 1/4" seam allowance because if a bead got anywhere near the feed dogs, the machine would jam.
 Hand-sewing the bottom and side hems is everyday work around here, but how would I sew the rod pocket? There was no way to sew it by machine, and I just couldn't see sewing the actual pocket by hand. For one thing, my hands ached at the thought of such a tedious process, and I also didn't think it would be strong enough, let alone professional looking.
It took a lot of ideas percolating through my brain before one method filtered through and became feasible.
It boiled down to sewing the pocket in the lining and interlining only, and hand-sewing the face fabric to the back afterwards.

After hemming the sides nearly to the top, I trimmed the lining & interlining to finished length plus 3" and cut it in to the edge of the side hem, leaving the selvedges on.

The 3" of lining and interlining were folded down and pinned through the lining & interlining only. All 3 layers were pinned a few inches below the seam line to keep them from shifting while the panel went to the machine.


After sewing the pocket, back on the table, I folded the selvedge end back in, folded over the silk, and hand-sewed the edges to give a neat finish inside the pocket so there were no loose edges to catch the pole while it was being inserted.


The loose edge of the silk was trimmed earlier to finished length plus about 5". The last step was to turn it under and whip-stitch it across the back to the lining. This was a went quickly because the silk is not carrying any of the weight of the hanging fabric so tight, close stitching was not necessary.

That's an excellent idea! Necessity is the mother of invention. :)
ReplyDeleteLove the finished look of the panel without the normal topstitching. You may have started something here.
ReplyDeleteAnnie, you're so right! The problem-solving part of this "job" is my favorite part.
ReplyDeleteNancy, welcome! I love that "pocketless" look, too. Actually that part was a bit of a surprise- I hadn't totally visualized how it would look without a pocket and was a little leery of it, but I really like the effect.