Remember this bedding ensemble from a month or so ago?
Unfortunately the duvet was too narrow for the bed. Both the bed and the duvet were odd sizes, and even though the client had used them together for years, once the duvet was in a cover, it was obvious that it was too narrow.
After a brainstorming session with the designer, we decided to add to the width with a flange. The client needed to keep the cost down, and I wanted to be sure the flange looked as if it had been there all along. To keep the labor down, I didn't want to open up the serged seam if we didn't have to, or remove the snap tabs inside. I wanted to avoid extra bulk, and I didn't want any hand-sewing- it's a heavy bed-covering, and it needed strong machine sewing.
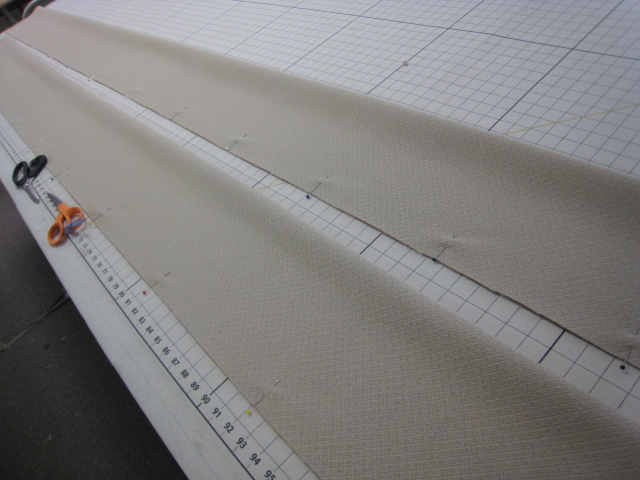
So our post-vacation mission was to create the flange to extend the sides and make it not look added on. With a sudden flash of inspiration, I realized we could use the braid trim to actually join the flange to the main cover, as well as to hide the join. That would eliminate excess bulk. We sewed two long tubes for the flange, open at each end..........
The front flat braid was sewn to the cover, just overlapping it halfway,
then the flange was tucked under the other side of the braid and sewn.
The duvet cover was flipped over and a row of flat braid was sewn onto the back side. It was fortunate that the braid on the front was nubby and patterned, to hide all the rows of stitching, otherwise this process wouldn't have worked.
The ends were sewn shut by hand. I had to leave that to the last, because I was sure that if I sewed the flanges to size beforehand, something would stretch, or shrink up, and the pieces wouldn't fit.
To stuff the cover, we turned it inside out, snapped the duvet to the cover, then gingerly turned it right side out, all as one. Heavy work!- you practically have to crawl inside it.
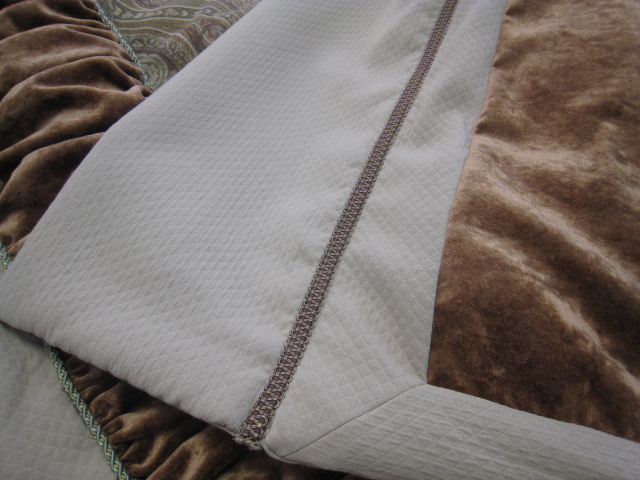
Here's the flange from the front.....
And from the back.
And by the way, those three Milan valances were for this master bedroom..... Now that the duvet cover is finished, I hope we'll be receiving a nice photo of the completed room.


No comments:
Post a Comment