For a new baby's room, the homeowner wanted to add blackout to the Roman shade we made last spring. Of course, it HAD to be an arched top shade with rib pockets in the lining.... no simple fix here.
The shade was 54" finished width and the fabric was just 55" and the homeowner did not want it seamed. So when it was originally made, we pressed the selvedge under just barely, and slip-stitched the lining to it- which worked just fine. However, the quilty face fabric had shrunk an inch, so now the lining came right to the very edge.
To add blackout, we had to take out the stitching, lay in the blackout, and slip-stitch it back together. We kept the ribs in the pockets and re-sewed rings with ladder tape.
Because of the shrinkage I was afraid to take apart the weight bar pocket, so the inserted blackout went to the top of the hem, and then on the outside I glued on a 4" strip of blackout that went to the very bottom and covered the raw edges with gimp.
The shade had shrunk vertically as well as horizontally so we just scrunched it forward on the frame to make it longer. Since it's an inside mount with drapery panels over, luckily the horizontal shrinkage hadn't mattered.
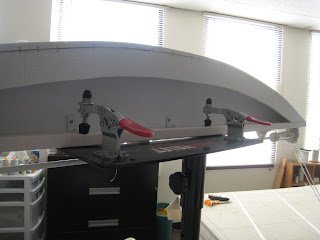
Here's the back view of the arched frame made with Firm-a-Flex.
THE BLOG IS HAVING TROUBLE WITH COMMENTS! SOMETIMES THEY DON’T GET PUBLISHED, AND WHEN THEY ARE I AM UNABLE TO REPLY TO THEM. IF THAT HAPPENS, JUST EMAIL ME AT stitchlore@gmail.com.
Looking for something specific? Check out the Topic Index, or the Search bar, just below, on the left.
Sorry about this problem!
SO.........WHAT ARE WE WORKING ON TODAY??
Subscribe to:
Post Comments (Atom)


No comments:
Post a Comment