 | |
| 2 green shades for the upstairs bedroom |
I was able to take down and take apart some of the original shades to see how they were made. We were asked to make the shades in the same manner, so we did, but- I am looking forward to re-creating this style, using my own methods, and perhaps some luxurious Domette interlining!
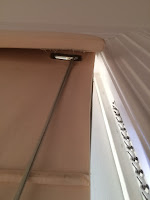
These original shades had cord locks; the cords were rigged to the front through an oval grommet concealed with a hard topper.
The new ones that we made are reverse mounted with a Rollease clutch. They are blackout lined with Silky Blackout in color Sand from Angels Distributing.
 |
| 4 shades for the Master Bedroom |
We marked carefully with disappearing pen, folded the lines, and ironed them, alternating direction front to back.
For the folds to the front, we didn't mark the line; we simply ironed and pinned, using the table grid as the guide.
It was tedious, but the sewing went really well, thanks to Camille's infinite patience!
When the sewing was finished, the shade was laid out and lightly pressed, manipulating the pockets straight, again using our indispensable gridded canvas table top as a guide.
We had already prepared the blackout lining; after the pockets were sewn, the lining was laid out on the back of the shade, right over the pockets, and the sides and bottoms were secured with Dofix Bortenfix hemming tape.
With all those ribs to support the folds, the shades needed only 3 rows of lift lines.
We used 3/16" cast acrylic rodding from U. S. Plastics for the back ribs, and 3/16" clear plastic ribs from Rowley for the front ribs.
The rings were sewn at the ribs, catching the pocket beneath, then the ribs were slid in and the ends sealed with a tiny dot of hot glue.
The shades were reverse-strung with Rollease clutches and SafeTShade Ring Locks, and a separate hard valance added at the end. We made our toppers on 1/4" thick hardwood, with little returns so the clutches weren't visible from the side.
 |
| 3 shades for the Guest Bedroom and Bath |


No comments:
Post a Comment