I was happy to have an order for 3 Milan valances- the second time recently that someone finally ordered something I'd been dying to make! (The other time was the panels with the scalloped lavender lead edge.)
I assumed I'd use the M'Fay pattern, but unfortunately my valances were only 34" wide, too small for the pattern and too drastically different to modify it. I'd have to re-create it from scratch. Hurray, who doesn't love an opportunity to practice their pattern-drafting skills?
I used the designer's sketch which was drawn to scale. It took a couple of muslin copies: first to get the proportions right, and then to re-proportion it to allow the diamonds to match on the pleats.
The way that I decided to layer the fabrics required a three-step cutting process. First the face, then the face with the lining, nestling the curves to save on fabric;
then the face down against the interlining. When the valance was turned to the right side, I wanted the interlining layer to be seam allowance layer that sat next to the face fabric, because I didn't want the bumpy embroidery to show through.
Grading the seams, clipping the concave curves, notching the convex curves, turning, and pressing takes as much time as the actual sewing.
 |
| A boo-boo |
On four of the six pieces I needed to re-sew the curve because I didn't get close enough to the microcord the first time, like this:
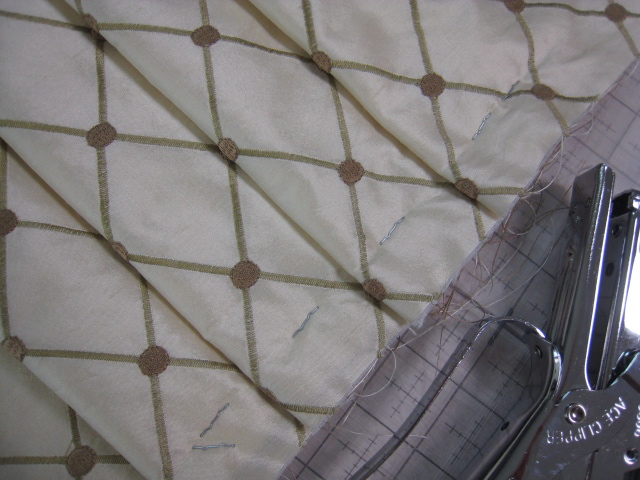
I staple-basted because I had a funny feeling that I'd have to do some adjusting of the pleats on the board, and I was right. It took some fiddling to get everything just right.
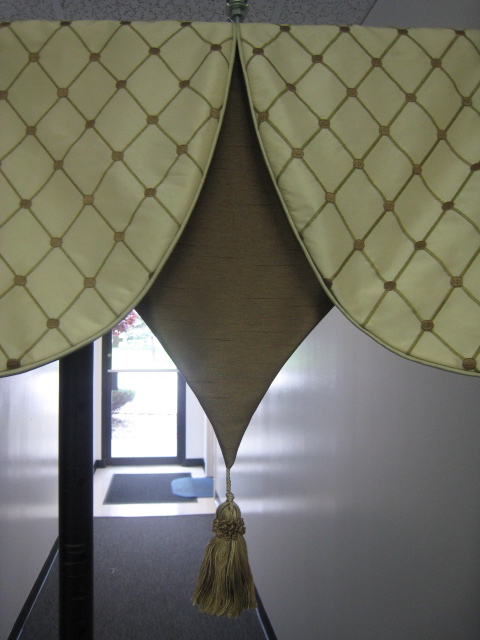
But look: beautiful, I think!
And now......
We are going on vacation!
cya later!