THE BLOG IS HAVING TROUBLE WITH COMMENTS! SOMETIMES THEY DON’T GET PUBLISHED, AND WHEN THEY ARE I AM UNABLE TO REPLY TO THEM. IF THAT HAPPENS, JUST EMAIL ME AT stitchlore@gmail.com.

Looking for something specific? Check out the Topic Index, or the Search bar, just below, on the left.


Sorry about this problem!

SO.........WHAT ARE WE WORKING ON TODAY??
Showing posts with label welting. Show all posts

Friday, November 15, 2019

Layering sequence to feature the "Important" side

In this Master Bath renovation, different wall finishes required a fabric that would complement both.  Susan Marocco chose a traditional motif, Martinique by Cowtan and Tout, in a fresh colorway that worked with both the painted and tiled areas.  Variegated lip cord from Samuel and Sons defines the lower edges.
We were able to raise the valance over the tub without drilling into the tile by mounting on wood extenders for the L-brackets.
A toned-down, straight kick-pleat valance out of Schumacher's "Woodberry" was an understated treatment for the Guest Bath window.  Rather than divide the width into three equal sections, we instead left the motifs whole by slightly rearranging them and making a barely wider center section.
Sewing patterns are available for shaped box pleated valances- this is the "Sheffield Valance" from M'Fay- but after planning, cutting, and joining the individual sections, I usually just draft the shape directly onto the fabric, free-hand, with erasable pen.  This allows me to customize the long and short points of the treatment.  (In the years before drafting onto the fabric, I probably fabricated 5000' of Sheffield valances, so I had a feel for how to draw those curves!)
After the first return, horn, and scallop are cut, I flip the fabric to repeat the silhouette across the pieced fabric.  To do this, it's essential to cut the sections accurately and straight at the top, because the top line is the reference point.
I layer the interlining and interlining, and cut around the valance.
Very importantly, I notch all three layers before moving the layers, so there are reference points in case the layers start to drift during sewing.
Now I rearrange the layers so the right sides of the face and lining are together, and the interlining on top of the face.  The notches help me re-align the curves.  When turned right side out, the order of the layers will be face, interlining, lip cord or welt, then lining.  This sequence helps eliminate any bulge from the lip cord trim on the right side- the "important" side. 
The layers are all pinned together; the lining is held back so the lip cord can be basted.  (Yes, I'm using a zipper foot.  Many people use a cording foot, with the welt to the bottom during sewing.  Sometimes I do, too.)
The lining is folded back into place and all layers are sewn together.  The seams are graded, the corners and curves are clipped, and the valance turned right side out, pressed, and mounted. 
The interlining smooths out the front of the valance so no seam allowance is detectable.  I learned, years ago, from reading M'Fay patterns, to determine the "important side" of the treatment, and layer accordingly. 


Monday, July 2, 2018

Details on the 158" shade

There's a lot of detail I'd like to share about the 158" shade featured in last Friday's post.
The fabric was railroaded- it wasn't perfectly symmetrical in both directions, but nearly, and the repeat was small in either case, so I thought it would be best to have no visible seams.  Instead, we seamed it horizontally and hid the seam under a fold.  Figuring out the logistics was trickier than I thought it would be!  Luckily I got it right, whew.  The repeat is just 4.5" so the folds are a little smaller and closer together than I usually plot for hobbled shades.
I did catch a break on marking the fabric for sewing the tape and rings.  I used a lovely double-wide cotton sateen from Hanes, and could just see through it enough to make the marks by pattern instead of having to measure.  THAT was a huge plus- it not only saved time, but also assured accuracy.  I took this photo of the first shade as pattern placement reference for the following two.
The Rollease Skyline clutch on a 1.5" tube provided a strong lift system.  After using this tube a lot recently for both clutch AND spring lift systems, I think I will now remember without having to look it up: screw eyes for clutch, NO screw eyes for spring.
Another thing I think I finally will remember without having to look it up: for reverse mount hobbled shades, DO NOT put the grommet through the tape!  I had to wiggle the tape free out of every grommet in order to make slight adjustments to the board line.  I also finally got smart while making the adjustments and instead of unstapling, I used a blunt instrument to nudge a bit of lining upward and stapled it to the back of the board.
Did you see what tool I'm using there?  It's our new Milwaukee cordless, battery-operated staple gun!  My hands are no longer able to operate an old-fashioned manual staple gun, and the shade was too far away for the compressor hose, so this new toy I mean tool came in very handy!
The tube, at 158", was too long to safely use without support.  Luckily Rollease has introduced a splice- the Easy-Link.  This allows the tube to be split in half and spliced, with the splice doing double duty as a support bracket.
For a fail-safe during transportation, we used cable tie mounts at each end of each tube, just in case the tube came out of the bracket.  It can't fall far, because it's all strung up to the shade, but it saved some annoyance when it DID happen and we needed to put it back together.  Please note: we snipped the cable ties loose once the shade was installed, because they would add resistance to the lift if they stayed in place.
There are two types of cable tie mounts: one is all in one piece; the other sticks on then you secure it with a screw- that's the one we wound up using.
Oh, and another thing.  If you read the previous post, you might remember that the soft cornices didn't quite fit in the corner, and I had to take them back to adjust the ends.  I made a piece of welting on "wings" with velcro, and velcroed it in between where the new ends met.  I forgot to take a photo of the welt with wings, sorry.
I wish I could say that the pattern flowed around the corner because of meticulous planning, but really it was serendipity that the pattern on the two ends created a near match.  Sometimes luck is better than skill!
It WAS skill, however, and not a bit of luck involved, that the pattern matched preciselty from the soft cornice to the shade!  And I'll gladly take full credit for THAT, as well as the perfect pleat-to-pattern :)

Thursday, February 8, 2018

Pattern matching on cushions

When I filled this cushion, for Crosstown Shade and Glass, I stood back to have a look at the pattern match, and I couldn't believe I had sewn it!  (Yeah, I know, I've only had 30+ years experience sewing cushions, but still!)  Matching pattern without welting is always tricky, and this required joining widths, as well. 

Welting provides a little buffer between the two layers of fabric, giving a little wiggle room, like this:
Or as in the pillows accompanying the cushion:
Perhaps there's a mathematical way to cut boxing to match the cushion body, but I need a more literal approach.
After I've cut the body..... just pretend this little strip is a cushion body, for illustration purposes..... I mark the seam allowance using a clear ruler and an erasable pen.  I use a 3/4" seam allowance, but other fabricators use 1/2" or 5/8" or 3/4" or whatever they're comfortable with.
I lay the body piece on the fabric that will become the boxing strip, matching up the pattern, and draw an erasable line at the body's cut edge.
I then mark and erasable line 1.5" away from that first line- that gives a 3/4" seam allowance on both the body and the boxing pieces.
I cut the boxing strip on that line; then I'll use a rotary cutter and straightedge to cut the other side of the boxing strip (not shown).  Regarding pattern centering: my concern is to center the pattern properly on the cushion body, not on the boxing strip.  The boxing strip is cut to allow the pattern to match and flow, and won't necessarily have a centered feature.  Perhaps there might be other situations where it would make more sense to work from the boxing, but in this case, I worked from the body.
I remove the first purple line with the eraser end of the marking pen.  NOTE:  always test your fabric first, to be sure the purple pen will erase from your fabric!
I turn the boxing strip over and mark a 3/4" line which will be the stitching line.
I crease along that line- I finger-pressed this particular fabric but you could use an iron if necessary.
I lay the boxing on the body, aligning the pattern.  (That top piece is the body- we're pretending that it's a normal size- it was cut small for this illustration.)
I fold the boxing back so the two pieces are right sides together.
Checking the pattern as I go, I pin frequently.
 At the sewing machine, I sew along the purple line which is also creased.
I check the pattern match before leaving the machine, in case any little sections need to be taken out and re-sewn, and then I press it open very very lightly.
And there you have it!  The bottom edge of the boxing will not match the other side of the body, unless you cut the body to match the boxing, in which case the pattern on the other side of the body will be upside down, and not be the same as the front, and also likely will not be centered.  You can do that if you wish if the pattern is not obviously directional and if it's aesthetically pleasing.  


Tuesday, October 14, 2014

Two Pinch Pleat projects

Well, the premise of this blog is that our projects are shown mostly in the workroom, warts and all, but, I do sometimes wish I had "after" photos!  I go along on some installations, but often the products are picked up and I never see them in the homes they were designed for, and never get good photos in situ.
Here are two such projects.

Eventually I will get to the house to photograph this one.  Meanwhile, here are a few shots to show how this treatment was assembled.
These pinch pleats were fabricated from an amazing linen with a beautiful drape, at three times fullness; the lead edges are trimmed in a gorgeous woven banding.
While we've mounted plenty of inverted pleat panels to waterfall over a flat topper, this is the first time we've mounted pinch pleats over a topper.  We fitted the topper with screw eyes so the panels could hang with drapery hooks at the pleats, and added velcro so the header would fit snugly without drooping.
We used fusible velcro for the panels themselves.  I didn't realize how long that would take- 90 seconds for each little piece, holding the iron hovering over each strip- but it is very secure.  There's a half hour out of my life that I'll never get back!


I do have an after picture of this pair of side panels, for Monica Plotka Interiors, but they're wrapped up for training!  So while it shows the finished product, it's not exactly the "money shot."  However, you can see how beautifully they turned out.
Originally the plan was inverted pleats, but after mocking up and sending pictures to Monica, she decided to go with pinch pleats instead.  Inverted pleats really brought out the geometric aspect of the fabric, and it was a bit too much.

Two-finger pinch pleats were just right.
The lead edge side hems looked too plain- we needed every bit of the pattern to achieve the pattern layout- so a microcord on the hem gave a more finished look.


Sunday, January 9, 2011

Pink Day

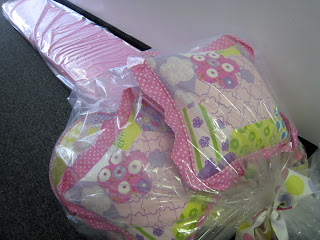
Coordinating window treatments and pillows were made for two sisters whose rooms are across the hall from each other.  The round pillows are boxed, and small square pillows and shams have a flat flange that is gathered in the corners. 
All welting and banding is done in the same pink dot that covers the window seat cushion.

Over the window seat in the little sister's bedroom is an Imperial valance out of a crazy-quilt print.  The back is faced so the dot is visible peeking out from behind the horns.  Blackout lining inside eliminates the shadow the 4" shaped facing would have cast.  The dot worked nicely as 3/8" welting.
The older daughter's room has a 12' window with a flat, shaped, banded valance.  Here it is laid out on the table.   Luckily this large polka-dot could be railroaded.   The 1/2" banding was done binding-style.

To draft the pattern for the bottom serpentine silhouette, I drew the general shape right onto the fabric with a purple disappearing pen.  Then I laid gridded paper over my roughly sketched line to begin drafting the pattern.  The 12' section has 7 scallops.  The serpentine shape continues onto the separate 2' sections at each side for the small windows at right angles to the 12' window.
After cutting the face I laid it wrong sides together against napped lining, cut, and pinned well.  The bias banding strips were a little over 2" wide; it stretched enough to ease around the curves with a 1/2" seam allowance; then wrapped perfectly around to the back to make a 1/2" band on the front.   This is just like binding a quilt.

To finish the back, there are 3 options- top-stitch by machine from the front side, bond with glue or other adhesive, or hand-sew.  I chose to top-stitch-in-the-ditch for this product since the fabrics were well-behaved and they didn't warp with stitching.