Last night I dreamed of a way to make sheer hobbled shades without pockets. I have numerous methods for making hobbled shades. Mostly I use ribs without pockets, but I still sew pockets for sheer hobbled shades. You know how things you dream seem so logical in the dream, and are clearly absurd when you wake up? I'm not sure, but I THINK my dream method might actually be feasible and useful. I'm going to think about it today as I work on other products, and decide whether or not it's worth an experiment.
Meantime, I made these sheer hobbled shades a few weeks ago, using one of my regular pocket methods.
I sew the translucent twill tape on as I sew the pocket.
The pocket fold line is marked with disappearing purple pen. I have to work quickly, before the ink disappears!
I dread sewing pockets because it's not easy to keep the fabric grain lined up. But I have always felt that sheer shades need the pockets for stability. This happened to be a well-behaved fabric, so the process wasn't too painful. I didn't even have to pin the fold- which kept my arms and midriff free from pin gouges!
After all the tapes are on, I sew on clear rings which are shrouded with clear ring locks- both from SafeTShade. The ribs from Rowley Co are clear plastic.
The shade safety standards determine the maximum spacing allowed on hobbled shades, just as on flat romans: 16.9" of combined loop. With hobbled shades, the loop includes the fabric and tape, so the row and ring spacing must be calculated to fall within that range.
I wonder if I should see a therapist to analyze me and my dream-method for making sheer hobbled shades without the pockets? Perhaps in a few months I'll have a whole new technique!
THE BLOG IS HAVING TROUBLE WITH COMMENTS! SOMETIMES THEY DON’T GET PUBLISHED, AND WHEN THEY ARE I AM UNABLE TO REPLY TO THEM. IF THAT HAPPENS, JUST EMAIL ME AT stitchlore@gmail.com.
Looking for something specific? Check out the Topic Index, or the Search bar, just below, on the left.
Sorry about this problem!
SO.........WHAT ARE WE WORKING ON TODAY??
Showing posts with label clear rings. Show all posts
Thursday, November 2, 2017
Friday, February 4, 2011
Sheer Hobbled Shade
Definitely a fab fabric.
It became a hobbled shade, sheer, unlined.
Since it was a reverse mount, I could not easily find a way to photograph the front. But the back is more interesting, anyhow. It uses translucent twill tape from Rowley to create the hobbles; TechStyles' cord shroud was joined to the twill tape; then the clear rings were sewn over both to secure.
The shade width was 61", and the fabric was 58" wide. The widths were joined and serged, and wide, double 2" hems pressed in, completely covering the seams. The hem was hand- blind-stitched, catching the serged seam, so no hand stitches show on the fronts.
Here's a close-up of this wonderful fabric.
Monday, November 29, 2010
Two Fab Fabrics
One is an amazing soft wool paisley, the other is.... I have no idea what. It feels like.... plastic macrame? But it's not plastic, because it ironed beautifully.
The wool became a relaxed Roman shade.
It's trimmed with a loop fringe layered over white grosgrain.
The mesh fabric became long drapery panels, which I wish I had seen on-site, but alas I only saw them here. But the homeowner and decorator flipped over them! They called twice to say how happy they were. All hand-sewn of course, except for the actual pleats. The picture does not do them any kind of justice. The top-tacked heading has translucent buckram.
Khaki chain weight in the bottom is thanks to Kelly from Scarlet Poppy Interiors in Texas who saved the day! I tried to order it from Rowley but it is on backorder. Kelly responded to my plea on the CHF Forum.
And that wasn't all. We made Roman shades too out of the mesh. Here they are not hiding the shelves full of supplies and tools. They are reverse-mounted, but we didn't have to make a self-fabric valance because they went under cornices.
The best part was, we didn't have to put in grommets- just ran the matching tan string through the mesh!
Monday, July 26, 2010
A Miscellany
Here is a collection of recent projects.
The first picture is my very own hybrid: a flat Roman shade, ribbed in back, with relaxed Roman folds over a straight bottom. We wanted the bottom straight so the relaxed folds didn't pool on the shelf and also so the bottom corners would not be uncovered. I've never seen a shade like this anywhere else, so as far as I know, I invented this myself!
If you're interested in how this is made, I'll do a separate post about it. Let me know in the comment section at the end of this post.
Imperial valances with jabots, self microcording |
Kick pleated valance in adjacent kitchen bay window. |
![]() |
Remember these pillows? Here they are on a campaign bed, with the tapestry hanging. |
Another "winter trees" shade- it just never gets old! |
Calvin Klein sheer, Roman shade |
![]() |
Self-lined, hand-sewn. This reminded me of fine Madras. |
Friday, July 2, 2010
Sheer shades, in the moment
Sheer shades continue to be amazingly popular.
This is a poly sheer which looks and feels so ethereal it's hard to believe how sturdy it really is.
I love making these shades. They're made entirely on the table so nothing shifts, and I totally enjoy the process of taking one step at a time until it's all done. Sometimes I forget, and insist on looking forward to the end of the process while I'm actually still near the beginning, and the joy goes out of the project, because it feels like it will never be done; anxiety mounts; impatience sets in; dare I say that I even feel bored. Once I re-focus on the step I'm performing that moment, I love it again.
Boredom is something I loathe more than almost anything, so I make sure not to feel that way. I always find something to fascinate me, or to think about.
Friday, June 25, 2010
Tools my grandmother didn't have!
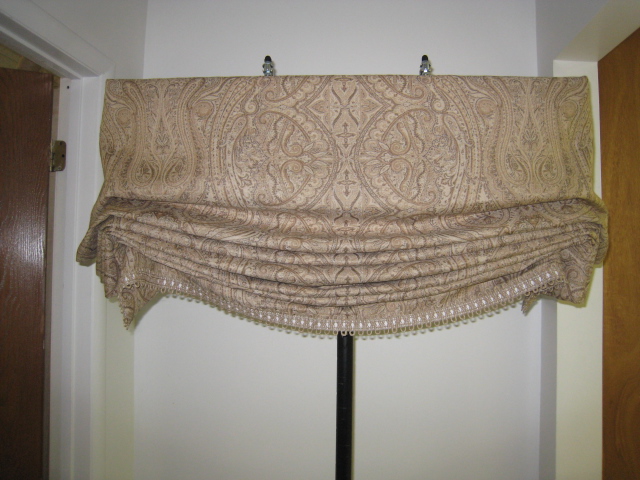
Does this fabric look familiar? Back in the winter I posted pictures of a small shade out of this fabric. It was fun using twill tape to band the edges and the shade turned out great.
The decorator wanted to use it again for this shade which is wider than the width of the fabric. We needed to find a way to join the widths.
The face fabric is a very sheer silk, with a 1/4" hemp rope woven in horizontally. The rope is very bulky, making it impossible to sew the widths, so we thought of using the twill tape to hold the widths together and at the same time hiding the join line. The twill tape is topstitched down each side, through all the layers.
This is where some modern workroom tools really made it possible to fabricate this shade with confidence.
The shade was made almost entirely on the table. Since you can see through the sheer silk and the sheer linen lining, I used the gridded canvas table to press and lay out the fabric and keep the rope lines and the lining grain line straight.
Adhesive tape was used as a basting tool. Once the half widths were positioned next to the full center width, I ran adhesive tape down the join line and pressed the twill tape into place. I also used the tape to position the twill tape used for the banding. The tapes were also pinned to keep the layers together.
Fabric staples across the top kept the fabrics from shifting while the shade went off to the machine for topstitching.
Back to the table, wrong side up, the grid again assisted in marking for the rings. As a matter of fact, I didn't even mark- I just followed the rope lines and the vertical grid lines and sewed the rings on by hand right on the table. The clear plastic rings and tan lift cord are nearly unnoticeable from the front.
The twill tape in folded in half and made a pocket for the weight bar which I sewed right behind the bottom band, following the topstitching line.
Tuesday, February 16, 2010
Another Sheer Shade challenge
Here is a sheer shade challenge for which I needed to find a fabrication method.
The face fabric is a silk sheer with jute rope woven in horizontally.
The lining is a loosely woven yet stiff linen sheer.
In the first photo you can see both fabrics laying next to the tabled shade which is being prepared.
Around the sides and bottom is a twill tape 1 3/16" wide to be folded in half and wrapped around to the back.
First I used fusible adhesive webbing to fuse the edges of the 3 sides- it is narrower than the twill tape and won't show. I wanted to do this to keep the edges from fraying.
Then I laid the tape on the back and fused it, then wrapped to the front and fused again, mitering the corners as I went.
From the front I topstitched close to the edge.
The rings are sewn on by hand, into the jute rope so no stitches show from the front.
I wrapped the weight bar with the twill tape- it just exactly made it around the weight rod and I whip-stitched it shut, then sewed it to the shade at the rings, so the rings are mostly bearing the weight.
The last picture shows the shade from the wrong side, the rod sewn to the rings. It might need more securing but I'll wait til it's hanging to determine whether or not that will be necessary.
That's as far as I've gotten- it's now ready to be stapled and strung- and I'll add those pictures later.
I love sheer shade challenges! They're my favorite shades to make, and nearly every one presents a unique challenge. Finding the solution is my favorite part of my work.
Ta-da!

The lining is a loosely woven yet stiff linen sheer.
In the first photo you can see both fabrics laying next to the tabled shade which is being prepared.
Around the sides and bottom is a twill tape 1 3/16" wide to be folded in half and wrapped around to the back.
First I used fusible adhesive webbing to fuse the edges of the 3 sides- it is narrower than the twill tape and won't show. I wanted to do this to keep the edges from fraying.
Then I laid the tape on the back and fused it, then wrapped to the front and fused again, mitering the corners as I went.
From the front I topstitched close to the edge.
I wrapped the weight bar with the twill tape- it just exactly made it around the weight rod and I whip-stitched it shut, then sewed it to the shade at the rings, so the rings are mostly bearing the weight.
The last picture shows the shade from the wrong side, the rod sewn to the rings. It might need more securing but I'll wait til it's hanging to determine whether or not that will be necessary.
That's as far as I've gotten- it's now ready to be stapled and strung- and I'll add those pictures later.
I love sheer shade challenges! They're my favorite shades to make, and nearly every one presents a unique challenge. Finding the solution is my favorite part of my work.
Ta-da!

Subscribe to:
Posts (Atom)