THE BLOG IS HAVING TROUBLE WITH COMMENTS! SOMETIMES THEY DON’T GET PUBLISHED, AND WHEN THEY ARE I AM UNABLE TO REPLY TO THEM. IF THAT HAPPENS, JUST EMAIL ME AT stitchlore@gmail.com.

Looking for something specific? Check out the Topic Index, or the Search bar, just below, on the left.


Sorry about this problem!

SO.........WHAT ARE WE WORKING ON TODAY??
Showing posts with label Balloon shade. Show all posts

Friday, May 15, 2015

Wide sheer balloons

Often the fabric for oversize treatments is both wider and longer than the work table.  For two tailored balloon shades, for Fabric Factory Outlet, 115" wide and 44" long, the 120" double-wide fabric needed to be cut 70" long and about 215" wide. 

I was not looking forward to cutting the fabric, hemming it, then tabling it to sew the rings on- every time the fabric is moved or manipulated, it has the chance to distort and get out of square.  That's why I like to make shades entirely on the table from start to finish.

 So- I decided to make the shade before cutting and hemming the fabric.  And I did!-  the fabric did not leave the table until the shade was 90% complete.  It's kind of backwards, but it ensured that the grain remained straight and eliminated distortion from hemming.

My awesome gridded fabric table cover made this possible.

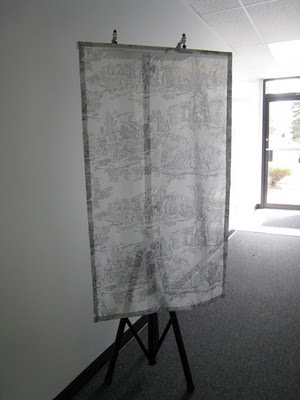
The first step was to get the grain straight by pulling a thread across the entire width and beginning the cut there.
I rolled the fabric to the end of the table, smoothed it, and lined the selvedge up on one side and lined the fold up with the 60" grid line on the other side.
I was able to see the printed lines through the two layers, so I cut the top layer at 10" to create the 70" cut.  I cut all the way to the end of the table and removed the leftover, keeping the fabric well weighted throughout.  That gave me about 144" of my 215" and I left the roll intact at the far end.
At the near end, I folded and pressed the side hems.  I did not see any upside to actually hemming the sides.  With the rings securing the hemline, the fabric stayed in place and there was no stitching or take-up to mar the sides.
I used the selvedge as the top of the shade to ensure that the board line was straight on the grain.  I moved across the table marking every 23" for the vertical ring rows.  I was able to mark 7 of the eventual 10 rows with the fabric that was on the table.
At the bottom folded edge, I marked for the second to last ring, and the lowest ring which was 3" from the edge to allow for a double 1.5" bottom hem.
I didn't have to mark for any other rings because I could see the grid through the sheer.  I weighted the shade down and got to work sewing rings.
At the far end I was able to sew most of the rings on that 7th row.
The rings provided reference points for shifting the fabric to get the last of the fabric on the table and cut.  I pulled a thread to get the straight grain, and I was happy to note that even after shifting 6 yds of fabric, it remained straight within 1/2".   I placed the rings on their marks, weighted down the fabric, and finished cutting and hemming the far edge.  
After all the rings were on, I pressed in the bottom hem, blindstitched it, and sewed on the bottom row of rings.
We used Ring Locks from Safe-T-Shade for these sheer shades.


Friday, July 29, 2011

Gathered Swags and other stuff

There is a lot of work done here that we never get to see after it leaves the workroom.   I was dying to see the opera shade featured last week and was thrilled that the timing worked out and I was able to get to the installation.

As a bonus, I got to see on-site the many other projects we've done for this home over the past few years.  I wish my photo of these gathered swags and jabots looked as good as they do in reality in the master bedroom.

For some reason, I don't seem to have a workroom shot of these treatments.  Single swags covered the small windows flanking the bed.

I do have a workroom shot of these silk balloon shades- the detailing is discussed in this blog post from April 15, 2010- can't believe it was so long ago!

And now I have an after shot, too.   That's one fancy master bathroom!

A few years ago we made medallion swags for a different room, and this past winter the designer had us re-cut them for the narrow windows on the wall leading outdoors. 

Here is how it looked in the workrooom in this post on March 11....

And a few weeks later we made pillows out of the scraps.   I love this fabric and was happy that it wasn't wasted.

One of my favorite treatments is also the simplest: a totally flat panel, on a board, to showcase the amazing Jeanne d'Arc toile print on a fine cotton sheer.  It provides just enough privacy for a downstairs powder room facing the back garden.

Here's how it looked in the workroom, on March 9.

One of the coolest fabrics ever!.........

Friday, July 22, 2011

Night at the Opera


Another Opera Balloon Shade...... 142" wide!... with 5 poufs of varying widths.  The fabric is a semi-heavy silk & rayon blend.  It's lined with napped sateen, though the draperies are lined and interlined.


Can you believe- this is the fabric?  The gold is the right side; but, amazingly, the wrong side is that acid green.

Workroom shot:

This shade is functional, but it will never be fully lowered, so when it's down it's just flat.  It was really cool to see the green glowing through the part of the fabric that was over the open window where the sun came through.

As the shade was raised, the green disappeared....

When fully raised, only the gold is apparent.  

From this angle you get a hint of the green.  This shade operates with a 30# Rollease clutch.  If you make these, you might be interested to know that the weight bar is attached 5 rings up.

Here are two other opera shades we've shown previously: this one with a header and 5 poufs of equal size, in an upholstery weight fabric-

This one with 5 narrower sections, also in an upholstery weight fabric-

Friday, November 12, 2010

Make-over

Here is one of four valances that we just made out of two pairs of draperies that we made about 3 years ago.  The client has moved house, and now has four windows in her daughter's room, so each panel of one and a half widths became one of these balloon valances.  There was just enough to allow for a ruffle for the bottom.
It's barely shirred- after it was hemmed the piece was only 75" wide to cover 54" of board (including the returns)- but the four-cord shirring tape gives the illusion of more fullness than there really is.  And they're interlined, which gives substance to the chintz.  The half-width seam is right in the middle of a pouf but it was well matched and doesn't show.
This style is very messy as an operable shade- it took a lot of dressing, and, I know, it could use a little more!  We used 54" in length of face fabric, plus the ruffle, to make these valances.  We tied up three rings and the valance is adjustable so it can be set where the decorator likes it.   I like it set here at about 30" long.

Friday, September 10, 2010

Experimenting

When we aren't sure how to make something, we do mock-ups.  Usually we make them out of scrap fabric, but here is a mock-up out of the actual product, a sort of balloon-London hybrid.
Originally we mocked this up to see about trim placement, but in the process we also worked out a way to shorten up the tails.
The client does not like the tails to be longer than the shades.  Tail length is just a numbers thing, it's a product of the size of the return, the size of the side section, and the depth of the pleat.  In this case that added up to quite a long tail, as you can see on the left side.
We pinned this shade together and attached the rings, then experimented by pinning a sharp taper on the right side to get the tail length we wanted.
Decorator and client are happy with the results, so now to finish this one and make two more!
If I don't forget, I'll take pictures of the layout as we make them, and the final shades.

Wednesday, September 8, 2010

Another opera balloon shade

It's flat when fully lowered, and pulls up dramatically, magically.  I left it hanging in the workroom for the decorator's twins, four and three quarters years old by their reckoning, to see when they accompanied their mom to pick it up.  They were enthralled by the shade.  And I was enthralled by them.  I wish I'd taken a video of them raising it!
See how the pattern laid out?  The blue flowers are arranged nearly symmetrically.  That was the purest luck!  The board is 65" and I had 2 widths of fabric to work with.  There were no choices to be made about how to lay out the pattern- it could only be how it was.  Luckily the eye-catching blue is the most perfectly placed.

Monday, July 12, 2010

Opera Balloon Shade

I just love the drama of an opera balloon shade.  
I asked the decorator to wait til the installation was finished before coming into the room.  
When lowered, this shade is straight across the bottom like any ordinary balloon shade, but the special stringing method causes an opera shade to raise its sections to different heights.
So for the decorator we staged a theatrical curtain raising, and it got rave reviews.

Thursday, April 15, 2010

Pleated balloon with header


These pleated balloons have separate headers, with lip cord in between and a loopy braid run horizontally across the center of the header.
This is a silk plaid which was railroaded in order to get the header out of the most appropriate section of the plaid.
It's interlined, and as you can see trimmed at bottom with a tassel fringe.
Though they will be used as stationary valances, we have strung them with a cord lock so the length can be adjusted on-site.
I don't see all of the treatments we make here in the homes for which they were created, because, as in this case, a lot of designers pick them up and arrange and supervise the installation.
I dressed these for the photo but dressing is NOT my strongest point!

If anybody wonders if blue is back, take a look at the trims I have sitting in my workroom for current jobs.  There was one more that I forgot to include.

The side hems on these shades were sewn by hand.  I took the opportunity to practice hand blind-hemming, although there was no need to use that technique here.  Once you get the hang of it, it goes almost as quickly as a slip stitch, but it does take practice.