THE BLOG IS HAVING TROUBLE WITH COMMENTS! SOMETIMES THEY DON’T GET PUBLISHED, AND WHEN THEY ARE I AM UNABLE TO REPLY TO THEM. IF THAT HAPPENS, JUST EMAIL ME AT stitchlore@gmail.com.

Looking for something specific? Check out the Topic Index, or the Search bar, just below, on the left.


Sorry about this problem!

SO.........WHAT ARE WE WORKING ON TODAY??
Showing posts with label inverted pleats. Show all posts

Monday, April 15, 2019

A pleat-to-pattern natural

Pleat to pattern, pleat to pattern, are we tired yet of pleat to pattern?  UMMMM...... NO!
At least not on this project for Crosstown Shade and Glass.
Pleat to pattern just keeps getting more fun.  This applique stripe is such a cool fabric, OF COURSE it had to be pleated to pattern.
The homeowner's original idea was ripplefold draperies with this fabric.  I made mockups to help the client and designer choose how to best show off this pattern and address the practical issues.
With ripplefold, half the fabric goes to the front, half to the back, just like grommet draperies.  A workroom sample like this helps everyone visualize the effect.
I did a mockup with buckram on a string to simulate the profile. 
We also made a mockup of inverted pleats, so the client could compare styles.  This creates a wave effect, which visually is very similar to ripplefold, except instead of a backward-projecting ripple, that fabric is pleated to the back and stitched down flat.
Guess what, inverted pleats were the choice.
The pleats are sewn to the back, instead of to the front as they are with pinch pleats. 
Since these draperies were unlined, we French seamed the widths together, so there were no raw or serged edges.
The pleats were flattened out and "stitched in the ditch" on the front.
The pleats lie flat, but once they're hung on a rod, the flat part rolls forward like a wave.
Everybody was happy with this project!


Monday, January 1, 2018

Oversize panels

Until this project, I had never made panels longer than my 12' table.
When my designer friend Liz began furnishing her Florida home, she asked me to fabricate her 14' long draperies in my NY workroom and ship them to her.
We first mocked up the pleats to determine the pattern layout.  This fabric lent itself beautifully to inverted pleat.
The embroidery was irregular, so I worried a little about the geometric shapes not aligning perfectly, but at a height of 168" the small variation is totally not noticeable!
 The family room panels are pleated to pattern with a two-finger pinch pleat and 5" buckram.
Most of the panels in this home were 1.5 widths, but this corner required a 3-width panel.
I've made plenty of oversize shades, so that experience was helpful in managing the fabric volume.  It also helped to have taken Ann Johnson's excellent "Super-Size Me!" class on how to handle all kinds of oversize treatments.
First I worked the bottom 12' of the panel, shifting my way across the 3 widths, making sure to baste a precise horizontal line so I'd have an accurate reference line for shifting to the top.  (You know I love to baste!)  Once the bottoms 12' of the 3 widths were finished, I shifted the fabric to fall off the end of the table, and worked back across the 3 widths to complete the tops.
This entire project was intense!  I was working so hard, I did not take a single photograph during the fabrication, which I now regret.  Next time.  Ha. 
The master bedroom panels are a mere 126" long, by comparison a breeze.  I don't have good photos of this room yet so I'll just show the pretty pleats.
The embroidery made the pleat tops flare out too much, so I secured them at the back to control them and make them uniform.
My next oversize project is going to be a hobbled shade 158" wide and 75" long.  Always an adventure!

Tuesday, June 21, 2016

Some recent projects

I have been so remiss lately, totally forgetting to document our daily fabrication adventures!  Partly because we're busy, and partly because I some projects can't be photographed, and partly because I just forget.
So here are some post-installation photos of some recent projects.

Denise Wenacur turned this window seat into a colorful and tasteful space that a young girl can grow into.  Is glazed cotton making a resurgence?  Both of these prints were somewhat glazed, especially the cushion fabric.  It was a delight to sew, and the geometric design made it super easy to match the pattern on the boxing to the main body.
I opted to alternate motifs on the valance.  The valance is 18" long, and to have the sections all literally match just seemed too much.
In the guest room, I got to reprise the hybrid soft cornice with kick pleats that I had so much fun making earlier in the year.  You can't tell from the photo, but the light color diamond pattern is a fairly heavy chenille, so there was a bit of a challenge keeping the bulk off of the board at the ends. 
Here is the same style we made back in March.  I posted a how-to at the time, here.  We made these new ones the same way, on buckram with interlining, minus the trim and lip cord.
The room is not quite finished, but the window treatments will be an important component.
Let's see, what else?  For Suzie of Cottages to Castles: blackout draperies, 4 widths each side, out of a horizontal striped faux silk?  I did have help fabricating these- that's quite a handful of fabric!  We used double-wide "Silky" blackout so there would be no seams with light leakage.  These curtains are installed on a motorized rod.
And how about this room for D. S. Interiors, full of inverted pleat, mock wave curtains?  Every single space had a slightly different finished length, so we pattern matched from the top down, using 4" fusible transparent Dofix buckram.  What a breeze that product made the project!  The tucks were pleated to pattern so the geometric motif is the same on every "wave."  The bottom hems were barely 1" so there would be a minimum of embroidery showing through the double fold.  White chain weight helps the fabric stay put.  The measurements were so unequal, sometimes even on one single window, so we mostly split the difference to keep the bottom line of the curtain as much the same as possible.
Well, that's all for today, folks!  More next time........

Tuesday, October 14, 2014

Two Pinch Pleat projects

Well, the premise of this blog is that our projects are shown mostly in the workroom, warts and all, but, I do sometimes wish I had "after" photos!  I go along on some installations, but often the products are picked up and I never see them in the homes they were designed for, and never get good photos in situ.
Here are two such projects.

Eventually I will get to the house to photograph this one.  Meanwhile, here are a few shots to show how this treatment was assembled.
These pinch pleats were fabricated from an amazing linen with a beautiful drape, at three times fullness; the lead edges are trimmed in a gorgeous woven banding.
While we've mounted plenty of inverted pleat panels to waterfall over a flat topper, this is the first time we've mounted pinch pleats over a topper.  We fitted the topper with screw eyes so the panels could hang with drapery hooks at the pleats, and added velcro so the header would fit snugly without drooping.
We used fusible velcro for the panels themselves.  I didn't realize how long that would take- 90 seconds for each little piece, holding the iron hovering over each strip- but it is very secure.  There's a half hour out of my life that I'll never get back!


I do have an after picture of this pair of side panels, for Monica Plotka Interiors, but they're wrapped up for training!  So while it shows the finished product, it's not exactly the "money shot."  However, you can see how beautifully they turned out.
Originally the plan was inverted pleats, but after mocking up and sending pictures to Monica, she decided to go with pinch pleats instead.  Inverted pleats really brought out the geometric aspect of the fabric, and it was a bit too much.

Two-finger pinch pleats were just right.
The lead edge side hems looked too plain- we needed every bit of the pattern to achieve the pattern layout- so a microcord on the hem gave a more finished look.


Wednesday, May 15, 2013

Little inverted pinches

Diane Satenstein loves to dress her rooms with flat panels- a more casual style for a home's less formal rooms.  We use 2" clear buckram in the header for sturdiness and fluidity, and make tiny backwards pinches.  That gives the pins something to grab onto, and makes the top easier to control.  Recently we installed this style in four rooms of a house that Diane has been working on.
Kitchen- a long window that goes nearly to the floor.

Exposed glass is maximized by using a button holdback.

In the master bedroom, interlined silk is pleated to pattern, though that's not too obvious in this photo!
I love this star-flower!  Fine quality silk is luminous with the sun behind it.
In the dressing room, unlined embroidered, incredibly sheer, silk organdy.
Exotic looking trim against that sheer defines the line of the lead edge.
In a teenager's bedroom, blackout shades provide privacy, and ultra-cool fabric provides fun.
This was entirely hand-sewn; and not as difficult as it looks like it would be.

Wednesday, February 22, 2012

In a Purple Haze

I've noticed that purple is a popular decorating color in the winter.  February's birthstone is amethyst, which perhaps reflects an increased attraction to purple when it is cold and dull outside- it sure does pep up a subdued palate.  Still, it was surprising to have SO MUCH purple in-house this winter.
On February 4 I took this picture of purple fabrics that came in for immediate projects. 

These purples were mostly paired with natural, sage or loden, or silver-grey.

The project that kicked off purple month was a simple purple burnout velvet panel, box-pleated onto a board, with purple glass beads shown off when the fabric is draped back to one side.

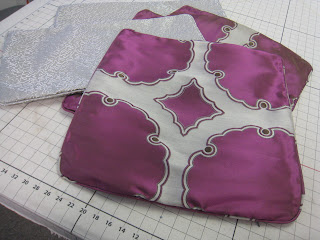
Next were pillows in silver and purple, balanced with a hint of loden in the outlining:

Then a 165" valance and panels of a gold-dusted natural silk, color-blocked with silver-grey and purple satin.  These did not photograph well, but in the house they are fabulous. 

Four neo-bohemian shades were exuberant with their purple borders trimmed with purple and sage glass beads:


The Sheffield Queen lined what felt like a couple of miles of valances with purple, trimmed with purple fringe: 

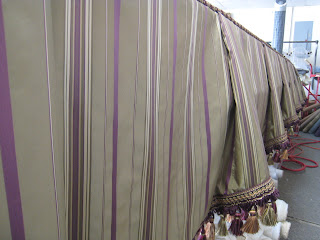
Here the sage and purple face fabric stretches across the workroom into infinity, or at least it felt that long:

And for the last purple project of the month: just-the-other-side-of-periwinkle-purple bands and welts the sage and purple toile on this goblet pleat valance: