THE BLOG IS HAVING TROUBLE WITH COMMENTS! SOMETIMES THEY DON’T GET PUBLISHED, AND WHEN THEY ARE I AM UNABLE TO REPLY TO THEM. IF THAT HAPPENS, JUST EMAIL ME AT stitchlore@gmail.com.

Looking for something specific? Check out the Topic Index, or the Search bar, just below, on the left.


Sorry about this problem!

SO.........WHAT ARE WE WORKING ON TODAY??
Showing posts with label pillows. Show all posts

Thursday, October 17, 2019

Tale of a Bunny Tail Trim

What a perfect combo- this Sanderson bunny print "Dune Hares," and soft grey "Strata Marabou" trim from Samuel and Sons.
This fuzzy brush fringe has tape on both sides, and I had no idea how to apply it.  I tried a few different ways, including attempting to baste it on by hand, all with dismal outcomes.
However, thanks to our marvelous workroom network, after posting an inquiry I got enough suggestions to cobble together a process I felt comfortable with, and started out with some confidence.  If I had to use this again, I might try another method, but for my first time, this is how I did it.
Before I began to sew, I had to satisfy my curiosity about the name "marabou."  First, a "marabout" is a west African Muslim ascetic and teacher.  A "marabou" is a sub-Saharan stork whose hermit-like habits I presume gave inspiration for the term for the reclusive saint.  The feathers of the avian marabou were used in fashion- think Mae West in a boa, or that fluffy, feathery trimming on high-style garments.  Nowadays you can buy fake marabou feathers or marabou trimming made from turkey feathers from places like Walmart.  And in home dec trimmings, the term seems to have expanded beyond feathers to include fluffy, bushy trim from any material- such as wool or silk, or in this case, poly/viscose.
Back to the bunny pillow.  I sewed the two layers of tape together- and I still am not sure if this is how it's intended to be applied!- but this is how I started.
I sewed it to the pillow edges with a skinny foot.  I know, I know, I know about using a cording foot with the cord down and the fabric on top- but this is how I did this.
I put right sides together and sewed around the perimeter- not too close.
I turned to the right side and used the edge of a scissor to pull out fringe fibers that had gotten stuck in the seam, and then I could see how much further in I needed to sew.
I sewed again from the other side of the pillow, still with the skinny foot.
THEN I switched to a cording foot, turned the pillow over one more time, and sewed from the other side.  This last go-around did the trick.   I'm sure you wonder why I didn't begin with the cording foot.  Well, I feel that I could not have sewn the trim effectively if I had just started from this point- I feel that I would've gotten too much fiber caught into the seam.  I could be wrong, but this is the method I used and I'm sticking to it.
There was no way to sew a zipper to this, so I sewed the pillow closed by hand. 
It was tough sewing, and it took about four times longer than a normal pillow, but it turned out great!

Friday, August 10, 2018

Tapestry to pillow

An opportunity to improvise always makes my day, especially if it involves basting.  Crosstown's client brought in a beautiful tapestry to be made into a pillow.
The tapestry had finished edges and the client wanted to keep them- the goal was to make them look like welting.
Felted navy Ralph Lauren wool was chosen for the pillow back- an excellent choice because it is stable and doesn't fray.  We put an invisible zipper a couple of inches up from the bottom of the pillow back, then folded and pressed the long horizontal edges to the size of the tapestry.
 Using an easy-to-see contrast thread, we basted the tapestry to the backing.
You know how much I love to baste!  
 
The tapestry was sewn with a zipper foot very close to the woven edge detail.
The pillow was turned inside out, and the ends were sewn top to bottom.
When turned right side out again, the back topstitched seam was barely noticeable.
This is one project I would love to have been able to keep for myself :)

Wednesday, December 6, 2017

Mastering the Miter, one corner at a time

A miter queen I definitely am not- I know a miter queen or two, but I'm not one of them!  I have to carefully think my way through it every time.  As with many fabrication tasks, such as installing zippers in pillows, the only way to become proficient is to practice, practice, practice.
For these pillows, precision was key.  The Samuel and Sons 2" woven braid had to be turned into a 1/2" mitered flange.
When I made a trial flange, I immediately discovered that the soft braid would not hold its shape.
This was not the precise, tailored look I needed to achieve.
I made another experiment using fusible fabric stabilizer from Rowley Co. 
When I trimmed and turned the corner, there was the look I was going for!  The stabilizer gave me control over the shifty tape.
So I got out my rotary cutters and cleared my mother-of-all-cutting-mats tabletop.  I needed a sharp blade for the stabilizer, so I put a fresh one in my cutter.
I cut the strips just shy of the trim width.
I learned the hard was that the tape should be ironed on OVER the stabilizer, not the other way around.  A few miles of ironing later.....
Nothing for it but to plunge in and get started.  Once you get the hang of it, this is actually fun.

Maybe the Miter Queens can do the rest of this job with math, but I can't!  I pinned the flange to the table to mark the exact spot for executing the next corner- another use for my can't-live-without gridded table canvas from The Workroom Channel.
The pressed fold helped make it easier to be precise.
 I completed the corners one at a time, going back and forth from table to machine (it's only 3 feet away, LOL) for each step.
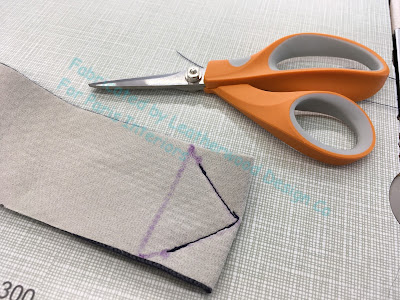
When they were done I laid the trim out to cut and pin the join, in the center at the bottom.
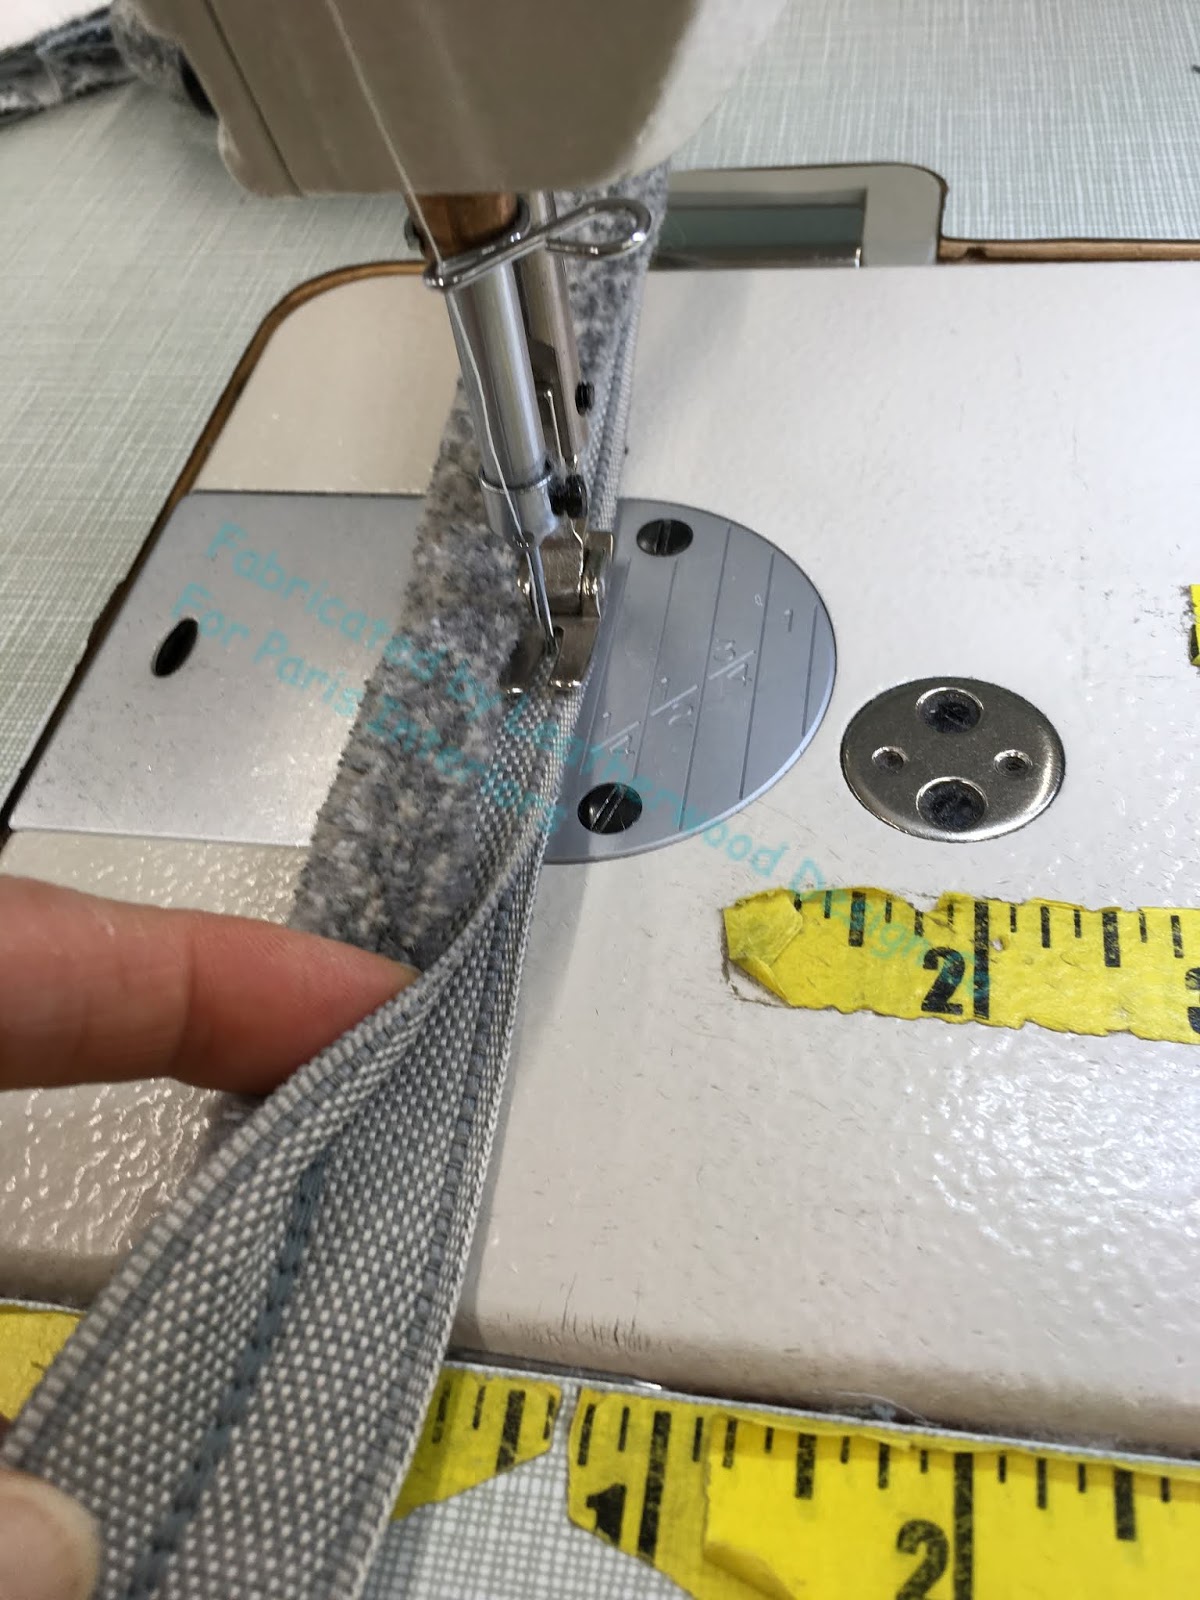
 The last step before applying to the pillow face was to stay-stitch the entire perimeter just inside the final stitching line, to keep the layers from shifting.
The completed trim was sewn to the pillow face as if it were a lip cord.
I just barely tapered the corners, to help avoid pointy pillow ears.
The pillow was finished the ususal way- right sides together and a color-matched zipper.  The rule for color-matching with a contrast zipper: match the trim, not the fabric.  This holds true 99% of the time in my experience.  Now they're ready for their new owner!

Thursday, January 19, 2017

Pillows, no frills, just good workmanship

More and more, the pillow orders that come my way are unembellished: no trim and not even self-welt.  These pillows are usually made from fabrics that speak for themselves, like this embroidered beauty.
On first glance it seems that without self-welt, the pillow would be quicker to make; but when there's a pattern and no welt to separate the front and back, it's important to be even more meticulous in the fabrication.
A neat, trim, sophisticated appearance starts on the inside, with tapered corners clipped close to the stitching to prevent pointy pillow "ears", and overlocked seams.
Thoughtful cutting helps the fabrication: the top and bottom seams were planned for in between the embroidered teardrops to minimize bumpiness.  Seams are pressed flat before stuffing the pillow.
Theses pillows were well-pinned before sewing, to make sure the embroidery was aligned for mirrored motifs on the side seams.   You can see how the seam is tapering in towards the corner.

My favorite detail is a perfect color-matched invisible zipper!  The zippers in color Pearl come from The Zipper Lady.