THE BLOG IS HAVING TROUBLE WITH COMMENTS! SOMETIMES THEY DON’T GET PUBLISHED, AND WHEN THEY ARE I AM UNABLE TO REPLY TO THEM. IF THAT HAPPENS, JUST EMAIL ME AT stitchlore@gmail.com.

Looking for something specific? Check out the Topic Index, or the Search bar, just below, on the left.


Sorry about this problem!

SO.........WHAT ARE WE WORKING ON TODAY??
Showing posts with label blackout with ribs. Show all posts

Friday, February 10, 2017

Extra long shades

Our workroom has standard 8' drop ceilings.  I had an order for 4 shades 42" wide and 99" long.  Since the shades were being shipped to Florida, I was not going to be at the installation, so I had to find a way to hang them.  Enter John: he took out a 48" ceiling panel, extended our hydraulic stand, and we raised them up into the ceiling so I could level them!
Not only were these shades long; they also were blackout lined with my no-pinholes method and ribs; and because circumstances necessitated mounting them on the molding, they also needed to be reverse mounted with a valance.  I used my standard no-pinholes method with ribs, which means working from the inside of the shade.  The combination of Bella Notte Duette (bonded with flannel) and Bella Notte Silky blackout makes a very handsome and substantial shade.
My favorite lift system for a reverse mount is a system such as Rowley's EZ-Rig, whose headrail comes with velcro on one side.  The shade goes on the back of the headrail so it will be snug up against the window molding and let less light in the sides.
I hand-basted the layers together at the top, then fused Dofix velcro to the face.  I did worry because of the weight so I took the totally completed shade to the machine and sewed the velcro for extra security.  This was a little awkward because the ribs and weight bar were sewn inside the shade, but since they were only 42" wide I managed it.

I left the basting stitches in and I left the raw edges- blackout linings don't fray, and the fused velcro hid the face fabric raw edges.
Each lift line needed a grommet for the cord to pass through to the front.  They need to go as high up as possible without causing any buckling; I usually put them about 6" below the top.
The shades were strung using Ring Locks from SafeTShade in order to be compliant with the safety standards.
I wasn't sure how long the valance would need to be to cover the grommets.  After the headrails were mounted on the boards we raised one up with a piece of paper taped to it to see how long to make the valances.  
The self-lined valances had to go 1" farther back than the board, so they would reach the wall.  I wanted to fit them with velcro to make the underneath more accessible for the installer, so I mitered the corners of the valances and added Dofix fusible velcro.

That is sweet!
Regular hook velcro from Rowley was stapled to the back edge of the board.
They fit beautifully and the installer's job was easier since he could peel back the corners to hang the shade.
Eventually I hope I'll receive photos of the installed shades, but for now, a table shot will have to do.

Friday, September 9, 2016

Blackout shades with no pinholes of light

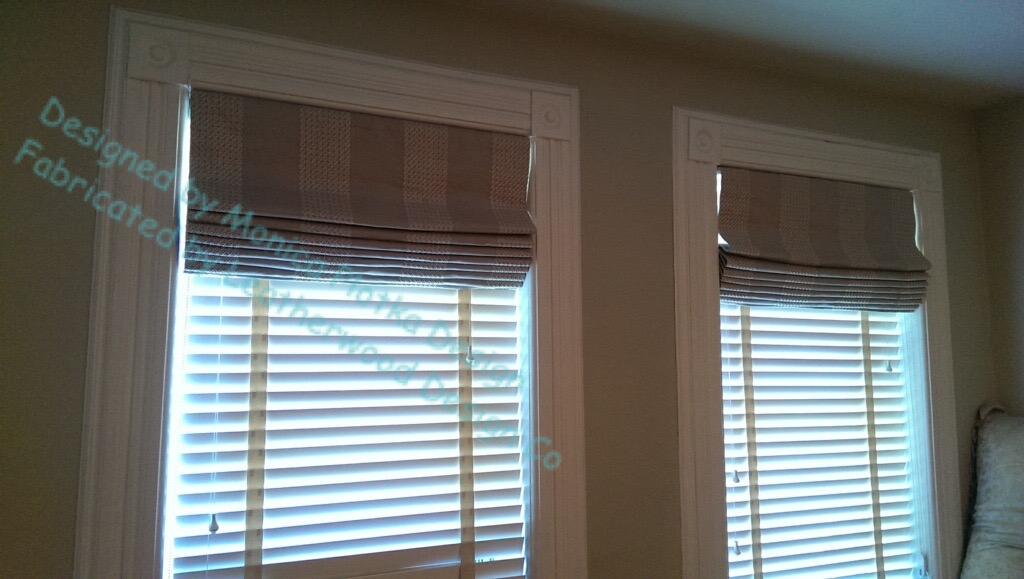
They might look plain, but these blackout shades for Monica Plotka Interiors are some of the best shades I've ever made.  There are no pinholes of light sneaking through the blackout.
The fabric is a thin, blueish-grey linen sheer, with a chambray feel to it.  The first step, as usual, was to pull a thread to get a line for cutting on the grain.
The inner blackout lining is Bella Notte Silky "Duette" which has an interlining bonded to one side.  The outer layer of blackout lining is "Silky" blackout.  The bottom hem is reinforced with fusible buckram, and a weight bar tube is run at the top of the hem and lightly secured with Jewel tape.
My No-Pinholes method is constantly evolving, and this is my best version yet.  All stitches are staggered so no light can peep through.
 Ribs have been sewn in, in between the rings, so they fall at the fold lines as the shade is raised.  The side hems are secured with Dofix and reinforced with the sewn rings.
The resulting shade is substantial and important-looking.  It's hard to believe it started as a delicate semi-sheer!  The method and materials used are perfect for the project, but I can also imagine how beautiful this linen would be as hand-sewn semi-sheer cafe curtains.
The shades were left up for days so the folds would train.  The linen has a memory of the folds, and the ribs in the front of the folds keep the fabric from buckling, so no dressing is needed.  I'm super happy with this job!


Sunday, August 16, 2015

About those blackout shades with no pinholes of light.

Back to the blackout shades.
The pinholes of light that come through where stitches are taken in blackout fabric are the bane of shade fabricators.
For the past year I've been thinking about how to eliminate those dots of light, experimenting with different products and methods.  I've focused on layering blackout so that one hole is blocked by another layer of blackout.  My secondary goal is to make this process as quick and efficient as possible.
Here's my favorite method so far.
These shades were made with an inner layer of Bella Notte Duette, to provide an interlining-like layer, with Silky Blackout on the outside.
The Silky layer was folded back and a ring-placement grid marked on the Duette.
A needle was threaded for every inner row of rings, in this case just two, and a stitch taken through the Duette and face fabric, about 3/16" to the side of the grid intersection.
The Silky was folded right up to the line, and the needles inserted right at the grid intersection.
The Silky was turned up and the threads pulled through and the ring sewn.  Those stitches are far enough away from the holes in the Duette that all the light is blocked!
All that's left is to do the side hems, and they don't really need special treatment.  However, ribs were requested for these shades, so they were simply slid in over the rings- no pockets!
I felt like I wanted to secure the ribs a bit, though it probably wasn't necessary.  I ran a double-sided adhesive tape to stabilize the ribs and secure the two lining layers.
Another strip of tape secured the face fabric to the Silky, and rings were sewn on the outer edges.
Ta-da!

Thursday, March 14, 2013

Fab Fabric Friday

Is it Friday yet???  If it's not, it should be!
I'm running so behind on blog posts that I think I'll bump Friday up a day.

This cityscape from Kravet is one of the most fab fabrics I've ever used.

All the shades for this home (we've done 33 so far!) have been French blackout lined, with ribs, and Rollease clutch lift mechanisms.

The rib pockets are sewn to the inside of the lining, which becomes the outermost of four layers of fabric, along with black sateen, interlining, and face fabric.

After raising and lowering just once, these folds were perfectly trained.
You can see that this fabric has a high sheen- it's almost satin-like in finish though not in weave.

For a lower level guest bedroom, three shades in a row provide privacy, darkening, and urban pizazz.

Monday, March 28, 2011

Today I got the chance to go see some of our recent work, installed.
Flat panels with rings; Roman shades.  All is lined with blackout to reduce light bleed from embroidery.


Drool


The valance is slightly curved to follow the arc above it.

Ribbed shades strung with JK mesh tube cord shroud.  The rings are sewn on and the cord and shroud fed through the rings. Then the mesh is secured to the ring with a clear miniature tie wrap, clipped short.  
The flat panels have 10 rings per width, spaced about 5" apart, for a casual, ripply look.
 
Stitched channels keep the drapery hooks in place.

Monday, January 17, 2011

More Pink Cuteness

I was not a pink girl- I rather loathed it, actually- but eventually reconciled myself to pink under certain circumstances, especially combined with closely related reds, oranges, corals, and other pinks.  Here is a shade combining two pink stripes with an orangish-red pompom fringe.

Rib pockets are fused to the inside of the blackout lining.


Encased cord