THE BLOG IS HAVING TROUBLE WITH COMMENTS! SOMETIMES THEY DON’T GET PUBLISHED, AND WHEN THEY ARE I AM UNABLE TO REPLY TO THEM. IF THAT HAPPENS, JUST EMAIL ME AT stitchlore@gmail.com.

Looking for something specific? Check out the Topic Index, or the Search bar, just below, on the left.


Sorry about this problem!

SO.........WHAT ARE WE WORKING ON TODAY??
Showing posts with label binding. Show all posts

Tuesday, January 8, 2019

Grosgrain ribbon binding as banding for shades

When banding is intended to go right at the edge of a shade, rather than inset, I do love the look of it wrapped around the edges, for a super clean look.
This does present challenges for inserting a weight bar, if you like your weight bar at the bottommost ring, as I do.
Here are two similar shades which were fabricated with different methods.  Yes, I know I'm showing them out of order.  That's because I like Method B better and want to show the better way first :)
For both of these shades, grosgrain ribbon was used as the wrapped binding, but the same methods would apply if the binding were a contrast fabric.
You can see that the results are pretty much the same from the front:

METHOD B- WEIGHT BAR INTERIOR POCKET
METHOD A- EXTERIOR WEIGHT BAR POCKET
METHOD B- INTERIOR POCKET
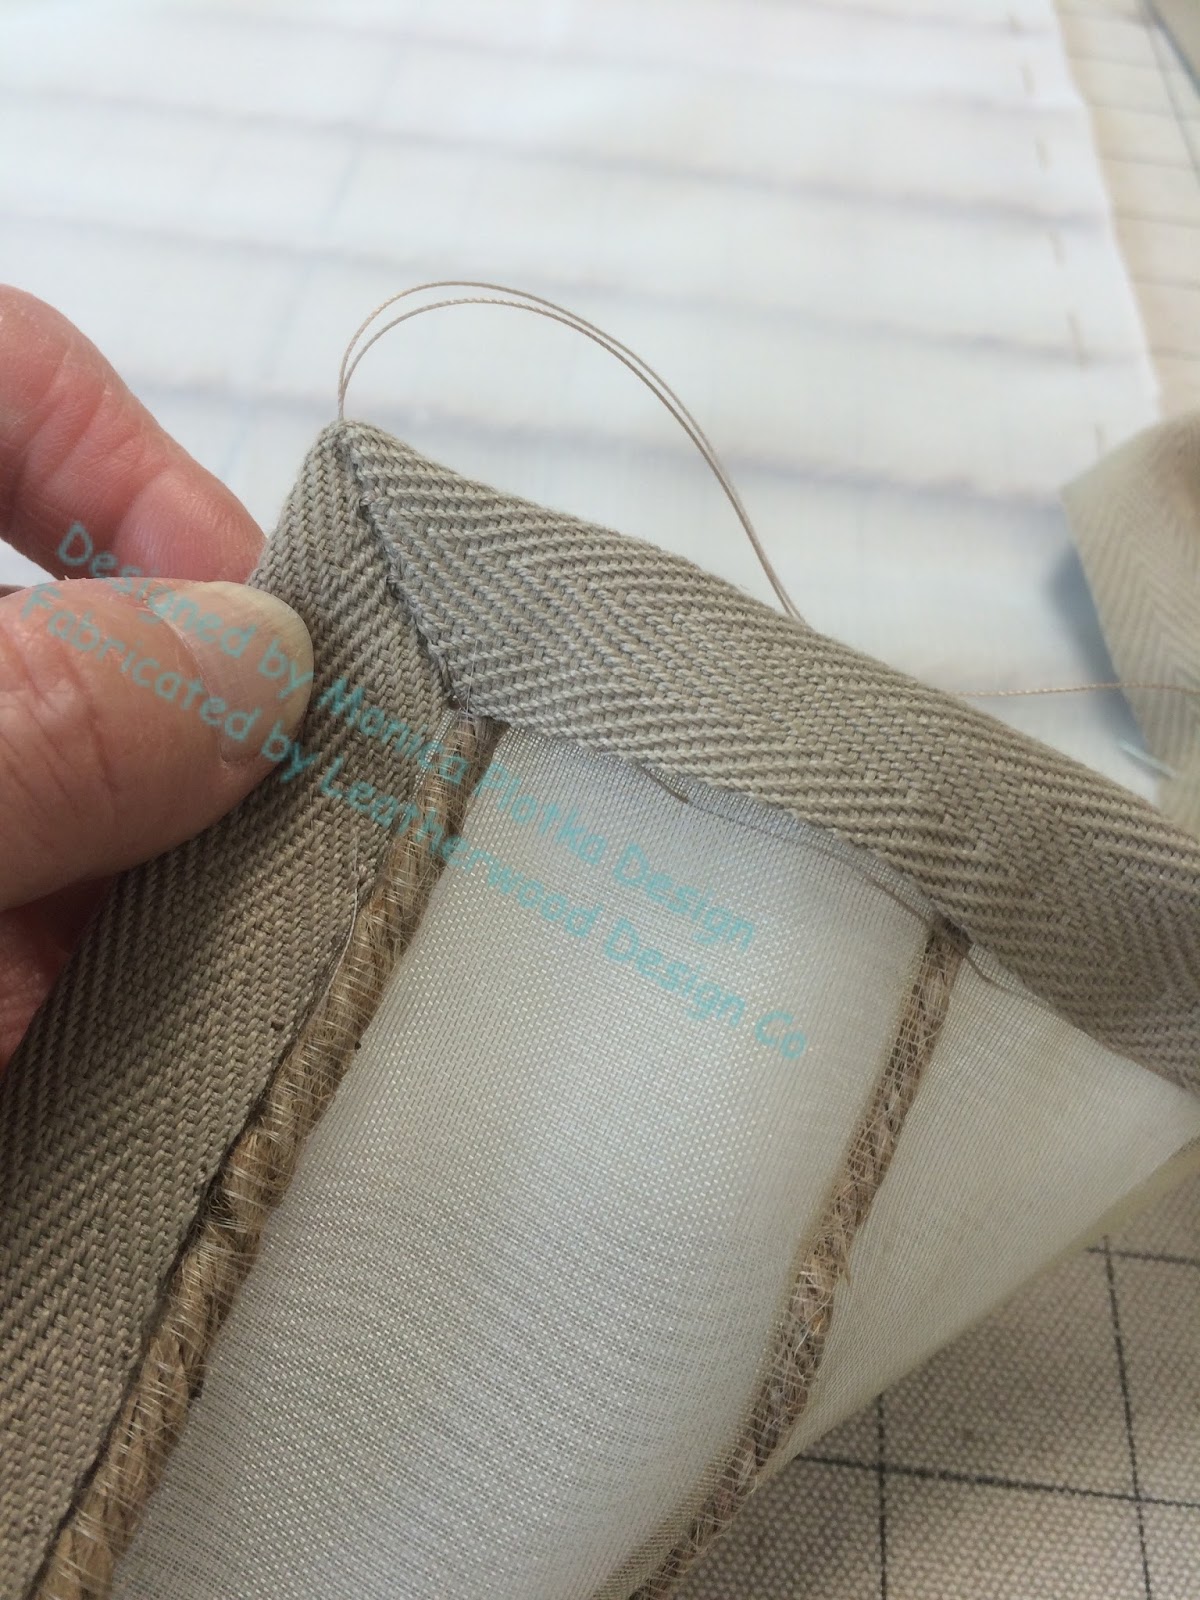
For this three-sided shade, we sewed a pocket in the lining for a flat weight bar.
The grosgrain binding was sewn to the shade face and pressed finished.
 A pocket was sewn in the lining to accommodate a weight bar.  The prepared lining was layered on and the bar inserted.  We used a flat bar to avoid the bulk of a heavier round bar. 
We added a second flat bar to stabilize the bottom and keep it square.  It also helps by adding a bit more weight.
The binding was hand-sewn.
The miters on the front were ladder-stitched by hand.
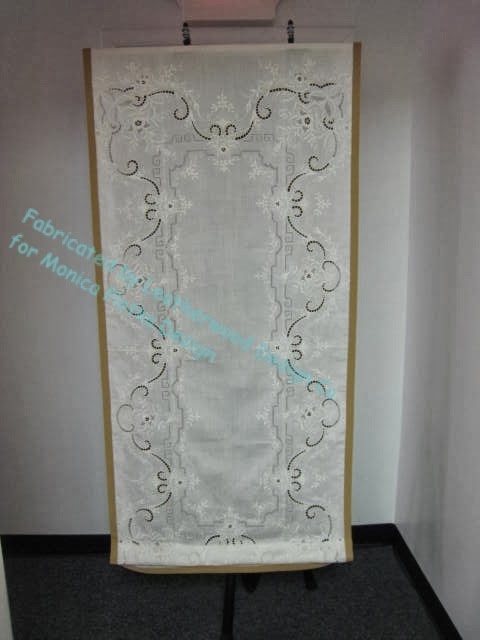
This was an aesthetic improvement over a previous similar shade, where we chose to tack the weight bar pocket  to the outside back of the shade.  However, the exterior pocket method does allow us to use a heavier weight bar, which helps when raising the shade, and this shade was much longer than the one I just showed.  We covered the ends of the pocket with the contrast ribbon, in case it showed from the side.  We also added a second flat weight bar at the bottom to keep the bottom edge straight.
In this case the ribbon was applied with Dofix fusible Bortenfix.  At the lowest fold you can see the bit of navy ribbon covering the ends of the weight bar pocket.  It's set in enough that it isn't visible from the front.
The results from the front are basically the same, but the pocket version is so much better on the back.  Also I think the sewn ribbon folds better than the fused ribbon.
P. S. I like to cover the ends of the boards with a bit of binding material, whether it is grosgrain or fabric.


Friday, August 26, 2016

Silk and jute sheer shade

I've worked with this silk and jute fabric before and it is always a pleasure. 
Designer Monica Plotka shares my love of twill tape binding and we've used it to bind this fabric which really cannot be hemmed.  This shade is lined with voile.
When working with sheer fabric, my first step is to pull a thread so I can cut along the grainline.
I basted the voile around the perimeter of the silk, both cut to the exact finished size.
Before finishing the edges, I sewed the clear rings to the shade.  This stabilized the layers further.
To apply the twill tape, I started with the bottom edge, on the back.  I nestled it up next to a row of jute and basted it in place.
Then I flipped the bottom up and hand-sewed the right side, making sure that the twill tape was caught on the back as well.
I turned the corners and started working the miters into place.
After securing securing the corners on the back, I folded the twill tape to the front and pinned it.
I finished hand-sewing the tape from the front side, catching both sides with one row of stitching, and ladder-stitched those pesky mitered corners.
For the weight bar pocket, I used a piece of translucent buckram, folded in half and stitched, and inserted a piece of 1/2" acrylic rodding, which was nearly invisible from the front.
Done!

Friday, January 15, 2016

Soft Cornice Magic

I'm entranced by the versatility of the soft cornice.  This particular one, for Monica Plotka Design, showcases an awesome fabric from R. M. Coco.
 I used the stripe in the motif as binding at the bottom.
I fitted the fabric onto two layers of buckram padded with interlining, then worked the cutout to fit the fabric design.
The shape was cut and the layers bound together with a little drizzle of white glue to keep them from shifting.  Even though the binding is sewn on, it first was secured with fusible adhesive tape.  I wanted to position the stripe and form the inside and outside corner turnings before beginning to sew.  This is a great time-saver because it keeps the binding from shifting as I sew. 
Now that I've learned the ladder stitch, I can't seem to live without it!  The binding is ladder-stitched to the face.  Because the fabric has a puckered look, the lines are not perfectly even.  But that is part of the charm.
After the face was prepared and the bottom turned back, the reverse side was covered with black lining and hand-stitched in place.  I couldn't do a proper ladder stitch here but it doesn't matter.

There are no returns- it fits between two cabinets and the board had to be just 3/4"- it seemed like returns would just be a distraction.
I want one!!!


Thursday, January 30, 2014

Vintage tablecloth re-purposed

Monica Plotka called me for this project, knowing that I would thoroughly enjoy it, and I sure did- this is one of the coolest shades I've ever made.  Her client dipped into her stash of vintage textiles and brought out this embroidered linen cutwork tablecloth to remake into a shade.
This very fine white linen pressed beautifully.  After the whole tablecloth was ironed, I marked out the exact finished size plus 1.5" for the board, then cut it out carefully, leaving the perimeter intact because..... well, just because I couldn't bear to cut into it.
Because of the openwork areas, it was easy to see the grid of the table behind the fabric.  That made the layout easier.
2" French cotton grosgrain ribbon was adhered to the back with Sealah tape, then pressed around to the front, mitering the corners along the way.
From the front, the ribbon was topstitched all around.

A length of Rowley's weight bar tubing was machine-sewn 3" above the top of the ribbon, the stitching ending right before the ribbon, with an extra couple of inches left at each end.
The first ring started 6" above the fabric tube, with ladder tape.  After all the rings were sewn on, the weight bar tube was folded up to meet the bottom rings, and tacked to that bottom ring.  The weight bar was inserted into the tube, and the ends finished. 
The fold created one permanent pleat at the bottom, even when the shade is fully lowered; the extra fold hides the weight bar pocket stitching, and any other clutter that might show through the open areas.
This project was right up my alley!  Thanks Monica, I'll do this again any time!

Friday, August 30, 2013

Fab Fabric Friday- fab fabric combo!

Monica Plotka loves natural fibers and interesting fabrics as much as I do, so I was excited about making for her these relaxed roman shades with an unusual combination of materials.

On the face, a white slubby windowpane sheer provides pattern, which is tinted by the lining, a gauzy khaki linen sheer.  A slate twill tape binds the edges on three side.  After layering the two fabrics, I basted the twill tape all around before folding in half to sew it down by machine.
Designers' Resource in Lodi carries a khaki ladder cord shroud which blended perfectly with the lining.  Clear rings, ivory cord, and natural weight bar tubing also help keep the lift system unobtrusive.  
I love the effect of the colored lining behind the white sheer.  In an actual window, sunshine will create layers of color as the folds stack up.
The shade will be mounted inside the window frame, but I still thought I'd better cover the ends of the boards in the twill tape in case a little bit is visible.

I can imagine tinting sheer face fabrics with all kinds of color and texture, and even pattern......

Thursday, July 25, 2013

More banding!

SuElyn Chase of Cottages to Castles had the enviable job of designing the window treatment for this gorgeous master bath.
And I had the enviable task of fabricating it!  The slightly overlapping lead edges are trimmed with a 2" band out of a delicate pale yellow, and a coordinating lip cord defines the top edge.

 I treated the band as if it were a binding: a scant 8" strip was sewn 2" from the raw edge, then wrapped around and folded in, then hand-sewn on the back.  So there are 4 layers of the yellow band which gives it extra substance and eliminates the chance of marks left by the iron from a seam allowance. 
Single shirring tape gathered the triple-full fabric so it could be stapled onto the board.  The fabric was 118" wide, and the hoped-for finished length was 117".  Without trimming off the selvedge, we made a tiny machine-stitched rolled hem for the bottom, and at the top nudged the shirring as far forward as possible on the board, and got perhaps 116" out of it.  Where there's a will, there's a way!
I like to tie off the shirring cord and secure it to the board with a staple or two, before hiding it all with the dustboard cover.  Just in case the panels ever need to be taken off, they can be ungathered and regathered without having to sew on new tape.

Thursday, July 18, 2013

Some folks do love their banding.....

Here is a way of using grosgrain ribbon that I can live with.

Notoriously annoying to apply, grosgrain is easy to work with as a binding, which in essence is what this banding is.
The face fabric and lining were cut to the exact finished size; the pink ribbon was top-sewn to the front and then wrapped to the back and secured with hand-stitching.


A little scrap of ribbon covers the ends of the board. just in case they are visible.