THE BLOG IS HAVING TROUBLE WITH COMMENTS! SOMETIMES THEY DON’T GET PUBLISHED, AND WHEN THEY ARE I AM UNABLE TO REPLY TO THEM. IF THAT HAPPENS, JUST EMAIL ME AT stitchlore@gmail.com.

Looking for something specific? Check out the Topic Index, or the Search bar, just below, on the left.


Sorry about this problem!

SO.........WHAT ARE WE WORKING ON TODAY??
Showing posts with label top tack. Show all posts

Monday, May 6, 2019

Fortuny panels, installed!

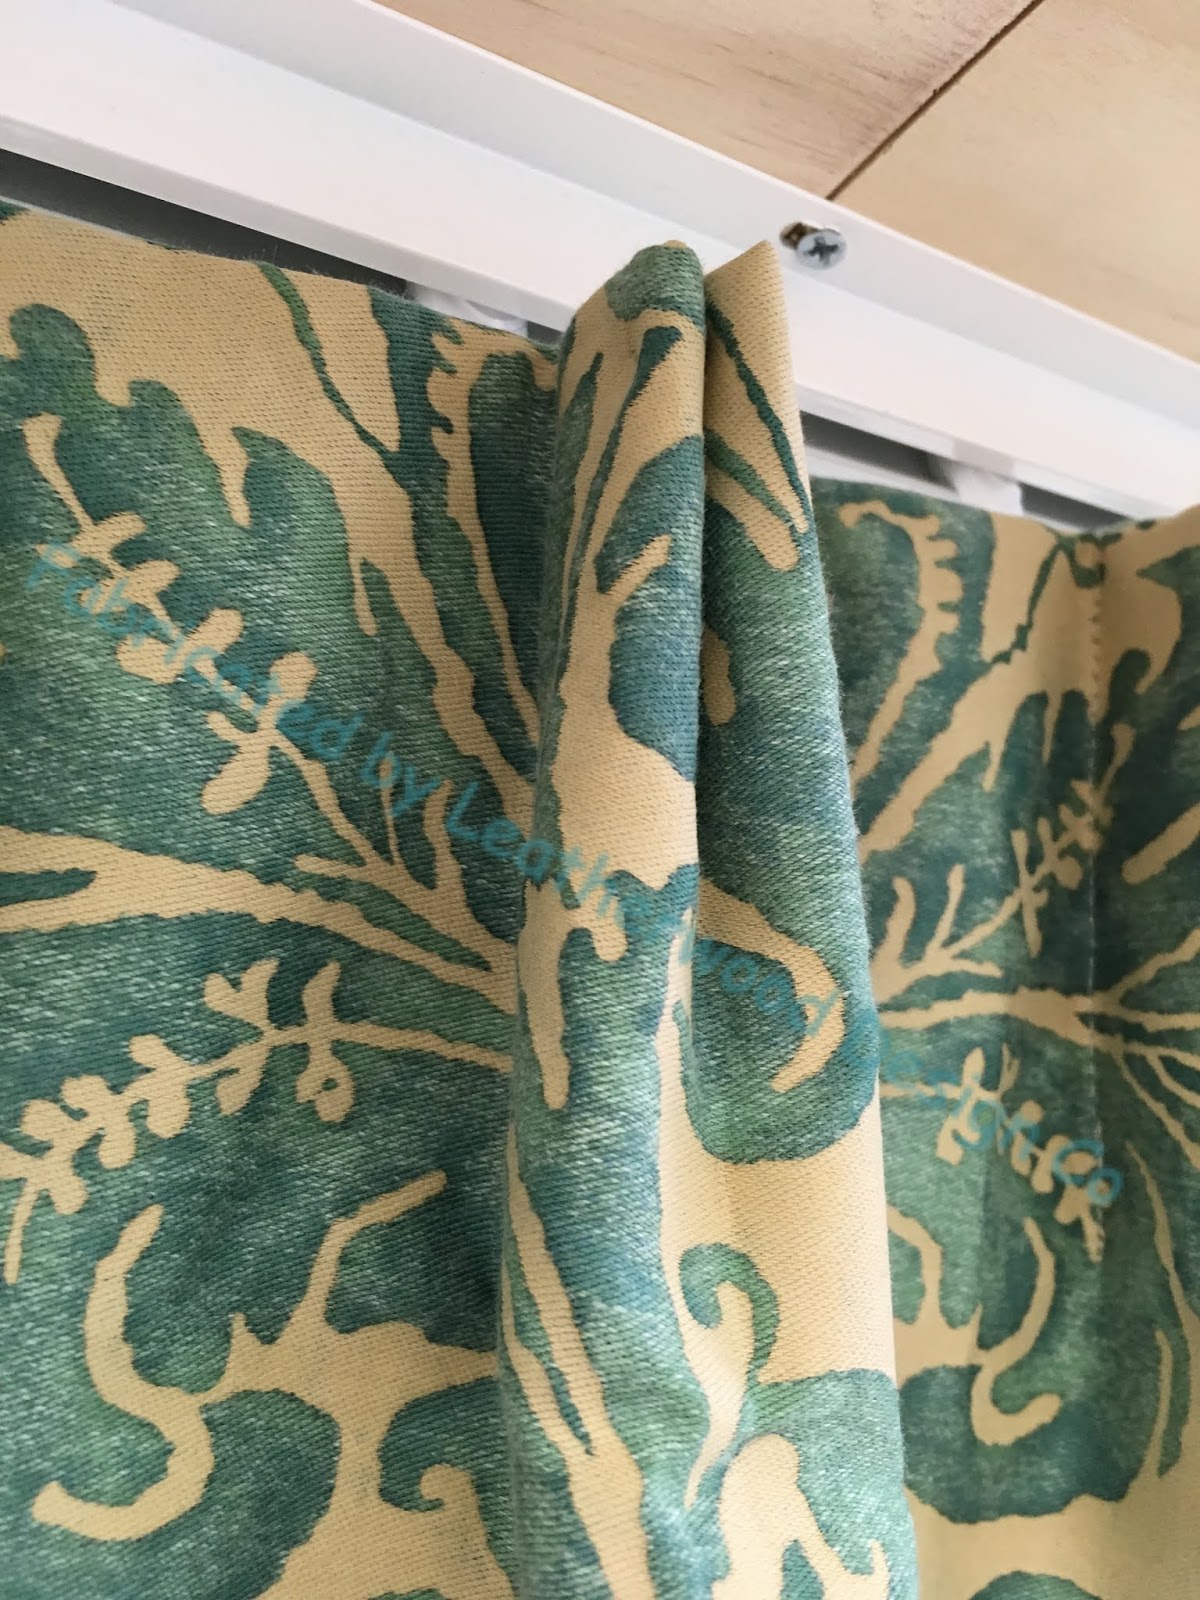
If there had been a DJ in the house, we'd have cued up Etta James and sung along to "At Last."  These stunning draperies were a long time in the making!
Designer Chrissy Glenn envisioned the Fortuny pattern with banding of the same fabric in a contrasting colorway, on the lead edges, and bottom.  Of course that meant accomplishing a perfect pattern match- in both directions.
Gold rope cording from Samuel and Sons defined the edges.
The project began with a day of assessment, layout, marking, rolling, re-rolling, more marking, and re-assessment.  The bittersweet colorway was discontinued, so what we had in-house was all there was on the planet- and we had just- and I mean JUST- enough.
It was truly exciting to see the plan develop.
Finalization of the plan called for celebration!
Cutting required a full day of calm, quiet, complete isolation, and a generous dose of chutzpah.  It was scary.  Quilters will recognize the term "fussy cutting" and this was fussy cutting to the extreme.
I knew that I could not manage perfect pattern matching with any ad-lib effort, so I used a double-sided adhesive tape to align the pattern.  I like to use Rowley's tape for this purpose, because it can be removed easily.  After pressing the edge to create a sharp, visible sewing line, I applied the tape in order to secure the layers perfectly.
The sharp crease provided a clear(-ish) stitching line.
The tape was removed right after the sewing was done, before trimming away the excess.
It is a testament to the high quality of Fortuny prints that the pattern aligned so easily.  In both directions there were few adjustments to be made.  This fabric isn't expensive for no reason!
The turquoise was intended to have a high translucence, so the panels were interlined with a light but dense cotton flannel, and lined with a tightly woven lightweight doublewide (seamless) cotton.
But first, we wanted to add a light-filtering layer to the bittersweet band, pressing the seams toward that side, to eliminate any shadow of the seam allowance. 
Grey cotton sateen was used to reduce but not eliminate light bleed. 
This grey was interlocked by hand with a herringbone stitch on all sides of both lead edge and bottom bands.
Once all twelve panels had been prepared, we began the process of assembling the layers.  Here is where I have no photos- I guess at the time I thought pictures of plain white linings were too boring!  We interlocked the interlining to the seams as usual, but also to the lead edges, since no lining layers were going to be rolled into the hem.  They were interlocked right over the grey lining, if you can imagine that from this photo.
After assembly, the last step was to pleat and tack.  Chrissy chose a two-finger top tack, tacked around the fronts of the pleats with coordinating thread.
I'll be going back to the house in the near future, and hope to take great photos then.  On installation day we didn't have time to steam, dress, and stage the photos since the family was leaving for the weekend.  However, even though they couldn't sleep in the room that night, they were pretty thrilled at having these to come home to!
Lots of love and gratitude to my support posse, Camille, Jen, and Rosemarie.  Their work, encouragement, and advice made this project happen!  And a huge shout-out to Penny from whom I learned techniques I'd never dreamed of that are now part of my daily work life.


Tuesday, April 9, 2019

Hybrid top tack and happy fingers

My favorite top tack style is with coordinating color thread wrapping around the front, like these:
There are other ways to create a top tack.  (As well as a lot of names for it, including Euro, fan, butterfly.  I call it top tack.)  I made this sampler to help my client choose between wrapped, stab, and across the top edge.  (The little pinch pleat was a last-ditch pitch though I knew she wouldn't choose it.)  She chose wrapped, yay! 
The pleat can be stabbed through the sides- and although I like how discreet this tack is (you can't even see it, can you?), it is really hard to do by hand.  Of course if the pleat is tacked by machine, this is easier, but not as nice looking.  But when tacking by hand, the layers of fabric, lining, and buckram make a stab tack almost impossible.
The pleats can have zero visible stitching, too, by tacking the folds across the top; but I like this the least, because I feel it doesn't control the fall of the fabric as well as the other methods.
Regardless of which method, it's important to catch the fabric at the top and back of the pleat to hold the folds securely in place.  Usually this step is done in conjunction with the hand tacking, but it adds up to a lot of time that my aching hands spend fiddling with controlling the folds. 
So I had a brilliant idea- why not do that step by machine?  It would save my hands, and also make the pleat much more secure. 
So I did!  Easier AND better = Winning!  (Another example of my "best of both worlds" fabrication philosophy.)  And I bet I am not the first person to have thought of this!!
I flattened out the pleat, making sure it was centered, then ran the tacker for one cycle.
There- that took a second or two, whereas doing that by hand would take a minute or two.
I formed the pleat and held the folds together with Wonder Clips.
With the folds secure, it was much easier to make pretty, even stitches.
On the back there is this little stitch from the machine.  On the front, nothing, because it's hidden!
I'm happy- but more importantly so are my hands, with this easier AND better pleat! :)


Friday, October 5, 2018

Custom Workroom Conference

Hi blog people!
I have been out of town at the Custom Workroom Conference in Spartanburg, SC, the workroom industry's premiere educational event, packed with inspiring instructors, eager attendees, and the most attentive and helpful vendors imaginable.
I was honored to be chosen to present my class "Set Yourself Apart," addressing ways in which a small workroom can set itself apart by offering the best in service, collaboration, and fabrication.
Thanks to Penny Bruce for the photo xoxo
Before heading to CWC we were busy in the workroom- besides fabricating for our designers and their clients, we were doing new quotes for future projects, research for product sourcing for current projects, and having a blast making class samples.
The last customer product that we finished was a roman shade with grosgrain ribbon banding.  I think this little shades is a great example of "setting ourselves apart."  We used the ribbon to cover the board ends as well as the ends of the weight bar.
 We made so many samples- I love this one, showing 5 different ways to make a top tack.
I left a day early so I could spend some time exploring South Carolina.
It was hard to choose what to visit, but I think I made the best possible choices for me.
I headed first to Middleton Place National Historic Landmark, one of the early rice plantations in the Low Country.
The tours showed me a perspective of history that I had never considered before.  I think that the Eliza's House and Beyond the Fields tour should be required attendance by every American.  I could've stayed all day, listening and learning.  I hope to return to the Low Country area and visit more historic sites and natural areas.
I was determined to get some sun on my face and dip my toes in the Atlantic Ocean, so I randomly picked what turned out to be the best beach choice I could've made for me- Folly Beach, off of James Island, just across from Charleston.  I traded $10 admission for a mere but highly satisfying hour walking in the ocean and collecting shells.
I was thrilled to find plenty of Thai food in both the Charleston and Spartanburg areas.  This is one of my favorite cuisines, so I got my fill, and for awhile, at least, I won't have to pester anyone at home to go to Thai restaurants with me!
In Charleston downtown, there are so many beautiful sights, I couldn't imagine what to pick to show you.  Just google Charleston, and you'll get an idea.
But what really sparked my imagination was this: the Karpeles Manuscript Museum.  What on earth is THAT?  I don't know, yet, but I know that I want to go back and visit it.
Well, I was so busy during the conference, there's not much I can show you in the way of pictures to give you an idea of what it's like.  Our workroom community is vibrant and exhilarating, and at the conferences and trade shows the excitement spills over until you think you just can't take in any more.  

The days were filled with meeting up with old friends, meeting new attendees and even brand-new rookie workrooms, attending the extremely moving and inspiring Keynote speech from Lonnie and Kelly from Weave Gotcha Covered!, sitting in on classes with other instructors, and networking with our awesome workroom supply vendors.  

Promoters Susan Woodcock and Rodger Walker are our workroom heroes and they put on an event for us that is unmatched.

If you've never been, and think that a few days of intensive industry immersion can improve your workroom business, let me know, and I'll keep you informed as details about next year's conference are settled.  

Now I'm home, in the workroom, and supplies that I ordered are beginning to arrive.
Time to get back to what I love to do- working with beautiful fabrics!  Stay tuned!


Wednesday, May 6, 2015

135" of drama. And arched shades.

On installation day, it often happens that we are so wrapped up in the details of the work, we forget to really look and see how beautiful the treatments are.  That's what happened to me with this job for Denise Wenacur: drapery panels 135" long flanking sheer arched relaxed shades.  When I got home and saw the photos on the computer, I was astonished at how dramatic this room had become!
The panels are two-finger Euro pleats with 6" buckram.
The shades are a very sheer voile, mounted on very discreet frames that blend in with the woodwork.
Making those frames was the biggest challenge of the project.  There was a lot of trial and error.  I chose to use FirmAFlex for the arched part.  It's white and I hoped it would blend in with the wood, but in the end I covered it all with fabric after all. 
The first template was made from paper, and then a second template from foam board.  I wanted something that was rigid, to fit into the space without flexing, for testing; but also a material that I could modify if corrections were needed.
John rigged up a way to stabilize the sheets of FirmAFlex so it could be cut with a jigsaw. 
The arch was attached to the dustboard, then a narrow strip to the top.  This is the back, facing outside.
The narrow edge became the front.  All the surfaces were eventually covered with fabric, hiding the little angle iron, the raw edges, and the joins.  In the window, the frame just disappears and looks like the woodwork.
When the shades were fabricated, the ladder tape stopped just above the board line, and I ran a line of basting thread along the board line as a reference for stapling later.
I'm getting ahead of the story now, but here, the shade already stapled on and hung on a Workroom Valet, you can see how the basting line guided the fabric placement.
But back to the fabrication story.  When it was time to put the shade on the frame, I eventually decided to run double-sided tape along the arch, and carefully fold the fabric (cut following the arch) up over the edge, easing in the fullness, and sticking it to the tape.
Next came the part where I forgot to take pictures of applying a narrow piping to the edge, and covering all remaining surfaces with fabric.  Then Rollease traversing clutches were mounted and rigged, the shade strung, and leveled- then packed for installation.
On installation day, our talented installer Mario dressed the draperies to perfection. 
In order to get the pleats and spaces right, I made mockups of the stripe and marked everything before trimming down the widths for joining.
In the adjacent dining room, two-finger Euro pleat panels are drawn to each side.  Sheer relaxed shades under the panels are just like the living room shades, minus the arch.