THE BLOG IS HAVING TROUBLE WITH COMMENTS! SOMETIMES THEY DON’T GET PUBLISHED, AND WHEN THEY ARE I AM UNABLE TO REPLY TO THEM. IF THAT HAPPENS, JUST EMAIL ME AT stitchlore@gmail.com.

Looking for something specific? Check out the Topic Index, or the Search bar, just below, on the left.


Sorry about this problem!

SO.........WHAT ARE WE WORKING ON TODAY??
Showing posts with label fabric stabilizer. Show all posts

Saturday, December 3, 2016

Ottoman Weave Fabric Pillows

Ottoman weave fabrics have a pronounced horizontal rib created by weaving a fine warp yarn with heavier filler yarns that become completely covered with the warp.  I recently made pillows for designer Susan Marocco with a cotton/poly ottoman fabric from Nancy Corzine. 


I should have known, but nevertheless somehow did not remember, that the horizontal rib is prone to raveling, and serging only makes it worse.   To my horror, the weft raveled all the way to the stitching line- everywhere!- especially at the zipper and the corners.  After I stuffed and zipped up the rectangular pillow covers, the fabric frayed to the stitching lines and began to fall apart! 
Luckily I was able to remake the pillows, using fusible fabric stablizer from Rowley Co.  I fused the stabilizer to the back then serged the edges.
I hadn't yet made the bolster, thank goodness.  I fused stabilizer to all the pieces, notched and clipped in order to ease the rectangle onto the circle, then applied a small strip of stabilizer to cover the clips.
For extra security and peace of mind, after sewing the pieces together, I re-serged to hold together the notches and clips.
You can see that I also zig-zagged at the clips for a little extra reinforcement.
The result- extremely substantial (albeit a little stiff) pillows that I was able to deliver to the client with no qualms about their durability.


Monday, November 23, 2015

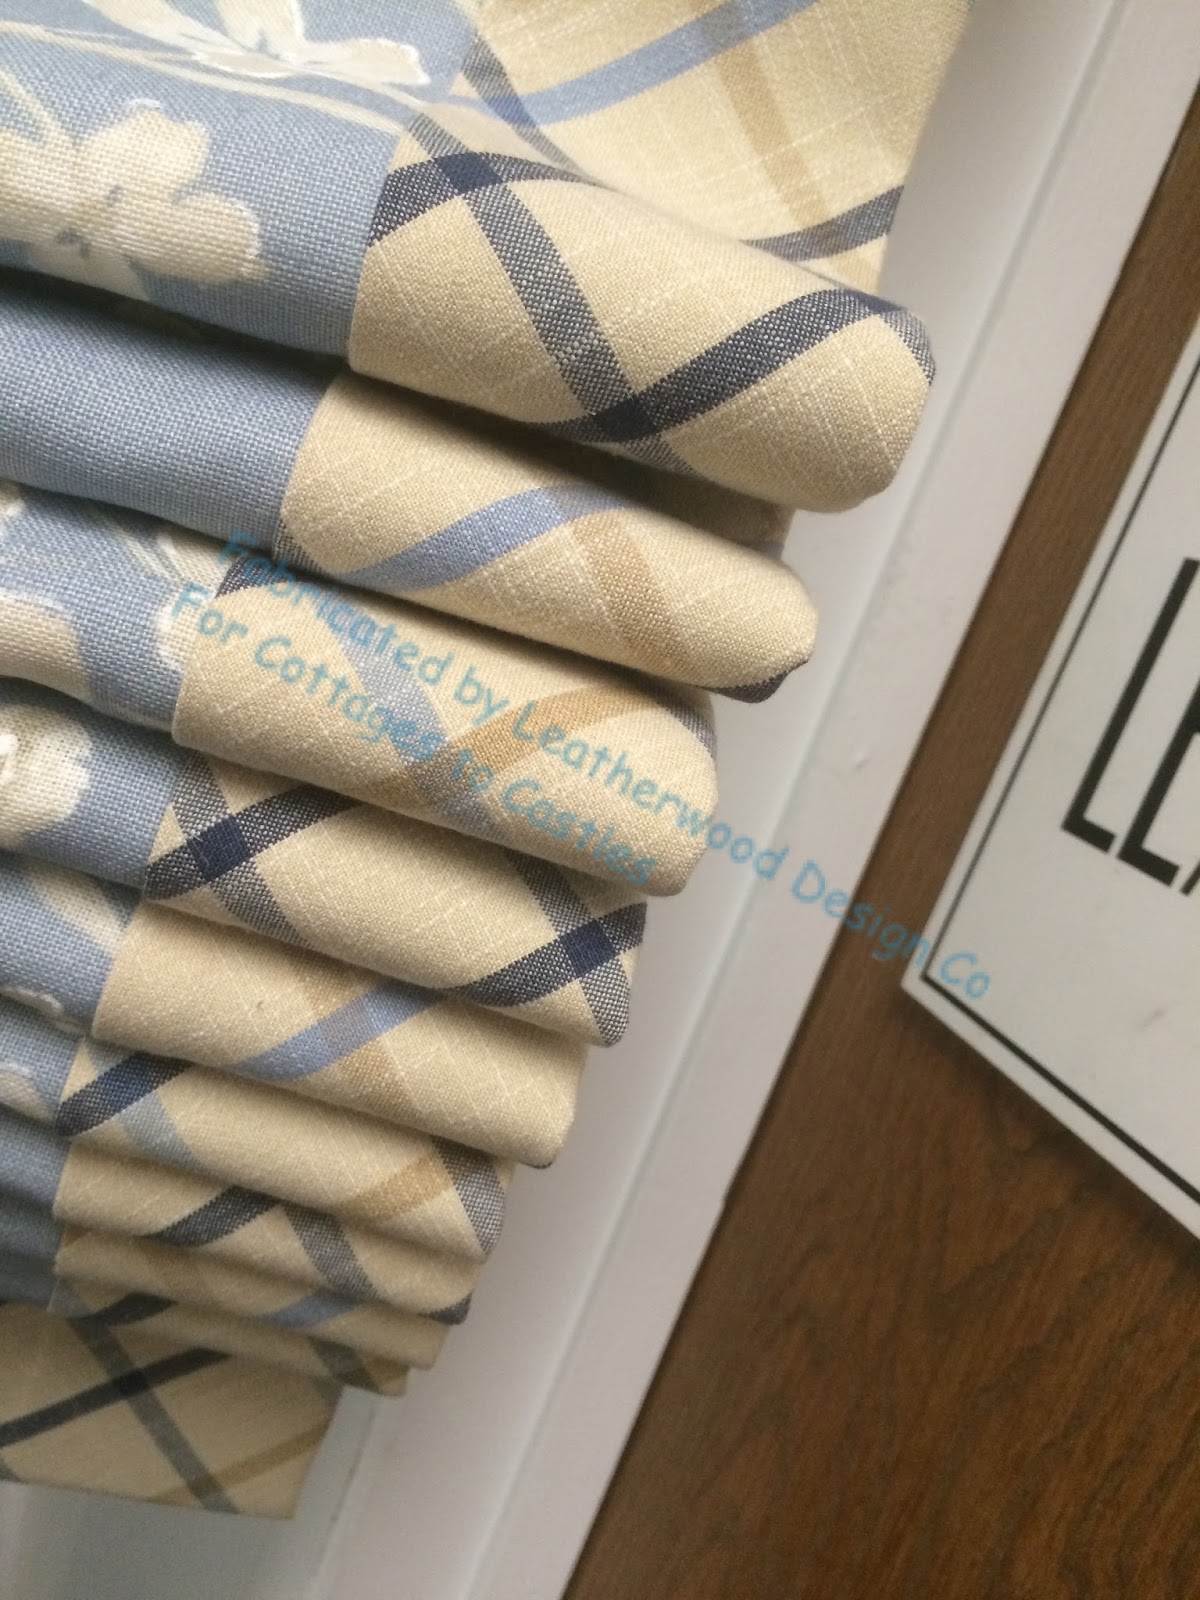
Bias banded shade

OK folks, I've been trying to get back into the swing of working!  Last week was a hectic pace keeping up with Thanksgiving deadlines.  Now I'm taking a breath and doing my first blog post in a month or more.
So I'm going to keep it simple and feature this adorable bias banded flat roman shade.
We needed to work with the available fabric, so we could not be sure the plaid would match itself on the vertical and horizontal intersection.  I sent a bunch of photos to the designer, Suelyn Chase of Cottages to Castles, so she could choose a layout for the bias plaid.  She decided to apply trim to the join to disguise the fact that the plaid doesn't align with itself.  Since the shade will always be up, it's almost a moot point anyhow.
The little blue trim covers the seam.
Before sewing the bias strips to the floral, I applied a fusible fabric stabilizer backing, from Rowley Company, to keep the band from warping.  My Dofix iron made easy work of that process!
The Dofix also came in handy for making the returns.  I used 4" fusible buckram, also from Rowley Company, to fabricate the little flaps without sewing.  I chose an area of the floral that was just the solid blue background.
Then I used Dofix fusible velcro loop tape on the flap, and stapled sticky-back hook tape to the board.  Easy-peasy!  My new tools and materials make short work of what used to be a tedious, time-consuming, and tiresome step.


Saturday, November 20, 2010

Not as simple as it looks

For such a simple-looking valance style, there was not one step in the fabrication that was easy.

We were asked to duplicate this valance, which is made out of a nice sturdy cotton.  Our yellow stripe is a paper-thin fine silk.
Hmmmmm.

The patterns were drafted based on the photo.  There are two valances this size, and one with five sections.
The two small valances have seven individual pieces- 2 scallops, 2 returns, and 3 jabots; and the large valance has 13 individual pieces.

To help make it easier to sew the welt to the stripe without puckering I fused the fabric pieces to Rowley's fabric stabilizer- a knit interfacing that adds stability and substance without stiffness.
Oh, boy, I love this stuff.  I bought it several years ago and never used it til now.
This was as eye-opening as glue basting was earlier in the year!
Interlining might have made it easier, but the order did not call for interlining.

All the little return pieces have a painfully close curve at the bottom, so I took special care with them.  Here you see five of them in different stages of completion:  I traced the piece onto the napped lining and pinned it without cutting the curve in the lining.  Then sewed on the welting and pinned it back to the traced shape and sewed around.  After it was sewn I trimmed off the lining around the curve.  The seams were graded before turning and then the piece was carefully ironed.....

Using this pressing ham to try to keep puckers out of the curve..... with varying degrees of success.  As a 35-year vegetarian, this is the closest I get to ham.


Once all the pieces were cut, sewn, turned, and pressed, time to staple.  The little "jabots" were pleated into place and stapled.  Then to compensate for the bulk of the jabots, I built up the board edge to the same height using rolled fabric, so the top would be even.


At long last, all done!

I'm so glad I'm not installing these.  I dressed these valances a dozen times already, at different stages along the way, and now it's someone else's turn!