THE BLOG IS HAVING TROUBLE WITH COMMENTS! SOMETIMES THEY DON’T GET PUBLISHED, AND WHEN THEY ARE I AM UNABLE TO REPLY TO THEM. IF THAT HAPPENS, JUST EMAIL ME AT stitchlore@gmail.com.

Looking for something specific? Check out the Topic Index, or the Search bar, just below, on the left.


Sorry about this problem!

SO.........WHAT ARE WE WORKING ON TODAY??
Showing posts with label acrylic weight bar. Show all posts

Friday, August 26, 2016

Silk and jute sheer shade

I've worked with this silk and jute fabric before and it is always a pleasure. 
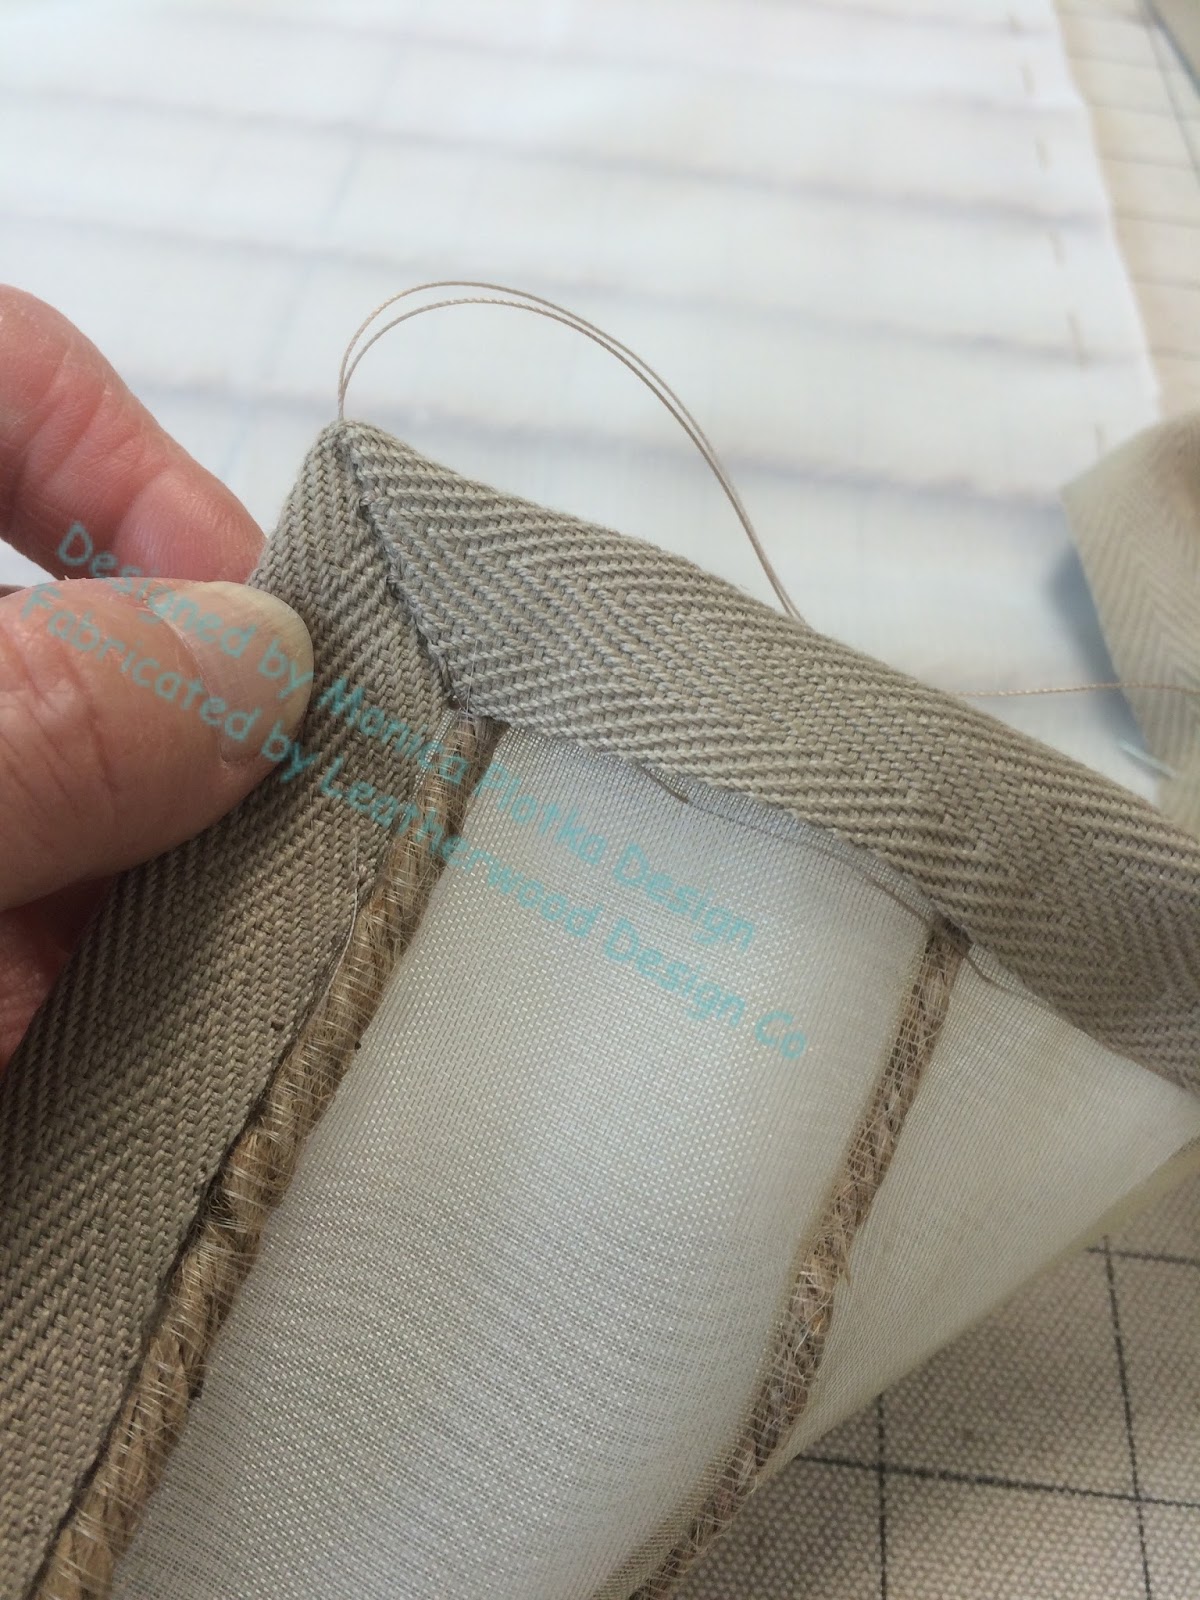
Designer Monica Plotka shares my love of twill tape binding and we've used it to bind this fabric which really cannot be hemmed.  This shade is lined with voile.
When working with sheer fabric, my first step is to pull a thread so I can cut along the grainline.
I basted the voile around the perimeter of the silk, both cut to the exact finished size.
Before finishing the edges, I sewed the clear rings to the shade.  This stabilized the layers further.
To apply the twill tape, I started with the bottom edge, on the back.  I nestled it up next to a row of jute and basted it in place.
Then I flipped the bottom up and hand-sewed the right side, making sure that the twill tape was caught on the back as well.
I turned the corners and started working the miters into place.
After securing securing the corners on the back, I folded the twill tape to the front and pinned it.
I finished hand-sewing the tape from the front side, catching both sides with one row of stitching, and ladder-stitched those pesky mitered corners.
For the weight bar pocket, I used a piece of translucent buckram, folded in half and stitched, and inserted a piece of 1/2" acrylic rodding, which was nearly invisible from the front.
Done!

Tuesday, September 22, 2015

Another sheer shade

Today we installed more sheer shades.

The variety of fabulous sheers available these days seems to be endless, which makes fabrication a lot of fun.  There's also an endless variety of fabrication methods, so you pick and choose at each step to come up with the best possible product.
It was important to me to make sure the pattern on this shade overlapped so it would not be all jumbled up on the side and bottom hems.
This shade was lined with a winter white voile.  Once it was tabled and all the hems pressed in, the shade was weighted down to keep it from shifting while sewing the rings.  No need to mark for rings- the grid was easily visible through the sheers.
For extra security, the sides and bottom also were pinned to the table, and the layers were basted across the pocket and just above it.
I didn't want any distortion of the pattern due to take-up from stitching, so I didn't sew the side hems.  Instead, I took a tiny tack right in the middle between rings, where the shade would fold.  The fabric held its pressed seam perfectly, and that little stitch prevented any buckling or gapping.
I made sure to baste well, because after everything else was done, I took the shade to the machine and sewed a pocket for the weight bar.  You can see I took tiny tacks between the rings on this horizontal row, as well.
Can you see the weight bar?  Just barely!- because it's actually 1/2" extruded acrylic.  The acrylic is not very heavy, but for this context, that was fine.  This shade will rarely be raised.  The acrylic is amazing, but must be used with discretion.
I couldn't be happier with this shade!
Tomorrow I'll do another post about the sheer dining room shades in this same house.