THE BLOG IS HAVING TROUBLE WITH COMMENTS! SOMETIMES THEY DON’T GET PUBLISHED, AND WHEN THEY ARE I AM UNABLE TO REPLY TO THEM. IF THAT HAPPENS, JUST EMAIL ME AT stitchlore@gmail.com.

Looking for something specific? Check out the Topic Index, or the Search bar, just below, on the left.


Sorry about this problem!

SO.........WHAT ARE WE WORKING ON TODAY??
Showing posts with label fabrication technique. Show all posts

Wednesday, May 16, 2018

Getting comfortable with oversize

At last I can post photos of the 173" long and 156" wide ripplefold panel!  35 yards each of 100% linen and napped cotton sateen lining went into the panel, valance, and tieback.  After fabricating this treatment for Crosstown Shade and Glass, I am feeling pretty comfy with oversize.  Jeff and Steve thought through every detail to ensure a perfect fit and smooth installation.
I hinted at this project in my last post, which was a whole month ago.  To backtrack and fill you in on that month- my friend Rosemarie Garner and I were co-presenters at the NJ WCAA chapter's annual Windows to Success event.  Organizing all our material and samples was an exercise in down-sizing!- we had so much to choose from and had to edit carefully.  It was a fantastic experience and we're both grateful to the Chapter for inviting us.  The preparation ahead of this presentation kind of ate into my blogging time, but now- I'm back!
The huge ripplefold fabrication began with the 156" motorized rod.  We insist, for good reason, on having ripplefold tracks in the workroom before cutting the fabric.   Crosstown Shade and Glass ordered the track and delivered it to the workroom. 
This project provided a great illustration of why it's so important for the workroom to have the track.  For starters, the manufacturer had rigged the master carrier backwards, as a left stack instead of right stack- not at all difficult to switch, but what installer wants to do that on-site on installation day?
For another thing, the return had removable snap pieces that I might not have known about if I hadn't had the rod.  Lastly, the master carrier on the lead edge was unlike any master I'd ever worked with before, and because it's essential that the tape be fitted, cut, and re-joined so the snaps fit perfectly, it was a good thing I had it in the workroom.
I leave nothing to chance with ripplefold.  I cut the tape and snap it on all the way across, labeling the forward and backward "ripples" in order to plan seam placement.  Seams must go alongside the snaps, not halfway between them, so they'll be the least visible when the curtain is hung.  
This curtain used 7 widths of fabric, and with 185" cuts, it was a monster to handle.   We joined pairs of cut lengths, then joined those; that way I didn't have to handle all the weight quite as often. 
Keeping the grain true and achieving the correct finished length took discipline.  For each cut I pulled a thread to be sure I cut on grain.  Jen and I made the curtain in stages, starting at the bottom.  After hand-sewing the return side hem, we worked the panel across the table, basting both vertically and horizontally.  The horizontal basting line became the reference line from which to measure the finished length after the bottom of the entire 7 widths was tabled.
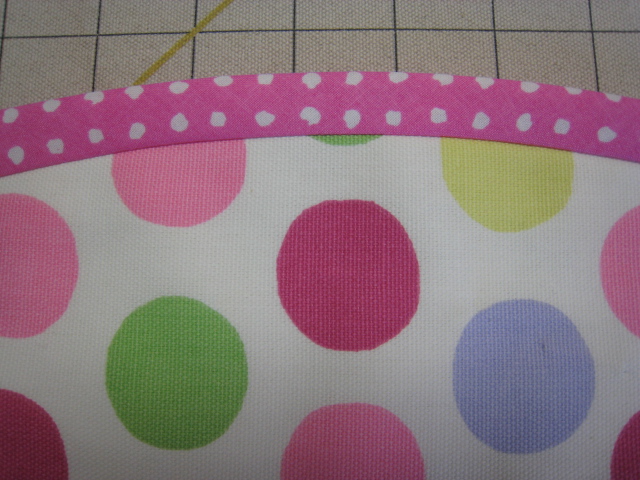
Photos of massive amounts of basted fabric are pretty boring, so here is the last stage when we finally reached the lead edge!  The vertical line you see there is the estimated lead edge of the panel- it isn't going to be cut and finished until after the ripplefold tape is sewn on.  The reason?  The tape will most likely "walk" a bit as it's sewn onto the fabric, so it's important to leave a little leeway and finish the curtain where the tape actually winds up.
Jen daisy-chained the hems together every quarter-width to keep the layers from billowing apart from each other.
After the bottom was done, we shifted the whole curtain downward to work on the top.  We measured up from the basted reference line and basted the top fold line.  Then we turned the panel to run the top along the length of the table.  We trimmed, folded, pressed, then basted yet again.
 The top edge was finished neatly even though it was going to be covered with ripplefold tape.
Since our sewing machines are on glides, we were able to slide the straight stitch over to the table, instead of dragging the curtain over to the machine.  I wanted to be comfortable while sewing the ripplefold tape!
Eleven yards of snap tape later.....
It came out to within an inch and a half of the projected lead edge!  Do you know how happy I was to see that???
NOW we finish the lead edge.  Using nice long John James needles with silamide thread, this was a peaceful and relaxed ending to the panel fabrication.
NEXT UP: HOW ABOUT THAT FITTED VALANCE AND GIGANTIC SHAPED TIEBACK?
TUNE IN TOMORROW!

Monday, January 20, 2014

Sheer Roman shades

Sheer roman shades were practically unheard of 15 years ago, but now, we make them all the time.  Most of the time we line them with a plain sheer, for extra support and body.
This set of four gave the opportunity to show some of the techniques we've developed to make them.
Three of the shades were just 29" wide, so they fit sideways on the table, side by side.  I like that I can be sure the spacing will be identical on all three.  Since the grid can be seen through the fabric, there's no need to mark the fabric for rings.  Fabric and sheer batiste lining were cut and tabled.  All the side hems were pressed and hand-sewn; bottom hems pressed and pinned; ladder tapes run and clear rings sewn.  We wanted one extra permanent fold, so the ladder tape ends at the first ring up after the hem. 
It's a good idea to check sheer fabrics to be sure there's no lint or thread caught in between the layers.  My inspection revealed a little fleck of red lint, so I covered the end of a yardstick with masking tape, slid it in between the layers......
Got it!
When it was time to sew the bottom weight bar pockets, I was dismayed to find that the presser foot would pick up and pull the loose threads that created the pattern.  This is the kind of thing that happens more often than we'd like.
I laid a flat metal hem gauge next to the presser foot and held it down tight to keep the loose threads in place so they wouldn't get pulled.
One great thing about bottom trims is that it can provide a clean bottom line when the fabric is a little wobbly.  I decided to glue this trim on so the shade could be tabled and the trim aligned to the grid.
The permanent fold is a great device for sheer shades, to hide all the stitching and other clutter that is necessary to make the shade work.  Instead of tying two rings together, I just folded the fabric up and stitched the weight bar hem to the first ring.
I covered the weight bar with natural color fabric tubing before inserting it into the pocket.
The weight bar is slip-stitched closed, and the ends of the trim tucked in and the bottom of the hem sewn shut.


Wednesday, August 21, 2013

How we made a 12' wide shade

The challenge: a 12' wide x 6' long shade out of a beautiful, shimmering, fluid gold sheer with a pleated bottom silk  banding.
I reached deep into our bag of workroom tricks to make this shade, including making a permanent bottom fold; using trim to hide the bottom hem; getting creative with the weight bar pocket; working on a gridded canvas table; and basting, basting, basting.

The gridded canvas table was indispensable for this project.  It's 12' wide and 5' wide, so I was able to get most of the shade done before having to shift the fabric.   Plenty of weights helped, too.
With a double wide sheer for both the face and the lining, there were no seams to contend with.  I probably logged 1/2 mile of walking just laying out the fabrics, smoothing, pressing, and aligning.  The fabric spilling onto the floor was cut off, so I wasn't worried about it, I just had to be sure I didn't trip on it.

The side hems are hand-sewn.  After debating with myself, I left the selvedges on, to be sure I was keeping the fabric straight.  See how the lining fabric "takes up" and doesn't line up after the stitching is done?  Trim at the bottom will totally hide the take-up and the selvedges.


I knew I needed a sturdy pocket for the weight bar, so I decided to add a permanent bottom fold which would hide the pocket.   I slipped a tube pocket (from Rowley) into the top of the double hem, pinned in place, then machine sewed it down at the very end, so the weight bar was snug and secure.  

Once the shade was prepped, I ran three horizontal rows of basting stitching lines: one just below the tube pocket, which you can sort of see below, one across the middle of the shade, and one near the table edge.  Besides keeping the shade stable, the basting lines are an alignment tool for when it was time to shift the shade.  After everything was done, before moving it from the table, one more basting row was stitched right at the board line, to make stapling foolproof.  I kept all the basting stitches in until the shade was mounted and tested.


Mesh tube shroud in a khaki color (also from Rowley) was the best lift cord option, so there wouldn't be rings showing through.  I spaced the tacks every 8" vertically since the shade was so huge, and the lift lines are 10" apart horizontally. 
The grid lines on the canvas cover could be seen through the sheer, so marks were unnecessary.   My favorite thread for rings (or "rings") is Coats Extra Strong Upholstery thread.  It doesn't break, it knots tightly, and best of all, it doesn't twist.

Trim at the bottom hid the selvedges, unevenness and takeup of the fabrics folded into the hem.  I glued the trim, then clamped the shade at each end of the table until the glue dried, to keep the ends from pulling in.  I used glue because I was afraid that hand-sewing 12' of trim would cause too much take-up.
A 30# Rollease clutch completed the product, and I was glad that some time ago I invested in a tube of 14' fiberglass rodding, so John had none of the headaches of splicing the clutch rod.  Our hanging system accommodates up to 12'- thank goodness! 

Monday, May 7, 2012

Greek Key shade, continued-

Well, I have quite a backlog of projects to show you; I've been waiting for installations, client photos, before-and-after opportunities, or whatever, so I'd have the whole story.  This week I'll focus on getting some of those photo series posted.

For the Greek Key shades I just couldn't wait for the "after" picture, so I showed the workroom shots last week- scroll down to read the previous post. 
Today, yay, I can show you the shades on-site, courtesy of Daniel Silva at Fabric Factory Outlet in Fairfield NJ: 
I had a hard time deciding how to apply the ribbon until I read a post by Liz Hawkes on the CHF Forum about her stencil method, and then it all fell into place.
First I drew out the entire shade, 4 corners and all, on 1" gridded pattern paper.

I then cut a stencil out of template plastic and pinned it in place on the fabric.

I traced the entire pattern onto the shade with purple disappearing pen, which I tested beforehand on the glazed linen fabric. 

Starting at the spot where the ribbon overlaps itself, I sewed around the pattern, holding the outside corners in place with a seam ripper while pivoting.  The hardest part was turning the fabric, keeping the needle in place and stuffing it all under the machine arm trying not to crumple it! 

With just one side sewn, it's a little scary looking, all wobbly and a little unnerving- I wondered if I'd ever get it to sew down nice and crisp- (and professional-) looking.

But after the second go-round, and tacking down the corners, it was neat as a pin. 

Now I have to say something about the machine I used, my Juki TL-98Q, designed for quilters.  It can be instructed to end with the needle in or out of the fabric, and there is a button which clips the thread for you.  It makes a wonderful neat stitch with perfect tension.  For the mitered corners, I used that auto-clip at the beginning and end of every corner.  This machine has its issues, but I do love it for fussy sewing like this.

Here is the shade from the back, tabled and pressed, waiting for its lining:

I didn't want any stitching on the front, so I devised a new way (to me, at least) to insert the lining.  On the sides the lining is pressed under.  At the bottom it's pinned to the hem:

Then opened back up, transferred to the machine, and sewn in two parallel rows to create the weight bar pocket.  After it was back on the table and laid out, the sides were hand-sewn.


Sunday, January 9, 2011

Pink Day

Coordinating window treatments and pillows were made for two sisters whose rooms are across the hall from each other.  The round pillows are boxed, and small square pillows and shams have a flat flange that is gathered in the corners. 
All welting and banding is done in the same pink dot that covers the window seat cushion.

Over the window seat in the little sister's bedroom is an Imperial valance out of a crazy-quilt print.  The back is faced so the dot is visible peeking out from behind the horns.  Blackout lining inside eliminates the shadow the 4" shaped facing would have cast.  The dot worked nicely as 3/8" welting.
The older daughter's room has a 12' window with a flat, shaped, banded valance.  Here it is laid out on the table.   Luckily this large polka-dot could be railroaded.   The 1/2" banding was done binding-style.

To draft the pattern for the bottom serpentine silhouette, I drew the general shape right onto the fabric with a purple disappearing pen.  Then I laid gridded paper over my roughly sketched line to begin drafting the pattern.  The 12' section has 7 scallops.  The serpentine shape continues onto the separate 2' sections at each side for the small windows at right angles to the 12' window.
After cutting the face I laid it wrong sides together against napped lining, cut, and pinned well.  The bias banding strips were a little over 2" wide; it stretched enough to ease around the curves with a 1/2" seam allowance; then wrapped perfectly around to the back to make a 1/2" band on the front.   This is just like binding a quilt.

To finish the back, there are 3 options- top-stitch by machine from the front side, bond with glue or other adhesive, or hand-sew.  I chose to top-stitch-in-the-ditch for this product since the fabrics were well-behaved and they didn't warp with stitching.