So, it's time to start filling in the blanks for many of the projects from the past month that barely got a mention. It was a hectic time leading up to vacation and there was no time for blogging in detail.
I'll start with these big, bad boys.
The day before we left for vacation, we installed these two very large, heavy hobbled shades, each 9' wide by 6' long, designed by
Denise Wenacur for a community gathering space.
I was nervous about these shades, because we had recently made blackout hobbled shades out of a similar fabric, and had a lot of trouble with distortion due to sewing the pockets for the ribs.
Thanks to great suggestions and advice and help from various very kind and generous people and vendors, fabrication was practically painless. You'll see plenty of shout-outs as you read through!
The fabric is a backed woven fabric with fire retardant treatment, and the lining is FR blackout. The blackout is seamless, thanks to
Angel's Distributing, who will sell 110" Silky Diablo Blackout lining in cut lengths, folded, because otherwise it would come on 110" rolls and cost a small fortune. I got two cuts and the 110" width was run lengthwise because the shades were 108" wide.
The face fabric was about 56" wide so I was JUST able to squeeze the width out of two cuts, with smallish side hems. The thought of sewing this heavy, inflexible fabric was daunting, however- not necessary, thanks to the pre-owned
Do-fix I had just purchased and set up! So I Do-fixed the seams, laid in the lining, and Do-fixed the side borders and the bottom pocket, and reinforced all Do-fixing with hand stitches. What a breeze! Eternal thanks to
Jen White for helping me set up the Do-fix and giving me a crash course in how to use it.
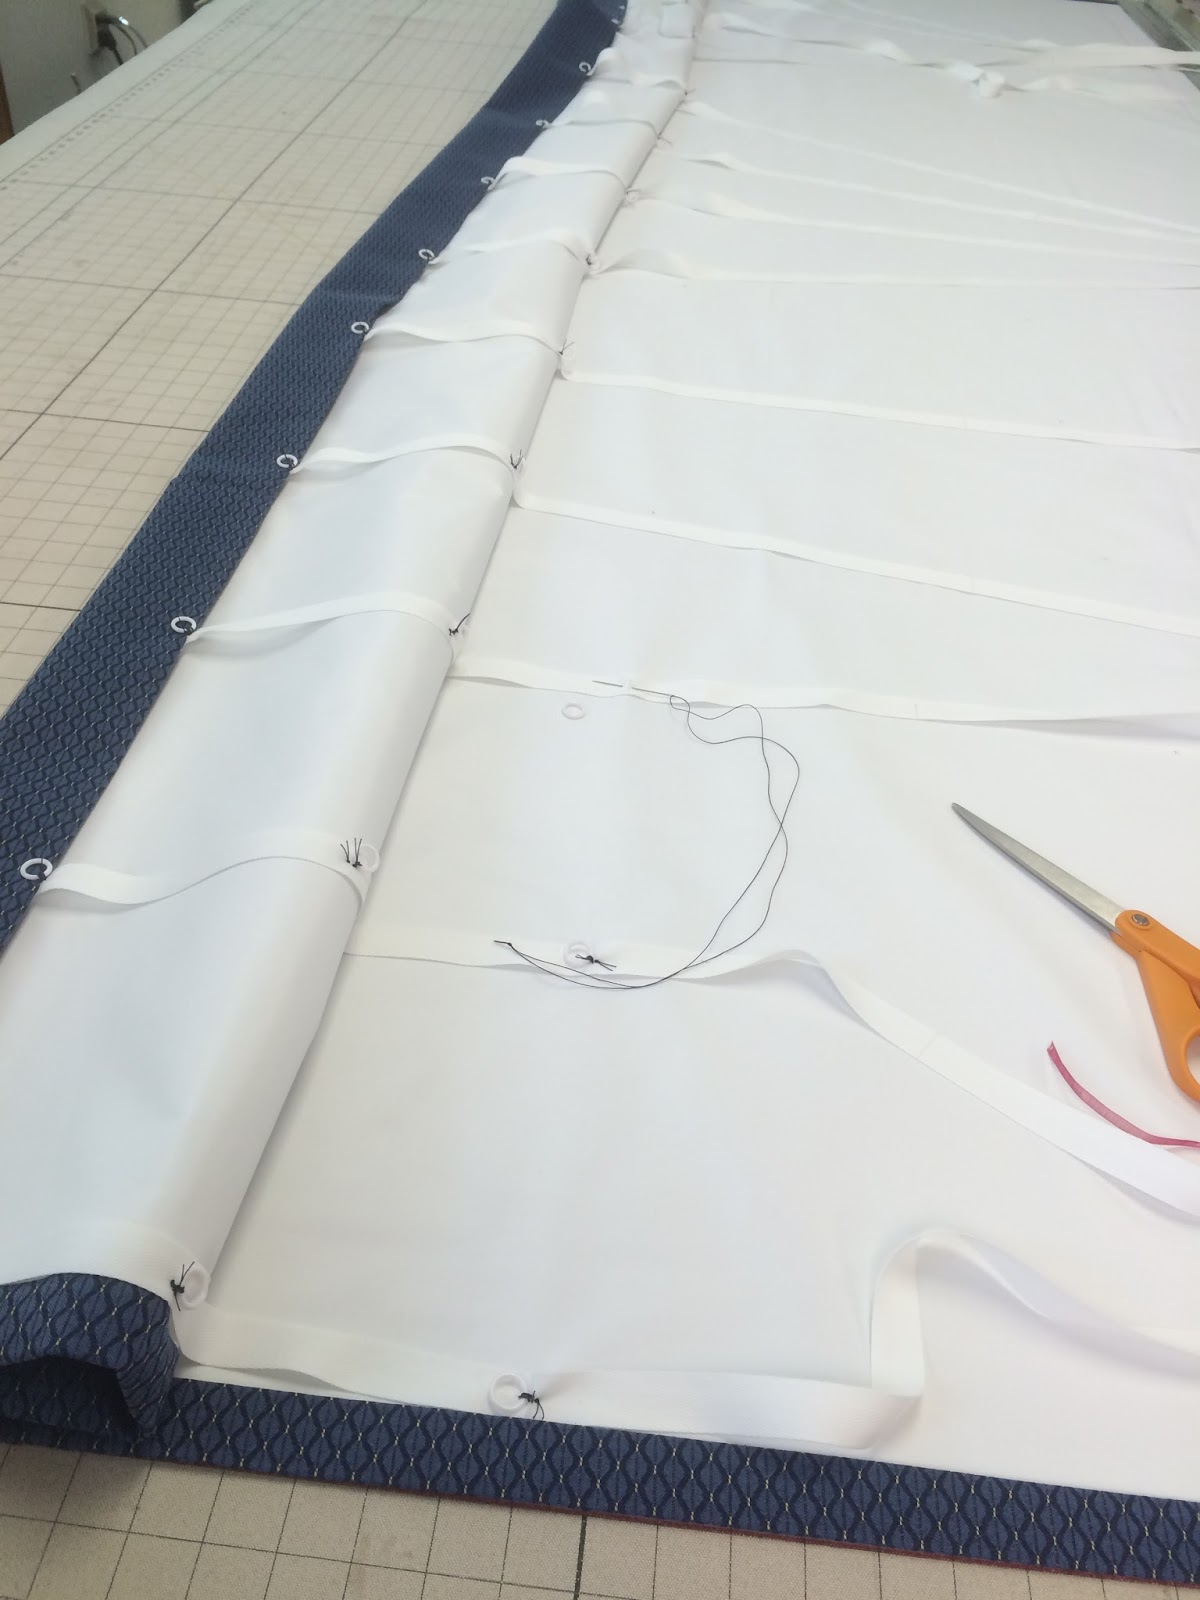
I marked for the ring placement and started sewing rings and twill tape.
OK, do you notice anything missing here?
There are no rib pockets!
This is the most amazing thing ever!
Scot Robbins (of Parkhill and Workroom Valet fame) had mentioned awhile back that he was making hobbled shades without ribs. I could not believe that it would work, but I contacted him and he assured me that as long as I used plenty of vertical rows, the folds would hold up. I took a deep breath and forged ahead. Sure enough, it worked incredibly well. Most of us do space vertical rows about 12" apart with ribs; for these I think the spacing was about 8.5"; you sew a few more rings, but the time savings is more than worth those extra rows!
Shifting the fabric and making sure to keep the rows true took extra care. Here is an excellent example of where taking extra steps saves time. I taped a 36" yardstick to my 96" straightedge and used the grid to mark the horizontal rows with disappearing pen, marked my increments, then quickly made pencil marks in the other direction for ring placement. (Have you noticed how quickly the purple pens disappear on blackout fabric?)
I marked the twill tapes with purple pen, and tacked the rings, folding up the bottom and doing the bottom row last.
When it was time to shift the fabrics, first I gathered the loose twill tapes and gently pulled up just a bit of the shade.
Then I pulled a bit more....
And a little more.....
Then pinned like crazy along the uppermost marked line.....
Then carefully, oh so carefully, shifted the fabric across the table until the pinned line was near the middle.
I wanted to keep enough of the finished portion of the shade on the table so I'd have a reference for the next ring marks.
You get the gist of it: pin, mark, tack, shift, repeat, until finally it was done. I also did the side hems as I went.
Luckily these windows had a 4" space in which to mount the shades. We knew these big guys needed a very capable and durable clutch. Mike at
Designers Resource came to the rescue, recommending the
Rollease Galaxy geared clutch, which can lift 53 pounds.
There was a relatively gentle learning curve because we'd only used these tube type clutches a couple of times before, and Mark and Mike were both very generous about advising us and pointing us to assembly instructions, even when it was 4:50pm and they wanted to go home.
I won't bore you with all the reference photos I took to remember how to mark the tubes for clip placement and direction. But once we had the hang of it, it went incredibly quickly. I'll use the Galaxy and Skyline clutches often now that I know how easy it it. Designers Resource cut the tubing to my exact size specifications which really saved time and trouble for us.
There are no photos of the back, so I can't show the Ring Locks by
SafeTShade. I thought they would be the best choice to allow the shade to stack up smoothly. They worked beautifully.
The only seriously scary time during the process came at installation. The first shade went in like butter, was easy to secure with a zillion screws, and lifted like a dream. The second shade...... was too big. Oh, yes, I measured incorrectly! The board was ever so slightly too big!
Here we are, wishing that wishing would make it fit........
Thank goodness this job is just 10 minutes from my workroom. We packed it up, I went home to pick up my hubby
John, and he came back with me to use his amazing Bosch multi-tool to slice off the ends without having to unstring anything. It took 10 minutes at the most.
Unfortunately. my installer,
Mario Fuentes, had to leave because his day was fully booked. So to the rescue- our nephew
Jim came along and between him and John we got the shade installed before the facility closed for the day at 2pm.
Cleo came along for the ride and helped by holding the screws and handing them to her dad when he needed them.
 |
| Now we can go on vacation! |
|