THE BLOG IS HAVING TROUBLE WITH COMMENTS! SOMETIMES THEY DON’T GET PUBLISHED, AND WHEN THEY ARE I AM UNABLE TO REPLY TO THEM. IF THAT HAPPENS, JUST EMAIL ME AT stitchlore@gmail.com.

Looking for something specific? Check out the Topic Index, or the Search bar, just below, on the left.


Sorry about this problem!

SO.........WHAT ARE WE WORKING ON TODAY??
Showing posts with label twill tape. Show all posts

Thursday, August 16, 2018

Hobbled shade valance

Stationary shades used as valances is a hot trend right now.  To achieve the order specifications from Crosstown Shade and Glass, this shade required a different approach.
They're sometimes made just the same as a functioning shade, except without a lift system- the treatment is adjusted on-site to a chosen finished length.
They're popular on doors, so I've developed a method for door windows, to get them nice and snug to the door.
 Fixed shades using luxury fabrics such as this wool require just as much attention to detail during fabrication as a functioning shade.
 A shaped frame was built for this bay with an arched window.
I have half a dozen ways of making fixed shades, but sometimes a request requires a different approach.  This order came with exact specifications as to the depth and spacing of each fold, the bottom reveal, and the top picture area, and I realized this treatment would be best made as a mock hobbled shade, with tapes.

This 16.75" long shade required about 55" of heavily embroidered fabric to make all those folds to the specified depth.  It was interlined with black flannel to reduce pattern wash-out when the sun shines through it.
Horizontal lines denoted the back fold lines where the tapes would be sewn. 
Tapes are marked to 1.25" increments to meet the unusual order specifications.  When there is anything out of the ordinary, I avoid getting confused by making a careful sketch using the worksheet I've developed for myself, and sometimes I'll even make a mockup of a selvedge to be sure I've got it right.
The tapes are sewn at the lift areas across the width of the fabric.
It gets a little bulky under the machine arm by the time the top row is sewn!
I was happy that I could machine-sew the layered trim. 
When I mark the tapes, I use disappearing pen for the horizontal lines, except for the board line where I use pencil so that the line will not have disappeared before it's time to staple it to the board.  In this photo you can also see the backstitching at the tapes- extra security in case there's any trouble during transportation or installation so the tape won't ever come unsewn.


Friday, December 16, 2016

Heavy-weight French blackout shades

Upholstery fabrics make stunning shades, and I have a few techniques for working with the extra bulk.
These shades are extra bulky because they are lined with French blackout.
Double side hems, the default standard, would've been really thick, so I improvised to create a single hem.
 For French blackout, interlining and dense black cotton sateen are layered between the face fabric and white sateen lining.
I fold the layered lining, then cut while still folded, to grade the layers and avoid a blunt, thick edge.
To reduce bulk, instead of a double side hem, I sewed twill tape to the edges, then hand-hemmed.  (I always hand-sew side hems when I use interlining.)  One of the two shades was just 3" less than the width of the fabric, so I didn't have enough to make a good hem anyhow, without piecing it, which would've been even bulkier.  I kept the selvedge and sewed the tape over it.  For the other shade, I trimmed down the side hem and added twill tape to create a single hem.

  In this picture you can also see how severely I graded the bottom hem to keep the white lining from bubbling up from the bottom fold.
It looks pretty cool, I think!
I baste the layers before stapling bulky fabrics to a board.  This helps them grade themselves as they fold over the board edge.  Since a shade is flat all the way across, I don't cut out the inner layers of interlining as I would with a treatment that is pleated onto a board, where thick layers build up and look lumpy.
I'm loving the new grey lining.  It's available from both Angel's and Hanes.

Friday, August 26, 2016

Silk and jute sheer shade

I've worked with this silk and jute fabric before and it is always a pleasure. 
Designer Monica Plotka shares my love of twill tape binding and we've used it to bind this fabric which really cannot be hemmed.  This shade is lined with voile.
When working with sheer fabric, my first step is to pull a thread so I can cut along the grainline.
I basted the voile around the perimeter of the silk, both cut to the exact finished size.
Before finishing the edges, I sewed the clear rings to the shade.  This stabilized the layers further.
To apply the twill tape, I started with the bottom edge, on the back.  I nestled it up next to a row of jute and basted it in place.
Then I flipped the bottom up and hand-sewed the right side, making sure that the twill tape was caught on the back as well.
I turned the corners and started working the miters into place.
After securing securing the corners on the back, I folded the twill tape to the front and pinned it.
I finished hand-sewing the tape from the front side, catching both sides with one row of stitching, and ladder-stitched those pesky mitered corners.
For the weight bar pocket, I used a piece of translucent buckram, folded in half and stitched, and inserted a piece of 1/2" acrylic rodding, which was nearly invisible from the front.
Done!

Friday, August 30, 2013

Fab Fabric Friday- fab fabric combo!

Monica Plotka loves natural fibers and interesting fabrics as much as I do, so I was excited about making for her these relaxed roman shades with an unusual combination of materials.

On the face, a white slubby windowpane sheer provides pattern, which is tinted by the lining, a gauzy khaki linen sheer.  A slate twill tape binds the edges on three side.  After layering the two fabrics, I basted the twill tape all around before folding in half to sew it down by machine.
Designers' Resource in Lodi carries a khaki ladder cord shroud which blended perfectly with the lining.  Clear rings, ivory cord, and natural weight bar tubing also help keep the lift system unobtrusive.  
I love the effect of the colored lining behind the white sheer.  In an actual window, sunshine will create layers of color as the folds stack up.
The shade will be mounted inside the window frame, but I still thought I'd better cover the ends of the boards in the twill tape in case a little bit is visible.

I can imagine tinting sheer face fabrics with all kinds of color and texture, and even pattern......

Thursday, August 30, 2012

A closer look- my faves

Of the 10 shades I made for Liz and showed off in the previous post, this little guy is probably my favorite, or should I say the one I most would like to have for myself.

I just love the valance shape.   
And I love how I used the unembroidered selvdege to make a banding around the valance, and I love how I applied the trim so the bead hangs over the band.
Can you tell that I worked out the detailing myself?   Yes, I'm slightly in love with this shade!  Also I'm obsessed with anything remotely star-shaped.

It was not easy working the plain band fabric cut on the lengthwise grain, not bias, into the curves and the inside corner.  But I was determined, and with a couple of tucks strategically hidden behind beads, it worked.

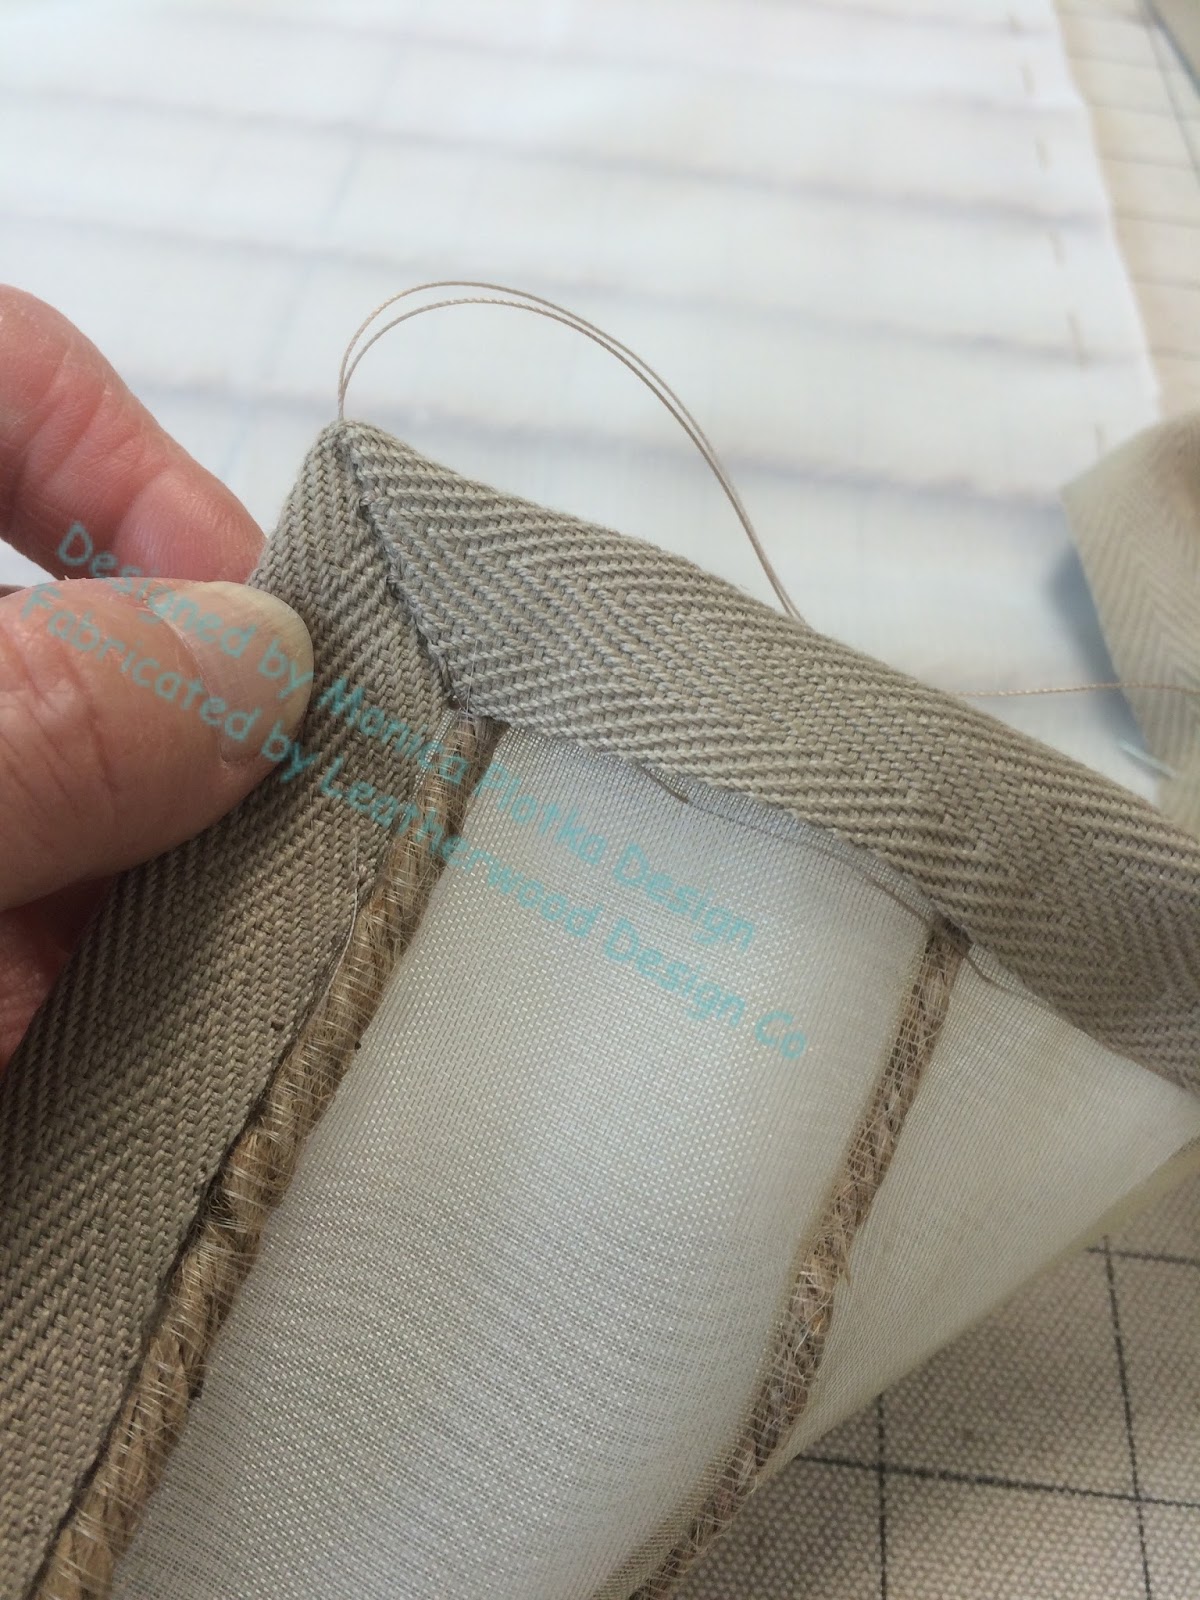
Competing against the star shade for my personal favorite is this sheer silk with horizontal jute lines.  I've used this fabric before, for flat romans, but since I had the choice this time, I made the shade relaxed instead, and tied up the bottom two rings for a permanent fold, which I think helps disguise the covered weight rod.

When I worked on this fabric last year with another decorator, we came up with using twill tape to bind the edges, since the cut edges can't be sewn.   I love binding!  This was 1" twill tape, but in the past I've also used it in larger sizes.  It's folded in half over itself, glued into place, then when dry it's topstitched close to the edge.  My gridded fabric table top helps make sheer shades a breeze- you can see right through the fabric and line up the jute.

The tassel trim made it easier to deal with the bottom.  It's hand-sewn to a row of jute, and got another layer of hand-stitching after the hem was folded up.

On the back I also ran hand-sewing along the two jute lines that overlap, to prevent them from shifting.  There was another line or two of hand-stitching to stabilize everything.  As you can see I kept it very simple.  The weight rod was covered in a tube made from khaki lining and tacked at the lowest ring so the shade is very stable.

Now that it's in the store, this little sweetie of a shade is going to get some sort of topper to hide the cord lock.  Either something out of a wonderful fabric, or a carved wood cornice from, I don't know, Bali, or someplace like that.