One of the hardest things for me to do is stand in an empty room and visualize the changes that the designer can so easily see in her own mind.
Katherine Stern has a great imagination. She also is in love with pattern and color. When she presented me with half a dozen fabrics that seemed to bear no relation to each other, I could but have faith in her vision of the master bedroom she was designing.
I'm hesitant to show these now because the room is unfinished, but here we go anyhow.
When the room is complete we will have installed window treatments as well. But so far our share on this side of the room is the bedskirt, duvet cover, and flanged shams;
on the other side, this round tableskirt, and a topper which I pieced from a too-small remnant that Katherine loved and scraps of the sham fabric to make it big enough.
The most fun part of the project was creating the topper from scraps from the shams. The look and the process are right up my alley. How about those mitered corners? I hated to give this topper to its owner!
Not shown in the picture at top are the feather/down wedge bolsters out of the headboard fabric. Albany Foam custom-made the feather/down inserts from the template we made.
I called them the "purple monsters" because stuffing those inserts into the covers was like wrestling an insanely strong, clunky, irrational being.
THE BLOG IS HAVING TROUBLE WITH COMMENTS! SOMETIMES THEY DON’T GET PUBLISHED, AND WHEN THEY ARE I AM UNABLE TO REPLY TO THEM. IF THAT HAPPENS, JUST EMAIL ME AT stitchlore@gmail.com.
Looking for something specific? Check out the Topic Index, or the Search bar, just below, on the left.
Sorry about this problem!
SO.........WHAT ARE WE WORKING ON TODAY??
Tuesday, September 25, 2012
Thursday, September 20, 2012
Box-pleated header, and more.....
Finally. The last shade in the Paris Interiors collection.
Right off the bat you could see that the vertical ribbon can be run sideways as a border. So we split the fabric in half and pieced one row onto the bottom.
Since you can see the wrong side of the tails, we contrast lined with a blue silk. I don't much like pillowcased sides, so I experimented with sewing in a teeny little blue silk flange, on the sides as well as the bottom.
The beautiful solid glass beads were kind of heavy for the fabric, and the tape was sort of dull, so I sewed the trim tape halfway into the bottom seam with the little flange behind it.
The box-pleat header idea was irresistible. Since the dotted ribbon is printed crookedly, the blue band came out all wonky, which I just loved.
I imagine it's not to everyone's taste, but it suits me perfectly.
The header is stapled to the 3/4" board face, then the blue welt is stapled over that.
The tricky part is stapling the shade, upside down, with tacking strip up against the welt.
Then the shade is flipped down revealing a beautiful finished top.
Monday, September 17, 2012
More Layered Trim......
This print sort of swallowed up the blue trim until I tried narrow strips of red peeking out from behind.
The narrow ribbon created such a great pop that I decided to carry the red-blue to the top. Making microcord out of 1/2" wide grosgrain is not easy! Actually it wasn't much easier to make pencil welt out of the heavy, textured blue braid, either. I never layered welt before- I like it!
Although the pattern on the topper was carefully matched to the shade when looking straight on, from a lower sight line there seems to be a gap. The bottom row of red ribbon fills in the space and gives one last bit of pop.
The narrow ribbon created such a great pop that I decided to carry the red-blue to the top. Making microcord out of 1/2" wide grosgrain is not easy! Actually it wasn't much easier to make pencil welt out of the heavy, textured blue braid, either. I never layered welt before- I like it!
Although the pattern on the topper was carefully matched to the shade when looking straight on, from a lower sight line there seems to be a gap. The bottom row of red ribbon fills in the space and gives one last bit of pop.
Friday, September 14, 2012
Aaarrrggghhh more shades!
Back in Liz's shop...... I swear, I do have other projects to report!............. but I'm going to get through these display shades first. One more post next week then we've moving on.
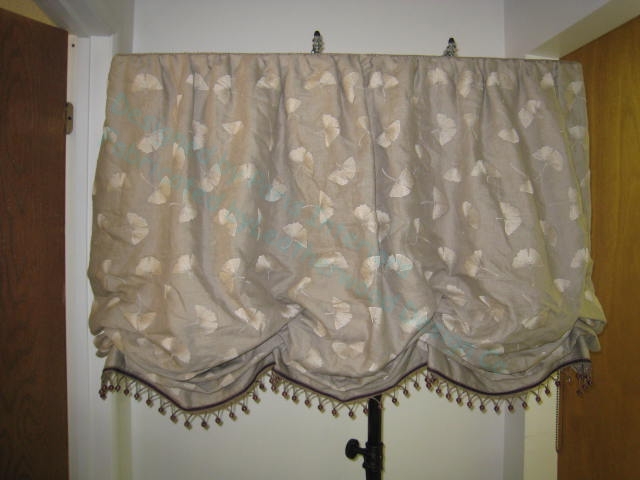
I do really love this little balloon shade. With fullness at barely 1.5x the bottom silhouette is gentle and understated. Balloon shades can have up to 3x fullness. The more fullness, the deeper and droopier the swoops.
Liz loves her trims, and this is one of the prettiest in this collection of display shades.
After the shade was on the board I felt like the top needed a defining line. I found this soft twist cord at Fabric Mart in Yorktown Heights.
Off-white sheers with gorgeous trims were chosen for two relaxed styles.
London shades are really just a type of balloon shade, with a larger-than-usual center section, and tails. This geometric sheer is lined with a white voile.
Clear square glass beads hang heavily from the orange tape and define the bottom silhouette.
The relaxed Roman is made up in a linen-cotton blend, and I'm sorry that the white-on-white applique is not so visible in these pictures.
Delicate hand-blown glass beads are works of art in themselves.
I do really love this little balloon shade. With fullness at barely 1.5x the bottom silhouette is gentle and understated. Balloon shades can have up to 3x fullness. The more fullness, the deeper and droopier the swoops.
Liz loves her trims, and this is one of the prettiest in this collection of display shades.
After the shade was on the board I felt like the top needed a defining line. I found this soft twist cord at Fabric Mart in Yorktown Heights.
Off-white sheers with gorgeous trims were chosen for two relaxed styles.
London shades are really just a type of balloon shade, with a larger-than-usual center section, and tails. This geometric sheer is lined with a white voile.
Clear square glass beads hang heavily from the orange tape and define the bottom silhouette.
The relaxed Roman is made up in a linen-cotton blend, and I'm sorry that the white-on-white applique is not so visible in these pictures.
Delicate hand-blown glass beads are works of art in themselves.
Wednesday, September 12, 2012
Eight mitered corners... Yikes!
This was the most difficult of the shades Liz ordered. Any shade with trim on four sides is going to cause a lot of angst. Everything must be square, but printed patterns are hardly ever printed true. Also since there is take-up every time you sew a stitch in fabric, by the time the sewing is done, the shade might be a little shorter than you had planned.
And that's not all. What you see there is not one trim, but two! The yellow trim is layered over the grey ribbon.
That meant eight miters.......... a time-consuming process.
This was a scary shade.
This shade was made with ribs in pockets on the back to help keep the folds. The layered trim makes the folds bulky so the shade looks best pulled up no more than half-way......
which is how we displayed it in the store.
Monday, September 10, 2012
Scalloped bottom with grosgrain ribbon
It sure is taking me a long time to get back into the blog groove. I think I know what it is: my desk is REALLY messy and I don't like sitting here feeling guilty about it. So this week is Desk Week.
Meantime, before I start cleaning (ha!), I want to continue showing some of the display shades I featured two posts ago, for my friend Liz's new store.
For this shaped-bottom flat Roman, Liz chose an adorable grosgrain ribbon with little buttons.
I didn't think I could get the ribbon to go around the curves of the scallops, but by hand-sewing with teeny-tiny stitches and easing the fullness around the curves, it worked. This is time-consuming!
After the shade was on the board it clearly needed something to define the top and balance the ribbon. I rummaged around and found a gorgeous pink velvet that I bought at a Couton & Tout warehouse sale. Perfect!
Meantime, before I start cleaning (ha!), I want to continue showing some of the display shades I featured two posts ago, for my friend Liz's new store.
For this shaped-bottom flat Roman, Liz chose an adorable grosgrain ribbon with little buttons.
I didn't think I could get the ribbon to go around the curves of the scallops, but by hand-sewing with teeny-tiny stitches and easing the fullness around the curves, it worked. This is time-consuming!
After the shade was on the board it clearly needed something to define the top and balance the ribbon. I rummaged around and found a gorgeous pink velvet that I bought at a Couton & Tout warehouse sale. Perfect!
Thursday, August 30, 2012
A closer look- my faves
Of the 10 shades I made for Liz and showed off in the previous post, this little guy is probably my favorite, or should I say the one I most would like to have for myself.
I just love the valance shape.
And I love how I used the unembroidered selvdege to make a banding around the valance, and I love how I applied the trim so the bead hangs over the band.
Can you tell that I worked out the detailing myself? Yes, I'm slightly in love with this shade! Also I'm obsessed with anything remotely star-shaped.
It was not easy working the plain band fabric cut on the lengthwise grain, not bias, into the curves and the inside corner. But I was determined, and with a couple of tucks strategically hidden behind beads, it worked.
Competing against the star shade for my personal favorite is this sheer silk with horizontal jute lines. I've used this fabric before, for flat romans, but since I had the choice this time, I made the shade relaxed instead, and tied up the bottom two rings for a permanent fold, which I think helps disguise the covered weight rod.
When I worked on this fabric last year with another decorator, we came up with using twill tape to bind the edges, since the cut edges can't be sewn. I love binding! This was 1" twill tape, but in the past I've also used it in larger sizes. It's folded in half over itself, glued into place, then when dry it's topstitched close to the edge. My gridded fabric table top helps make sheer shades a breeze- you can see right through the fabric and line up the jute.
The tassel trim made it easier to deal with the bottom. It's hand-sewn to a row of jute, and got another layer of hand-stitching after the hem was folded up.
On the back I also ran hand-sewing along the two jute lines that overlap, to prevent them from shifting. There was another line or two of hand-stitching to stabilize everything. As you can see I kept it very simple. The weight rod was covered in a tube made from khaki lining and tacked at the lowest ring so the shade is very stable.
Now that it's in the store, this little sweetie of a shade is going to get some sort of topper to hide the cord lock. Either something out of a wonderful fabric, or a carved wood cornice from, I don't know, Bali, or someplace like that.
I just love the valance shape.
And I love how I used the unembroidered selvdege to make a banding around the valance, and I love how I applied the trim so the bead hangs over the band.
Can you tell that I worked out the detailing myself? Yes, I'm slightly in love with this shade! Also I'm obsessed with anything remotely star-shaped.
It was not easy working the plain band fabric cut on the lengthwise grain, not bias, into the curves and the inside corner. But I was determined, and with a couple of tucks strategically hidden behind beads, it worked.
Competing against the star shade for my personal favorite is this sheer silk with horizontal jute lines. I've used this fabric before, for flat romans, but since I had the choice this time, I made the shade relaxed instead, and tied up the bottom two rings for a permanent fold, which I think helps disguise the covered weight rod.
When I worked on this fabric last year with another decorator, we came up with using twill tape to bind the edges, since the cut edges can't be sewn. I love binding! This was 1" twill tape, but in the past I've also used it in larger sizes. It's folded in half over itself, glued into place, then when dry it's topstitched close to the edge. My gridded fabric table top helps make sheer shades a breeze- you can see right through the fabric and line up the jute.
The tassel trim made it easier to deal with the bottom. It's hand-sewn to a row of jute, and got another layer of hand-stitching after the hem was folded up.
On the back I also ran hand-sewing along the two jute lines that overlap, to prevent them from shifting. There was another line or two of hand-stitching to stabilize everything. As you can see I kept it very simple. The weight rod was covered in a tube made from khaki lining and tacked at the lowest ring so the shade is very stable.
Now that it's in the store, this little sweetie of a shade is going to get some sort of topper to hide the cord lock. Either something out of a wonderful fabric, or a carved wood cornice from, I don't know, Bali, or someplace like that.
Subscribe to:
Posts (Atom)