THE BLOG IS HAVING TROUBLE WITH COMMENTS! SOMETIMES THEY DON’T GET PUBLISHED, AND WHEN THEY ARE I AM UNABLE TO REPLY TO THEM. IF THAT HAPPENS, JUST EMAIL ME AT stitchlore@gmail.com.

Looking for something specific? Check out the Topic Index, or the Search bar, just below, on the left.


Sorry about this problem!

SO.........WHAT ARE WE WORKING ON TODAY??

Friday, February 26, 2016

CWC at last!!!! Thank you everyone!

To everyone who signed up for my presentation today on Efficient Shade Making: thank you all so much for signing up, for all the enthusiasm and anticipation, and for making me feel at home with you in our classroom. 
To Susan and Rodger, many thanks for this opportunity at your crazily awesome event and congratulations on its obvious great success. 
To my friends and family and most especially John, thanks for the support and encouragement, and for accompanying me on this particular path- your confidence means the wide world to me. 
If you attended today's class, or if you're a blog reader who could not attend the CWC this year, I hope you will keep in touch with me at stitchlore@gmail.com
I'm looking forward to another day of great presentations tomorrow...... And now to sleep

Tuesday, February 23, 2016

Custom Workroom Conference!

This was yesterday...... Last batch of work going out: pillows, shades, double-sided velvet ripplefold.

This is today....... samples, mock-ups, and demos, packed and ready for the Custom Workroom Conference 2016  in North Carolina this week!
Stay tuned!

Wednesday, February 17, 2016

Pleating to Pattern- Roman shade style

When there is a bottom trim on a shade you want to pleat to pattern, it's easiest to do a little mockup to see how the pleats will fall.  The best ring and pattern placement might not be what at first seems to be the obvious.  I was glad I made a template before committing myself with this pattern:
I used a cut-off selvedge to make my template so that all 3 shades would match.  I also wanted a complete circle, not a section of a circle, at the top.  Luckily all 3 shades were the same size.
Something to look out for when marking for rings to pattern is take-up.  Here you can see that the pattern on the tabled shade is a bit shrunken compared to the selvedge.  I adjusted my ring mark placement to correspond to the fabric after tabling.
These shades were perfect for this home.  I was completely satisfied with the outcome!
Little return flaps hide the clutch.

The clutch was fitted with an antique brass bead chain loop and a brown tension device that blends in with the wood.
Everyone was happy when this was installed!  Especially me.

Wednesday, February 10, 2016

Aprons!

I totally can't believe that I never posted pictures of the aprons I made for my friend Camille's two twenty-something daughters.  I've been trolling my photo album, pulling pictures for my PowerPoint presentation, and here were these aprons that I forgot to ever show off.
I had so much fun, slicing and appliqueing and topstitching.  And when I found the red twill tape at Joann Fabrics, I was overjoyed!

Emily is into goats.  Yeah, goats, and no one knows why, but, it makes it easy to create a themed gift for her!  With the help of Spoonflower, I found plenty of goat fabrics to make this fully reversible apron.
Claire studied Russian, lived in practically Siberia, and earned a Fullbright scholarship to Armenia, so I used this Spoonflower print of a popular Russian fairytale for the front of her apron.
I made these completely spontaneously.  Nothing was pre-planned; I just kept adding details until they felt done.  I had the most fun with the yokes. 
I got to incorporate some vintage trims that I've hoarded for decades.
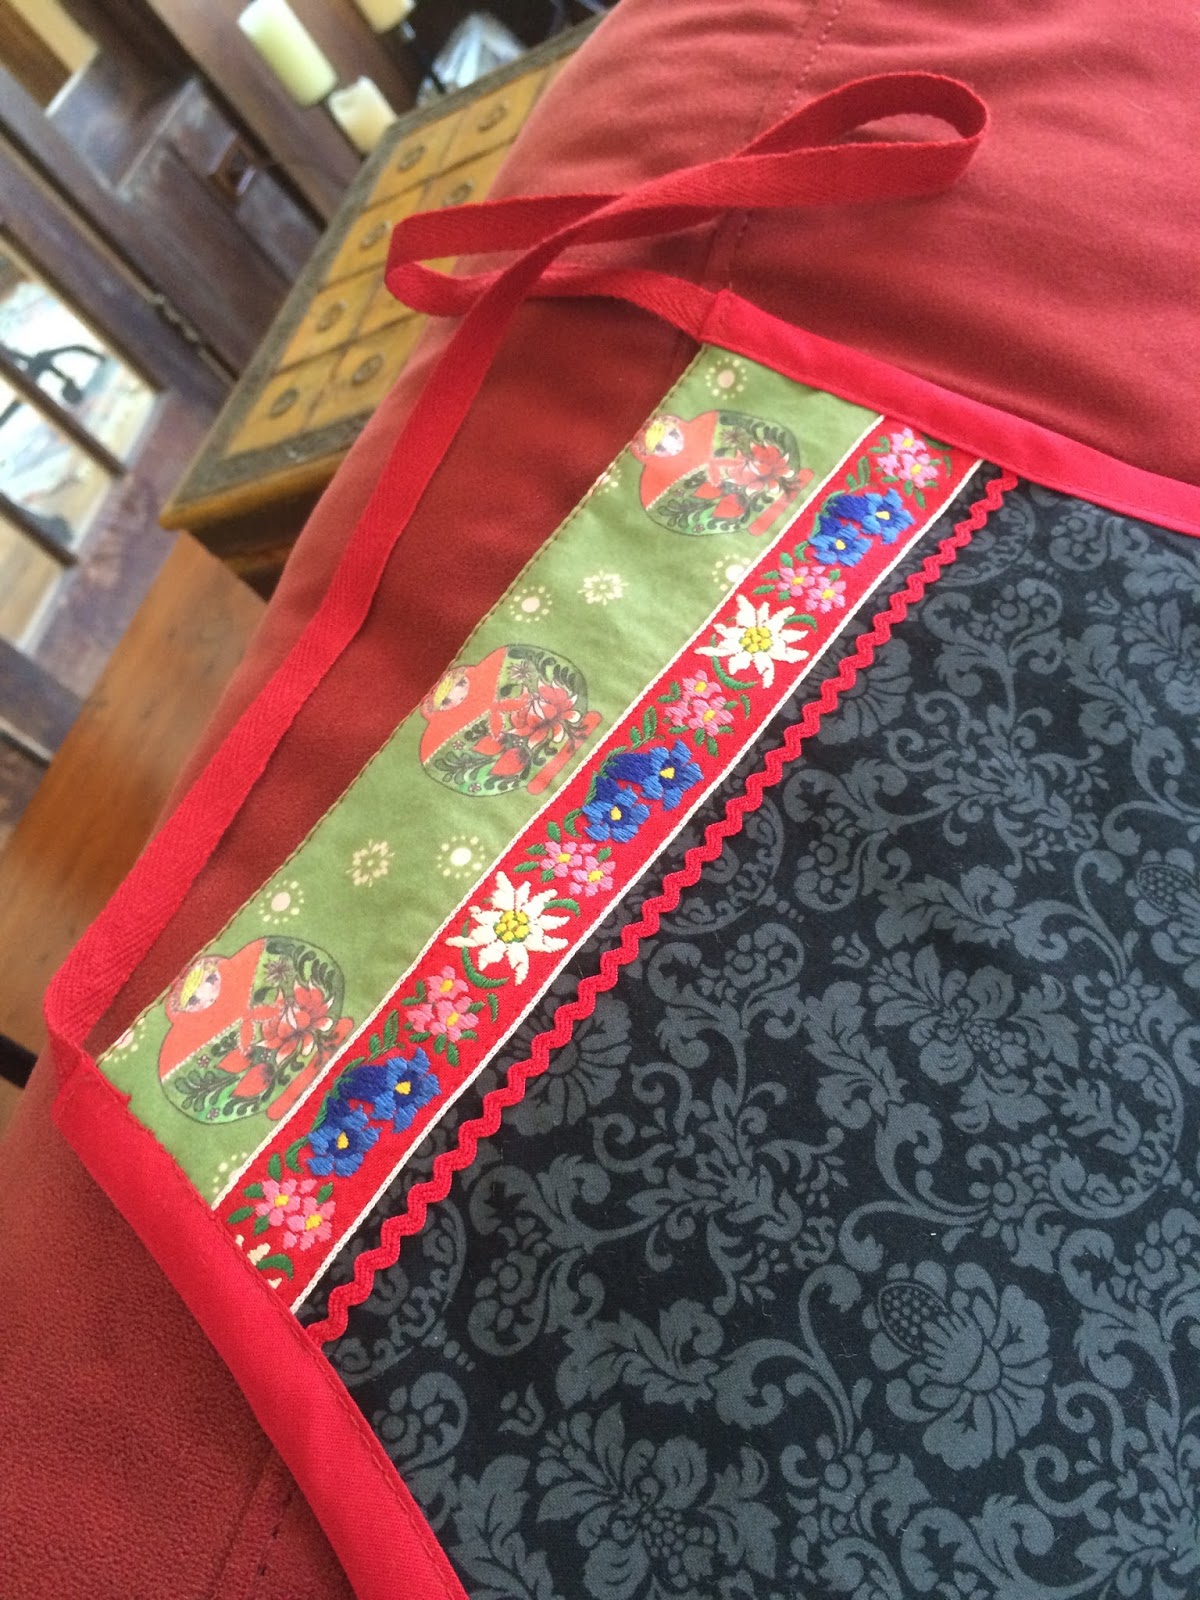
I had a fat quarter of a matryoshka print to make some yoke banding and a pocket.  There's a strip of another cherished vintage trim on Claire's.
I cut out Armenia from a map fabric to use as a pocket for Claire's.
There were just enough scraps of Emily's Three Billy Goats Gruff fabric to make a pocket.
 I love ric-rac, and I love red.  What can I say.
Skinny slices of a few prints made ribbon-like borders.

And I love topstitching.  Especially red topstitching.
Yes, someday there will be an apron for Camille, too.

Tuesday, February 9, 2016

Fourteen shades- and the CWC

I've been honing my "Efficient Shade Making" skills- practicing my efficiency chops ahead of the class by that same name that I'll be presenting at Susan Woodcock's Custom Workroom Conference, which begins in just over two weeks.
Everyone is getting mighty excited about the Conference!  It's going to be an amazing gathering of a couple hundred workroom professionals gathering in NC.  When I look at the list of classes I cannot believe how comprehensive are the educational offerings.  I'm excited about teaching, but equally excited about attending classes myself.

Anyhow, things are heating up around here, as we finish up projects before closing for a few days at the end of the month.
Here's what went out of the studio today:
Three of these- my favorite of the whole batch.  At first I felt woeful about the heavy-ish upholstery fabric, but it made up into beautiful AND well-behaved shades:
Three of these, another well-behaved fabric in a gorgeous shade of red which doesn't quite come through here:
Three of these, a nice contrast in the workroom with the brilliant red:
One of these, another incredibly well-behaved fabric, considering it's a fairly heavy woven geometric:
One of these, ok, I'll say it again, another well-behaved woven geometric:
And one of these, the only double-window sized shade- widths were joined, but it's lined with double-wide sateen so there are no seams in the lining showing through.  And the trim is lovely with the print:
Lastly there were two small hobbled shades that I forgot to photograph.
And that's all for today, folks!

Tuesday, February 2, 2016

Herringbone stitch

Sewing by hand is a meditative activity- though "meditative activity" is rather an oxymoron. 
I've become quite comfortable sewing by hand, and have recently learned new techniques.
The herringbone stitch is versatile; here it is concealed, on the inside of a shade, but it is also an attractive decorative finishing stitch.

Domette is a thick, plush, rich cotton interlining that adds a sumptiousness to layered fabrics that regular interlining cannot match.
If widths were sewn right sides together, the pressed-open seam would create a bump that must be avoided because the face fabric is a fine dupioni silk. 

Hence, today's meditation: joining overlapped widths of Domette Interlining by hand with a herringbone stitch.  


The visible herringbone will be the wrong side; on the other side it appears as two rows of running stitches.  The two rows make this join exceptionally stable.
After the fabric is lightly ironed and steamed to set the fibers and the thread, the selvedge melds into the other layer creating a very smooth join with no lump or ridge from a seam allowance.  This overlapped join is precisely aligned with the seam that joins the widths of silk.

Tuesday, January 26, 2016

Adding lining to existing shades

Do you remember these sheer shades from last autumn? http://leatherwooddesignco.blogspot.com/2015/09/the-other-sheer-shades.html
These are some of the most beautiful shades I've ever made, so you can imagine my dismay when the designer informed me that the homeowner needed them re-lined, with an opaque lining rather than the gorgeous grey voile.

I dreaded doing this, but it turned out to be a satisfying project.  It was less difficult yet more time consuming than I had projected; and the opaque shades with grey sateen lining are just as beautiful as they were when they were sheer.
The goal was to not have to take apart the shade and sheer lining. 
I did consider adding lining in the manner of a double-sided shade, but I thought that would be an untidy solution, and ultimately inefficient because I'd have to fiddle with it a lot, not to mention I'd be unhappy with it in the end. 
Therefore I decided to remove the rings and lay the new lining over the sheer. 
I unstrung the shade, removing the orbs and cord clips, leaving the lift cord in their clips.
First making sure all the rings pointed up, I laid out the lining, rough cut to about 3" over the finished size on each side, wieghted it in place, and used the iron to make an impression in the lining of the existing rings- sort of like making a gravestone rubbing!
I could see where the rings were sewn, and used purple pen to mark the stitches.
Keeping half the lining weighted down, I folded back one half at a time, and snipped off the ring stitches, except for the bottom rings which I clipped off because I wanted the stitching to remain.
I kept the lint roller handy so the little snipped threads wouldn't wind up inside the shade!
At the top, I trimmed the lining even, leaving enough to tuck under the board.
When I staple, I use tacking strip set back about 1/2", which leaves wiggle room at the front of the board.  That wiggle room is what allowed me to tuck in the lining.
I stapled to secure the lining.
Sewing the rings went quickly.
At the bottom I was careful to avoid a pucker at the pocket when I sewed the bottommost rings.
Because the weight bar lay underneath, creating bulk, I knew I should let the shade hang before sewing the bottom.
 I trimmed the bottom and folded it in place.
I pinned it for hanging, then removed and re-positioned the pins after I knew the shade was true.
The lining and sheer are ladder-stitched together by hand.  Re-stringing with ring locks was quick and simple.
After leveling and completing the rigging, all that was left was to sew the lining to the face at the bottom.
Ta-da!