Three shades embellished with grosgrain ribbon applied in a Greek Key pattern are among my top 3 most challenging, most fun, most satisfying, and most successful projects ever:
They're inside mounted and only 37" long, so when raised they don't go up very far because we wanted to show the corner pattern:
The fabric is wonderful, and perfect for this project- a sort of cotton duck but linen, and glazed like chintz. The trim is 1" grosgrain. Yes, it's still wrinkled here in the photo- but steamed out after installation.
I'll do a separate post on how I applied the ribbon. But right off the bat I have to thank my CHF Forum Friends who provided so many suggestions for fabrication; but most especially Liz Hawkes whose method I adapted.
The designer called as soon as installation was complete to tell me that they looked fabulous and everybody involved on the project was thrilled.
THE BLOG IS HAVING TROUBLE WITH COMMENTS! SOMETIMES THEY DON’T GET PUBLISHED, AND WHEN THEY ARE I AM UNABLE TO REPLY TO THEM. IF THAT HAPPENS, JUST EMAIL ME AT stitchlore@gmail.com.
Looking for something specific? Check out the Topic Index, or the Search bar, just below, on the left.
Sorry about this problem!
SO.........WHAT ARE WE WORKING ON TODAY??
Wednesday, May 2, 2012
Friday, April 27, 2012
The rest of the scarf project
The scarf pillows were just half of the project. Three other scarves were destined to become wall hangings. The challenge was to find a way to mount them without losing the rolled borders or the fringe.
I painstakingly sewed a doubled lip out of matching cotton, so close to the rolled border that the stitches didn't show.
The cotton was pressed crisply......
......and stapled around to the back of a narrow, covered board, turned on its side. The rolled hem stands up above the board line. The board will be mounted to the wall with screws.
The same technique was used with this scarf so we woudn't lose the lime green rolled hem.
For the fringed scarf, the lip was sewn 1/4" below the fringe in hopes that the turquoise fringe would stand up after the lip was stapled.
It worked!
I painstakingly sewed a doubled lip out of matching cotton, so close to the rolled border that the stitches didn't show.
The cotton was pressed crisply......
......and stapled around to the back of a narrow, covered board, turned on its side. The rolled hem stands up above the board line. The board will be mounted to the wall with screws.
The same technique was used with this scarf so we woudn't lose the lime green rolled hem.
For the fringed scarf, the lip was sewn 1/4" below the fringe in hopes that the turquoise fringe would stand up after the lip was stapled.
It worked!
Wednesday, April 25, 2012
More pillows!
Designer scarves make amazing pillows! We always line and interline silk pillows, or use napped cotton sateen. This Gucci scarf made a 34" pillow.
It's backed in silk and is welted with extra-micro welting.
We wanted to preserve the fringe on this scarf, so I topstitched it to a silk back creating a teeny-tiny flange. There is an invisible zipper on the back, up a couple of inches.
I folded this scarf in half so we wouldn't cut off the handlebars on the center bicycle motif. Of course you can't see the handlebars anyhow unless you're looking sort of from the top......
It's backed in silk and is welted with extra-micro welting.
We wanted to preserve the fringe on this scarf, so I topstitched it to a silk back creating a teeny-tiny flange. There is an invisible zipper on the back, up a couple of inches.
I folded this scarf in half so we wouldn't cut off the handlebars on the center bicycle motif. Of course you can't see the handlebars anyhow unless you're looking sort of from the top......
Friday, April 20, 2012
Trio of Coordinating Shades- on-site photos
Yesterday I visited the home of the three adorable shades designed by SuElyn Chase of Cottages to Castles for a gues suite, and blogged about here. We had a little tweaking to do and I had a chance to photograph them in their new element.
The London shade with contrast inserts and buttons:
My own favorite, the puckered faux-silk Roman with banding:
And the gathered, ruffled balloon, in a stairwell very high up:
The London shade with contrast inserts and buttons:
My own favorite, the puckered faux-silk Roman with banding:
And the gathered, ruffled balloon, in a stairwell very high up:
Friday, April 13, 2012
Fab fabric Friday- Enter the Dragons, again
Here again is "Enter the Dragons" in a muted, stormy colorway, interpreted this time as boxed pillows. The various borders were sliced off and turned into bottom detailing and boxing. Each 23x28" pillow has a different border combination.
The welting and backs are the same velvety grey ultrasuede that was used to upholster the 132" sectional seating.

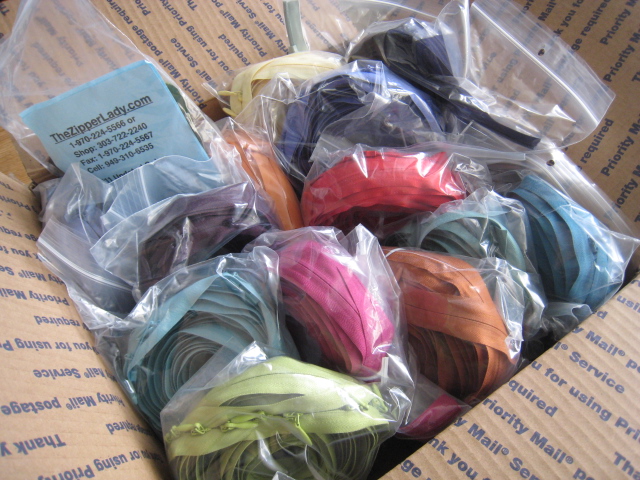
The moment our zipper order arrived from The Zipper Lady, we finished these pillows up. The grey was nestled in a boxful of brilliantly colored zippers........ now I just need somebody to order a magenta pillow, I'm ready!
"Enter the Dragons" from Jim Thompson was featured in January on Fab Fabric Friday, and as pillows.
The welting and backs are the same velvety grey ultrasuede that was used to upholster the 132" sectional seating.
The moment our zipper order arrived from The Zipper Lady, we finished these pillows up. The grey was nestled in a boxful of brilliantly colored zippers........ now I just need somebody to order a magenta pillow, I'm ready!
"Enter the Dragons" from Jim Thompson was featured in January on Fab Fabric Friday, and as pillows.
Wednesday, April 11, 2012
Kingston variation
The client showed us a picture of a Kingston-style variation that was shirred instead of pleated, so this is what we made for her- five of them, actually:
I used to struggle with top welt. While sewing and stapling it I'd fight to keep it from twisting. Then I read a tip from Merlyn on the CHF Forum and my life was changed forever: I don't sew or staple anymore- I use double-sided adhesive tape, and now my top welts are smooth and unwarped.
Adhesive tape is run along the front of the board.
The welt strip is laid over the tape, then another row of tape goes on top of the welt strip.
The welt cord is positioned at the edge of the board, letting just a little of it touch the sticky tape to hold it in place.
Then the welt strip is carefully rolled over the cord and secured to the adhesive.
Now it's ready to be stapled, all in one step with the cardboard tacking strip and the dustboard cover.
Now I enjoy applying top welt!
I used to struggle with top welt. While sewing and stapling it I'd fight to keep it from twisting. Then I read a tip from Merlyn on the CHF Forum and my life was changed forever: I don't sew or staple anymore- I use double-sided adhesive tape, and now my top welts are smooth and unwarped.
Adhesive tape is run along the front of the board.
The welt strip is laid over the tape, then another row of tape goes on top of the welt strip.
The welt cord is positioned at the edge of the board, letting just a little of it touch the sticky tape to hold it in place.
Then the welt strip is carefully rolled over the cord and secured to the adhesive.
Now it's ready to be stapled, all in one step with the cardboard tacking strip and the dustboard cover.
Now I enjoy applying top welt!
Saturday, April 7, 2012
Improvising to add blackout to an existing shade
For a new baby's room, the homeowner wanted to add blackout to the Roman shade we made last spring. Of course, it HAD to be an arched top shade with rib pockets in the lining.... no simple fix here.
The shade was 54" finished width and the fabric was just 55" and the homeowner did not want it seamed. So when it was originally made, we pressed the selvedge under just barely, and slip-stitched the lining to it- which worked just fine. However, the quilty face fabric had shrunk an inch, so now the lining came right to the very edge.
To add blackout, we had to take out the stitching, lay in the blackout, and slip-stitch it back together. We kept the ribs in the pockets and re-sewed rings with ladder tape.
Because of the shrinkage I was afraid to take apart the weight bar pocket, so the inserted blackout went to the top of the hem, and then on the outside I glued on a 4" strip of blackout that went to the very bottom and covered the raw edges with gimp.
The shade had shrunk vertically as well as horizontally so we just scrunched it forward on the frame to make it longer. Since it's an inside mount with drapery panels over, luckily the horizontal shrinkage hadn't mattered.
Here's the back view of the arched frame made with Firm-a-Flex.
The shade was 54" finished width and the fabric was just 55" and the homeowner did not want it seamed. So when it was originally made, we pressed the selvedge under just barely, and slip-stitched the lining to it- which worked just fine. However, the quilty face fabric had shrunk an inch, so now the lining came right to the very edge.
To add blackout, we had to take out the stitching, lay in the blackout, and slip-stitch it back together. We kept the ribs in the pockets and re-sewed rings with ladder tape.
Because of the shrinkage I was afraid to take apart the weight bar pocket, so the inserted blackout went to the top of the hem, and then on the outside I glued on a 4" strip of blackout that went to the very bottom and covered the raw edges with gimp.
The shade had shrunk vertically as well as horizontally so we just scrunched it forward on the frame to make it longer. Since it's an inside mount with drapery panels over, luckily the horizontal shrinkage hadn't mattered.
Here's the back view of the arched frame made with Firm-a-Flex.
Subscribe to:
Posts (Atom)